Singer SES2000 Instruction Manual - Page 36
Straight Stitch With Auto, Tie-off Function, Hand-look Quilt Stitch
 |
View all Singer SES2000 manuals
Add to My Manuals
Save this manual to your list of manuals |
Page 36 highlights
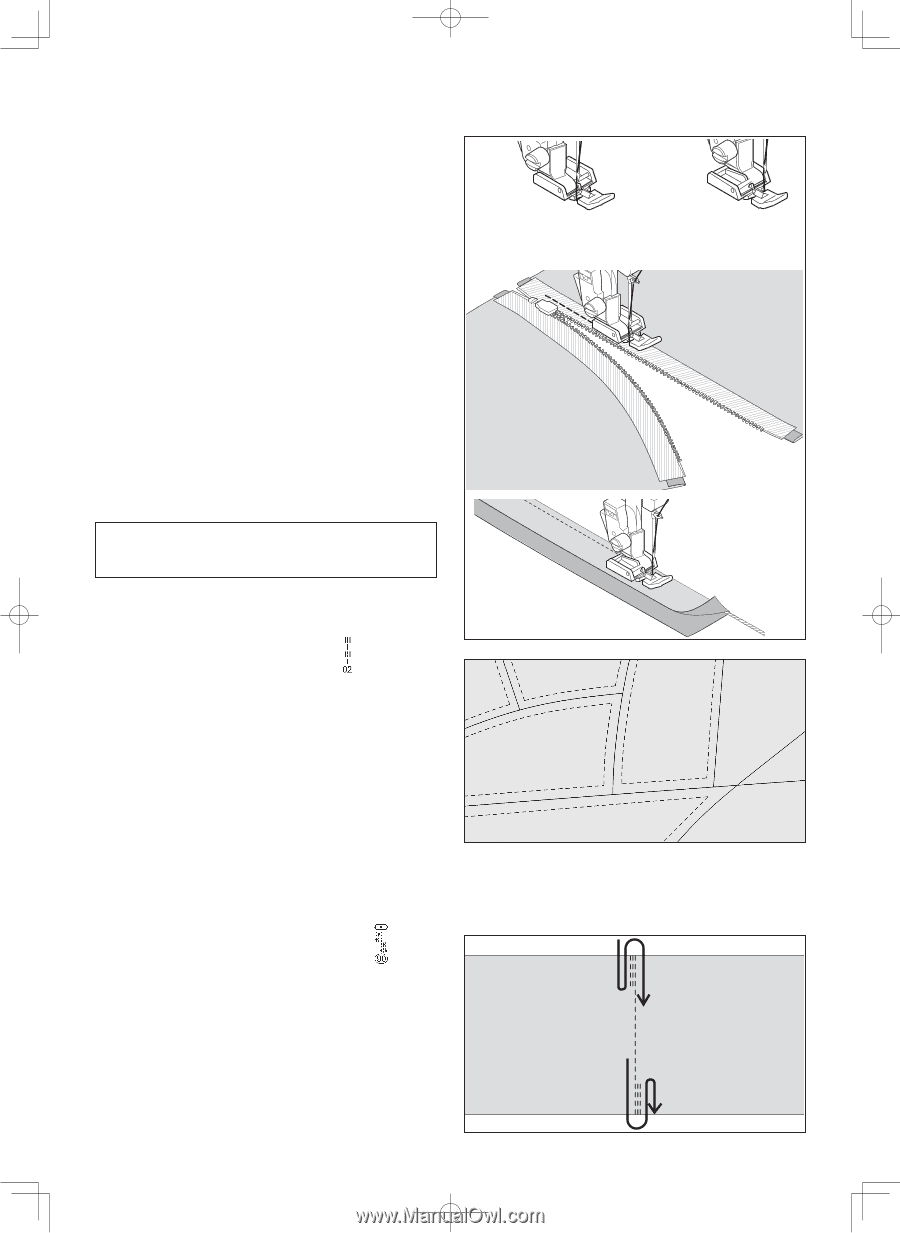
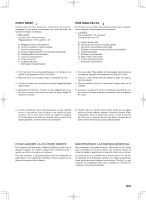
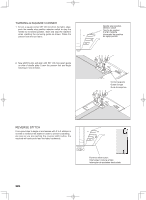
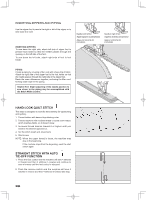
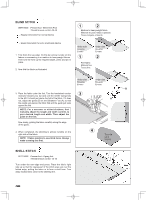
INSERTING ZIPPERS AND PIPING Use the zipper foot to sew to the right or left of the zipper or to sew close to a cord. INSERTING ZIPPERS To sew down the right side, attach left side of zipper foot to presser foot holder so that the needle passes through the opening on the left side of the foot. To sew down the left side, attach right side of foot to foot holder. Needle to left of foot Aiguille à gauche du pied presseur Aguja a la izquierda del prensatelas Needle to right of foot Aiguille à droite du pied presseur Aguja a la derecha del prensatelas PIPING Create a piping by covering a filler cord with a bias strip of fabric. Attach the right side of the zipper foot to the foot holder so that the needle passes through the right side of the zipper foot. Baste the seam allowances together, enclosing the filler cord, forming seam tape for the piping. Helpful Hint: Slight adjusting of the needle position to sew closer to the piping may be accomplished with the Stitch Width Control. HAND-LOOK QUILT STITCH This stitch is designed to look like hand sewing for topstitching and quilting. 1. Thread bobbin with desired top stitching color. 2. Thread machine with invisible thread or same color thread, which matches fabric, so it doesn't show. 3. Increase thread tension toward 6 or higher until you achieve the desired appearance. 4. Set the stitich length at 4 (maximum). 5. Start to sew. NOTE: When the upper thread is loose, the machine may stop in the beginning. If the machine stops from the beginning, push the start switch again. STRAIGHT STITCH WITH AUTO TIE-OFF FUNCTION 1. Press the foot control and the machine will sew 4 stitches in forward and then 4 stitches in reverse and continue to sew in forward until the foot control is released. 2. Push the reverse switch and the machine will sew 4 stitches in reverse and then 4 stitches in forward and stop. 36
-
 1
1 -
2
-
3
-
4
-
5
-
6
-
7
-
8
-
9
-
10
-
11
-
12
-
13
-
14
-
15
-
16
-
17
-
18
-
19
-
20
-
21
-
22
-
23
-
24
-
25
-
26
-
27
-
28
-
29
-
30
-
 31
31 -
 32
32 -
 33
33 -
 34
34 -
 35
35 -
 36
36 -
 37
37 -
 38
38 -
 39
39 -
 40
40 -
 41
41 -
42
-
43
-
44
-
45
-
46
-
47
-
48
-
49
-
50
-
51
-
52
-
53
-
54
-
55
-
56
-
57
-
58
-
59
-
60
-
61
-
62
-
63
-
64
-
65
-
66
-
67
-
68
-
69
-
70
-
71
-
72
-
73
-
74
-
75
-
76
-
77
-
78
-
79
-
80
-
81
-
82
-
83
-
84
-
85
-
86
-
87
-
88
-
89
-
90
-
91
-
92
-
93
-
94
-
95
-
96
-
97
-
98
-
99
-
100
-
101
-
102
-
103
-
104
-
105
-
106
-
107
-
108
-
109
-
110
-
111
-
112
-
113
-
114
-
115
-
116
-
117
-
118
-
119
-
120
-
121
-
122
-
123
-
124
 |
 |