Sony CDX-GT565UP Operating Instructions - Page 20
Customizing the equalizer, curve - EQ7 Setting, Optimizing sound by Time, Alignment - Listening,
 |
View all Sony CDX-GT565UP manuals
Add to My Manuals
Save this manual to your list of manuals |
Page 20 highlights
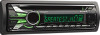
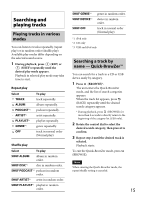
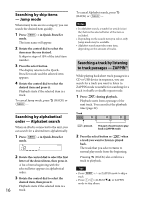
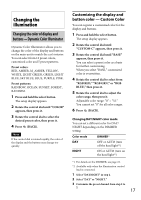
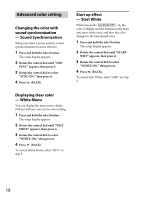
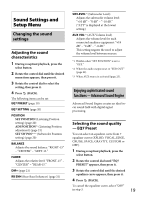
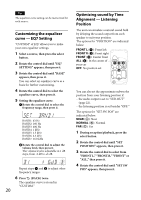
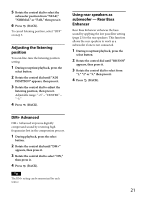
Tip The equalizer curve setting can be memorized for each source. Customizing the equalizer curve - EQ7 Setting "CUSTOM" of EQ7 allows you to make your own equalizer settings. 1 Select a source, then press the select button. 2 Rotate the control dial until "EQ7 SETTING" appears, then press it. 3 Rotate the control dial until "BASE" appears, then press it. You can select an equalizer curve as a basis for further customizing. 4 Rotate the control dial to select the equalizer curve, then press it. 5 Setting the equalizer curve. Rotate the control dial to select the frequency range, then press it. BAND1: 63 Hz BAND2: 160 Hz BAND3: 400 Hz BAND4: 1 kHz BAND5: 2.5 kHz BAND6: 6.3 kHz BAND7: 16.0 kHz Rotate the control dial to adjust the volume level, then press it. The volume level is adjustable in 1 dB steps, from -6 dB to +6 dB. Repeat steps and to adjust other frequency ranges. 6 Press (BACK) twice. The equalizer curve is stored in "CUSTOM." 20 Optimizing sound by Time Alignment - Listening Position The unit can simulate a natural sound field by delaying the sound output from each speaker to suit your position. The options for "POSITION" are indicated below. FRONT L (): Front left FRONT R (): Front right FRONT (): Center front ALL (): In the center of your car OFF: No position set You can also set the approximate subwoofer position from your listening position if: - the audio output is set to "SUB-OUT" (page 22). - the listening position is set besides "OFF." The options for "SET SW POS" are indicated below. NEAR (): Near NORMAL (): Normal FAR (): Far 1 During reception/playback, press the select button. 2 Rotate the control dial until "SET POSITION" appears, then press it. 3 Rotate the control dial to select from "FRONT L," "FRONT R," "FRONT" or "ALL," then press it. 4 Rotate the control dial until "SET SW POS" appears, then press it.
-
 1
1 -
2
-
3
-
4
-
5
-
6
-
7
-
8
-
9
-
10
-
11
-
12
-
13
-
14
-
 15
15 -
 16
16 -
 17
17 -
 18
18 -
 19
19 -
 20
20 -
 21
21 -
 22
22 -
 23
23 -
 24
24 -
 25
25 -
26
-
27
-
28
-
29
-
30
-
31
-
32
-
33
-
34
-
35
-
36
-
37
-
38
-
39
-
40
-
41
-
42
-
43
-
44
-
45
-
46
-
47
-
48
-
49
-
50
-
51
-
52
-
53
-
54
-
55
-
56
-
57
-
58
-
59
-
60
-
61
-
62
-
63
-
64
 |
 |