Sony CDX-GT805DX Owners manual - Page 4
Getting Started, Resetting the unit, Setting the clock, Detaching the front panel
 |
View all Sony CDX-GT805DX manuals
Add to My Manuals
Save this manual to your list of manuals |
Page 4 highlights
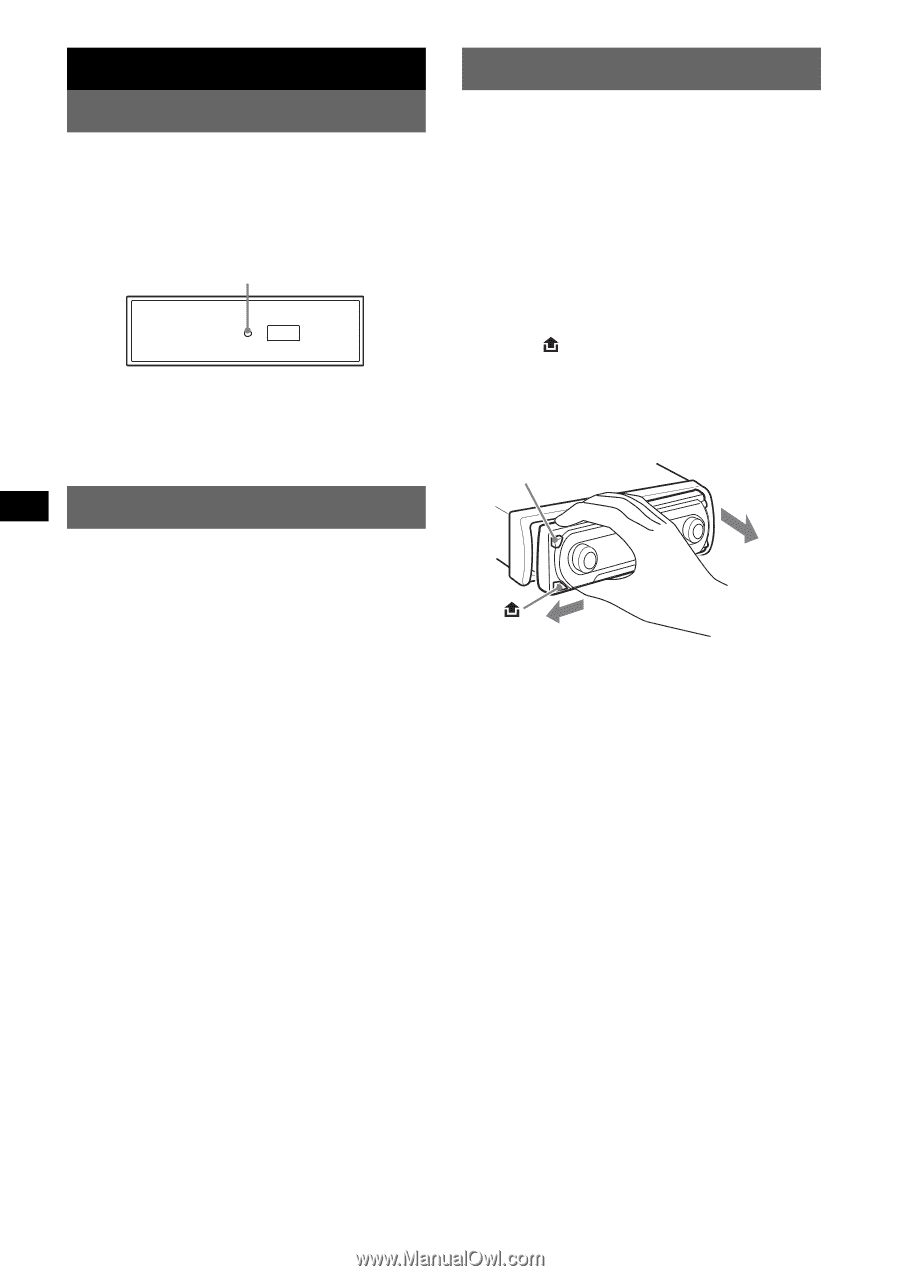
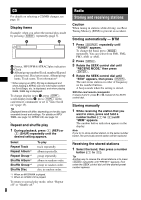
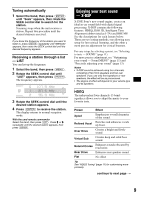
Getting Started Resetting the unit Before operating the unit for the first time, or after replacing the car battery or changing the connections, you must reset the unit. Detach the front panel and press the RESET button with a pointed object, such as a ball-point pen. RESET button Note Pressing the RESET button will erase the clock setting and some stored contents. Custom memory of HDEQ, DSO 3D and Intelligent Time Alignment (I-TA) will not be erased (page 11). Setting the clock The clock uses a 12-hour digital indication. 1 Press (MENU). 2 Rotate the SEEK control dial until "SETUP" appears, then press (ENTER). 3 Rotate the SEEK control dial until "Clock Adjust" appears, then press (ENTER). The clock adjustment display appears. 4 Rotate the SEEK control dial to set the hour and minute. To move the digital indication, press (ENTER). 5 After setting the minute, press (ENTER). The clock starts. With the card remote commander In steps 2 to 4: press M or m instead of the SEEK control dial; in step 4: press < or , instead of (ENTER). Detaching the front panel You can detach the front panel of this unit to prevent theft. Caution alarm If you turn the ignition switch to the OFF position without detaching the front panel, the caution alarm will sound for a few seconds. The alarm will only sound if the built-in amplifier is used. 1 Press (OFF). The unit is turned off. 2 Press . The left side of front panel is released. 3 Slide the front panel to the left, then gently pull out the front panel towards you. (OFF) 2 1 Notes • Do not drop or put excessive pressure on the front panel and display window. • Do not subject the front panel to heat/high temperature or moisture. Avoid leaving it in a parked car or on a dashboard/rear tray. 4
-
 1
1 -
 2
2 -
 3
3 -
 4
4 -
 5
5 -
 6
6 -
 7
7 -
 8
8 -
 9
9 -
 10
10 -
11
-
12
-
13
-
14
-
15
-
16
-
17
-
18
-
19
-
20
-
21
-
22
-
23
-
24
-
25
-
26
-
27
-
28
-
29
-
30
-
31
-
32
-
33
-
34
-
35
-
36
-
37
-
38
-
39
-
40
-
41
-
42
-
43
-
44
-
45
-
46
-
47
-
48
-
49
-
50
-
51
-
52
-
53
-
54
-
55
-
56
-
57
-
58
-
59
-
60
-
61
-
62
-
63
-
64
-
65
-
66
-
67
-
68
-
69
-
70
-
71
-
72
 |
 |