Sony CMT-L1 Operating Instructions - Page 10
Replacing the battery in the remote, Setting the clock, Press CLOCK/TIMER SET on the remote.
 |
View all Sony CMT-L1 manuals
Add to My Manuals
Save this manual to your list of manuals |
Page 10 highlights
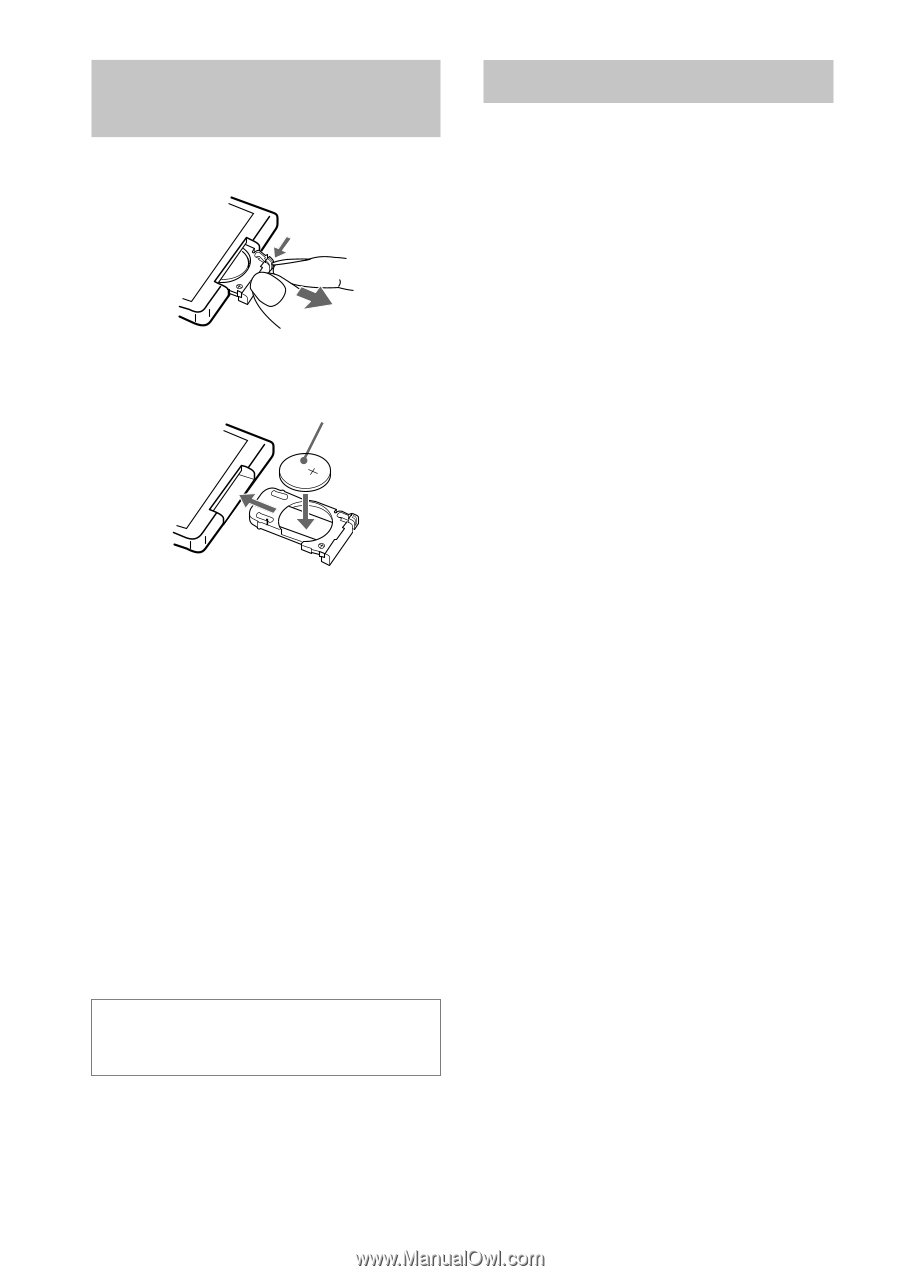
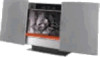
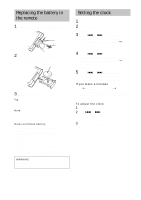
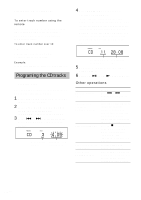
Replacing the battery in the remote 1 Slide out and remove the battery case. 2 Insert a new lithium battery CR2025 with the + side facing up. a lithium battery CR2025 3 Slide the battery case back in. Tip When the battery no longer operates the remote, replace the battery with a new one. Note If you are not going to use the remote for a long time, remove the battery to avoid damage caused by corrosion from battery leakage. Notes on lithium battery • Keep the lithium battery out of the reach of children. Should the battery be swallowed, immediately consult a doctor. • Wipe the battery with a dry cloth to assure a good contact. • Be sure to observe the correct polarity when installing the battery. • Do not hold the battery with metallic tweezers, otherwise a short-circuit may occur. WARNING Battery may explode if you mistreated. Do not recharge, disassemble or dispose of in fire. Setting the clock 1 Turn on the system. 2 Press CLOCK/TIMER SET on the remote. 3 Press . or > on the remote repeatedly to set the day, and then press ENTER/YES or CURSORt on the remote. The hour indication flashes. 4 Press . or > on the remote repeatedly to set the hour, and then press ENTER/YES or CURSORt on the remote. The minute indication flashes. 5 Press . or > on the remote repeatedly to set the minute, and then press ENTER/YES on the remote. If you make a mistake Press TCURSOR or CURSORt on the remote repeatedly until the indication you want to change (day, hour, minute) flashes, and then change the setting. To adjust the clock 1 Press CLOCK/TIMER SET on the remote. 2 Press . or > on the remote repeatedly until "CLOCK SET?" appears in the display, and then press ENTER/YES on the remote. 3 Do the same procedures as steps 3 to 5 above. 10GB
-
 1
1 -
2
-
3
-
4
-
 5
5 -
 6
6 -
 7
7 -
 8
8 -
 9
9 -
 10
10 -
 11
11 -
 12
12 -
 13
13 -
 14
14 -
 15
15 -
16
-
17
-
18
-
19
-
20
-
21
-
22
-
23
-
24
-
25
-
26
-
27
-
28
 |
 |