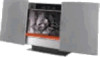
Sony CMT-L1 Operating Instructions - Page 7
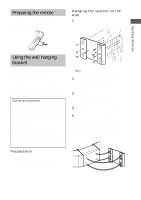
Getting Started, Set the AM loop antenna up before
 |
View all Sony CMT-L1 manuals
Add to My Manuals
Save this manual to your list of manuals |
Page 7 highlights
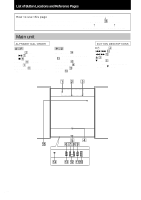
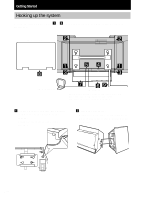
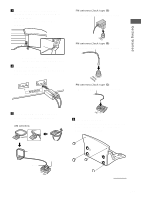
Getting Started 3 Secure the speaker cords with the speaker cord hooks at the bottom of the main unit. Otherwise, the speaker cord could be damaged. FM antenna (Jack type A) Extend the FM wire antenna horizontally Bend a speaker cord slightly, insert it into the hole and secure it with the hook. 4 Connect the speaker cords. Connect the speaker cords to the SPEAKER jacks as shown below. FM antenna (Jack type B) Extend the FM wire antenna horizontally FM antenna (Jack type C) Extend the FM wire antenna horizontally 5 Connect the FM and AM antennas. Set the AM loop antenna up before connecting it. AM antenna 6 Attach the stand pads. Attach the supplied stand pads to the bottom of the stand to stabilize the stand and to prevent it from slipping. AM loop antenna Black White continued 7GB
-
 1
1 -
 2
2 -
 3
3 -
 4
4 -
 5
5 -
 6
6 -
 7
7 -
 8
8 -
 9
9 -
 10
10 -
 11
11 -
 12
12 -
13
-
14
-
15
-
16
-
17
-
18
-
19
-
20
-
21
-
22
-
23
-
24
-
25
-
26
-
27
-
28
 |
 |
