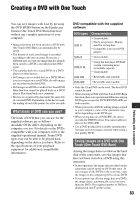
Sony DCR-SR60 Handycam Handbook - Page 85
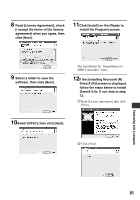
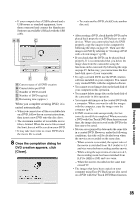
Performing with a computer, Once the completion dialog for, DVD creation appears, click, Close].
 |
View all Sony DCR-SR60 manuals
Add to My Manuals
Save this manual to your list of manuals |
Page 85 highlights
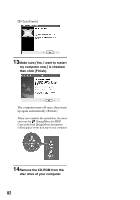
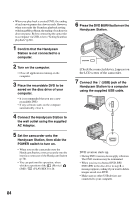
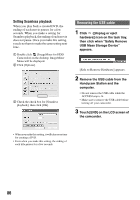
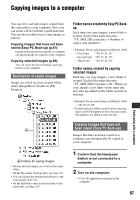
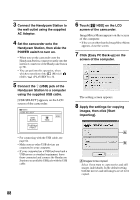
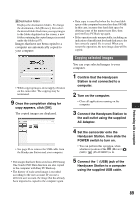
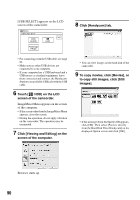
• If your computer has a USB keyboard and a USB mouse as standard equipment, leave them connected and connect the Handycam Station to an available USB jack with the USB cable. A Current status of all DVD creation B Current status per DVD C Number of DVD created D Number of DVD required E Remaining time (approx.) When you complete creating DVD, it is exited automatically. • When you cannot store all the recordable data on a DVD, follow the on-screen instructions, then insert a new DVD onto the disc drive. • The maximum number of recordable movie files is limited. When the movie files exceed this limit, the rest will be saved on a new DVD. • It may take more time to create DVD when the movie file is small. 8 Once the completion dialog for DVD creation appears, click [Close]. • To create another DVD, click [Create another disc set]. • After creating a DVD, check that the DVD can be played back properly on a DVD player or other devices. When you cannot play back the DVD properly, copy the images to the computer by following the steps on page 87. Then save the images on DVD by referring to "Creating a DVD with selected images" (p.96). • If you check that the DVD can be played back properly, It is recommended that you delete the image data from the camcorder using the functions on the camcorder by following the steps on page 45. In this way, you can increase the free hard disk space of your camcorder. • To copy a created DVD, use the DVD creation software installed on your computer. You cannot copy created DVDs with the supplied software. • You cannot record image data on the hard disk of your computer in this operation. • You cannot delete image data on the hard disk of the camcorder in this operation. • You cannot edit images on the created DVD with a computer. When you want to edit the images with the computer, copy the images onto the computer (p.87). • If DVD creation ends unexpectedly, the last correctly saved file is completed. When you create a DVD with One Touch DVD Burn function next time, the image data not saved on the DVD is the first one to be saved. • Movies are organized by date under the same title in a created DVD. However, under the following conditions, this title will be divided even when the movies are recorded on the same date. - When a movie is recorded, the aspect ratio of the movie is switched from 16:9 (wide) to 4:3 and vice versa before recording another movie. - While setting the aspect ratio of a movie to 4:3, the recording mode has been switched from [LP] to [HQ] or [SP] and vice versa. - When the movies recorded on the same date exceed 99. • The images that have been copied on your computer using Easy PC Back-up are also saved on a DVD with One Touch DVD Burn function. Performing with a computer 85
-
 1
1 -
2
-
3
-
4
-
5
-
6
-
7
-
8
-
9
-
10
-
11
-
12
-
13
-
14
-
15
-
16
-
17
-
18
-
19
-
20
-
21
-
22
-
23
-
24
-
25
-
26
-
27
-
28
-
29
-
30
-
31
-
32
-
33
-
34
-
35
-
36
-
37
-
38
-
39
-
40
-
41
-
42
-
43
-
44
-
45
-
46
-
47
-
48
-
49
-
50
-
51
-
52
-
53
-
54
-
55
-
56
-
57
-
58
-
59
-
60
-
61
-
62
-
63
-
64
-
65
-
66
-
67
-
68
-
69
-
70
-
71
-
72
-
73
-
74
-
75
-
76
-
77
-
78
-
79
-
 80
80 -
 81
81 -
 82
82 -
 83
83 -
 84
84 -
 85
85 -
 86
86 -
 87
87 -
 88
88 -
 89
89 -
 90
90 -
91
-
92
-
93
-
94
-
95
-
96
-
97
-
98
-
99
-
100
-
101
-
102
-
103
-
104
-
105
-
106
-
107
-
108
-
109
-
110
-
111
-
112
-
113
-
114
-
115
-
116
-
117
-
118
-
119
-
120
-
121
-
122
-
123
-
124
-
125
-
126
-
127
-
128
-
129
-
130
-
131
-
132
 |
 |
