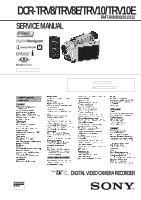
Sony DCR-TRV10 Service Manual - Page 3

Table Of Contents, To Take Out A Cassette When Not Eject - review
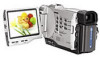
Page 3 highlights

TABLE OF CONTENTS SERVICE NOTE 1. POWER SUPPLY DURING REPAIRS 6 2. TO TAKE OUT A CASSETTE WHEN NOT EJECT (FORCE EJECT 6 SELF-DIAGNOSIS FUNCTION 1. SELF-DIAGNOSIS FUNCTION 7 2. SELF-DIAGNOSIS DISPLAY 7 3. SERVICE MODE DISPLAY 7 3-1. Display Method 7 3-2. Switching of Backup No 7 3-3. End of Display 7 4. SELF-DIAGNOSIS CODE TABLE 8 1. GENERAL Welcome 1-1 Checking supplied accessories 1-1 Quick Start Guide 1-1 Getting Started 1-2 Using this manual 1-2 Step 1 Preparing the power supply 1-2 Step 2 Inserting a cassette 1-4 Recording - Basics 1-4 Recording a picture 1-4 Checking the recording - END SEARCH/EDIT SEARCH/Rec Review 1-7 Playback - Basics 1-7 Playing back a tape 1-7 Viewing the recording on TV 1-9 Advanced Recording Operations 1-9 Photo recording 1-9 Using the wide mode 1-10 Using the fader function 1-11 Using special effects - Picture effect 1-11 Using special effects - Digital effect 1-12 Adjusting the white balance manually 1-13 Using the PROGRAM AE function 1-13 Adjusting the exposure manually 1-14 Focusing manually 1-14 Advanced Playback Operations 1-15 Playing back a tape with picture effects 1-15 Playing back a tape with digital effects 1-15 Quickly locating a scene using the zero set memory function 1-15 Searching a recording by date - Date search 1-16 Searching the boundaries of recorded tape by title - Title search 1-16 Searching for a photo - Photo search/Photo scan 1-16 Editing 1-17 Dubbing a tape 1-17 Editing partially on a DV tape - DV synchro-editing (DCR-TRV10E only 1-18 Audio dubbing 1-18 Superimposing a title 1-19 Making your own titles 1-20 Labeling a cassette 1-20 Customizing Your Camcorder 1-21 Changing the MENU settings 1-21 Resetting the date and time 1-22 Memory Stick Operations 1-23 Using a memory stick - introduction 1-23 Recording still images on memory sticks - Memory photo recording 1-24 Recording an image from a mini DV tape as a still image 1-25 Copying still images from a recorded tape - Photo save 1-26 Viewing a still picture - Memory photo playback 1-26 Superimposing a still picture in a memory stick on a moving picture- M. CHROM/M. LUMI/C. CHROM 1-27 Preventing accidental erasure - Image protection 1-28 Writing a print mark - PRINT MARK 1-29 Deleting images 1-29 Playing back images in a continuous loop -SLIDE SHOW 1-30 Additional Information 1-30 Usable cassettes 1-30 Troubleshooting 1-31 Self-diagnosis display 1-32 Warning indicators and messages 1-32 Using your camcorder abroad 1-33 Maintenance information and precautions 1-33 Quick Reference 1-34 Identifying the parts and controls 1-34 2. DISASSEMBLY 2-1. LCD PANEL (PD-110 BOARD, INVERTOR TRANS UNIT 2-1 2-2. FRONT PANEL ASSEMBLY 2-2 2-3. CABINET (L), BT PANEL ASSEMBLY 2-2 2-4. EVF 2-3 2-5. LB-60 BOARD 2-3 2-6. DD-123 BOARD, VC-217 BOARD 2-4 2-7. MECHANISM DECK 2-4 2-8. CS FLAME ASSEMBLY 2-5 2-9. LENS, OUTER CONNECTOR (HOT SHOE), JK-170 BOARD 2-5 2-10. MS SHASSIS, CONTROL SWITCH BLOCK (PS-4550 2-6 2-11. CK-84 BOARD, SPEAKER 2-6 2-12. LCD, CONTROL SWITCH BLOCK 2-7 2-13. SERVICE POSITION (Mainly for voltage measurement and check 2-8 2-14. CIRCUIT BOARD LOCATION 2-9 2-15. FLEXIBLE BOARDS LOCATION 2-10 3. BLOCK DIAGRAMS 3-1. OVERALL BLOCK DIAGRAM (TRV8/TRV8E 3-1 3-2. OVERALL BLOCK DIAGRAM (TRV10/TRV10E 3-5 3-3. POWER BLOCK DIAGRAM 3-9 4. PRINTED WIRING BOARDS AND SCHEMATIC DIAGRAMS 4-1. FRAME SCHEMATIC DIAGRAM 4-1 4-2. PRINTED WIRING BOARDS AND SCHEMATIC DIAGRAMS 4-4 • FP-83 (CCD IMAGER) PRINTED WIRING BOARD AND SCHEMATIC DIAGRAM 4-6 • VC-217 (FOCUS/ZOOM MOTOR DRIVE)(1/11) SCHEMATIC DIAGRAM 4-9 • VC-217 (CAMERA)(2/11) SCHEMATIC DIAGRAM 4-12 • VC-217 (BLOCKING COMPRESS)(3/11) SCHEMATIC DIAGRAM 4-15 • VC-217 (VIDEO INTERFACE)(4/11) SCHEMATIC DIAGRAM 4-18 • VC-217 (DV PROCESS)(5/11) SCHEMATIC DIAGRAM 4-21 • VC-217 (REC/PB HEAD AMP)(6/11) SCHEMATIC DIAGRAM 4-25 • VC-217 (VIDEO IN/OUT)(7/11) SCHEMATIC DIAGRAM 4-29 - 3 -

  • 1
  • 2
  • 3
  • 4
  • 5
  • 6
  • 7
  • 8
  • 9
  • 10
  • 11
  • 12
  • 13
  • 14
  • 15
  • 16
  • 17
  • 18
  • 19
  • 20
  • 21
  • 22
  • 23
  • 24
  • 25
  • 26
  • 27
  • 28
  • 29
  • 30
  • 31
  • 32
  • 33
  • 34
  • 35
  • 36
  • 37
  • 38
  • 39
  • 40
  • 41
  • 42
  • 43
  • 44
  • 45
  • 46
  • 47
  • 48
  • 49
  • 50
  • 51
  • 52
  • 53
  • 54
  • 55
  • 56
  • 57
  • 58
  • 59
  • 60
  • 61
  • 62
  • 63
  • 64
  • 65
  • 66
  • 67
  • 68
  • 69
  • 70
  • 71
  • 72
  • 73
  • 74
  • 75
  • 76
  • 77
  • 78
  • 79
  • 80
  • 81
  • 82
  • 83
  • 84
  • 85
  • 86
  • 87
  • 88
  • 89
  • 90
  • 91
  • 92
  • 93
  • 94
  • 95
  • 96
  • 97
  • 98
  • 99
  • 100
  • 101
  • 102
  • 103
  • 104
  • 105
  • 106
  • 107
  • 108
  • 109
  • 110
  • 111
  • 112
  • 113
  • 114
  • 115
  • 116
  • 117
  • 118
  • 119
  • 120
  • 121
  • 122
  • 123
  • 124
  • 125
  • 126
  • 127
  • 128
  • 129
  • 130
  • 131
  • 132
  • 133
  • 134
  • 135
  • 136
  • 137
  • 138
  • 139
  • 140
  • 141
  • 142
  • 143
  • 144
  • 145
  • 146
  • 147
  • 148
  • 149
  • 150
  • 151
  • 152
  • 153
  • 154
  • 155
  • 156
  • 157
  • 158
  • 159
  • 160
  • 161
  • 162
  • 163
  • 164
  • 165
  • 166
  • 167
  • 168
  • 169
  • 170
  • 171
  • 172
  • 173
  • 174
  • 175
  • 176
  • 177
  • 178
  • 179
  • 180
  • 181
  • 182

— 3 —
TABLE OF CONTENTS
SERVICE NOTE
1.
POWER SUPPLY DURING REPAIRS ·····························6
2.
TO TAKE OUT A CASSETTE WHEN NOT EJECT
(FORCE EJECT) ································································ 6
SELF-DIAGNOSIS FUNCTION
1.
SELF-DIAGNOSIS FUNCTION ······································· 7
2.
SELF-DIAGNOSIS DISPLAY
·········································· 7
3.
SERVICE MODE DISPLAY ·············································7
3-1.
Display Method ·································································· 7
3-2.
Switching of Backup No. ··················································· 7
3-3.
End of Display ···································································· 7
4.
SELF-DIAGNOSIS CODE TABLE··································· 8
1.
GENERAL
Welcome! ···················································································1-1
Checking supplied accessories ·················································· 1-1
Quick Start Guide ······································································ 1-1
Getting Started ··········································································· 1-2
Using this manual ·································································· 1-2
Step 1
Preparing the power supply ······································· 1-2
Step 2
Inserting a cassette ···················································· 1-4
Recording – Basics ···································································· 1-4
Recording a picture ································································ 1-4
Checking the recording
– END SEARCH/EDIT SEARCH/Rec Review ···················· 1-7
Playback – Basics ······································································ 1-7
Playing back a tape ································································ 1-7
Viewing the recording on TV ················································1-9
Advanced Recording Operations ··············································· 1-9
Photo recording ······································································ 1-9
Using the wide mode ··························································· 1-10
Using the fader function ······················································ 1-11
Using special effects – Picture effect ··································· 1-11
Using special effects – Digital effect ··································· 1-12
Adjusting the white balance manually ································· 1-13
Using the PROGRAM AE function ····································· 1-13
Adjusting the exposure manually ········································ 1-14
Focusing manually ······························································· 1-14
Advanced Playback Operations ··············································· 1-15
Playing back a tape with picture effects ······························ 1-15
Playing back a tape with digital effects ······························· 1-15
Quickly locating a scene using the
zero set memory function
·····················································1-15
Searching a recording by date – Date search – ···················· 1-16
Searching the boundaries of recorded tape by title
– Title search ········································································ 1-16
Searching for a photo – Photo search/Photo scan ················ 1-16
Editing ····················································································· 1-17
Dubbing a tape ····································································· 1-17
Editing partially on a DV tape – DV synchro-editing
(DCR-TRV10E only) ···························································1-18
Audio dubbing ····································································· 1-18
Superimposing a title ··························································· 1-19
Making your own titles ························································ 1-20
Labeling a cassette ······························································· 1-20
Customizing Your Camcorder
·················································1-21
Changing the MENU settings ·············································· 1-21
Resetting the date and time ·················································· 1-22
Memory Stick Operations························································1-23
Using a memory stick – introduction···································1-23
Recording still images on memory sticks
– Memory photo recording ·················································· 1-24
Recording an image from a mini DV tape
as a still image ····································································· 1-25
Copying still images from a recorded tape – Photo save
······· 1-26
Viewing a still picture – Memory photo playback···············1-26
Superimposing a still picture in a memory stick on a moving
picture– M. CHROM/M. LUMI/C. CHROM ······················1-27
Preventing accidental erasure – Image protection ··············· 1-28
Writing a print mark – PRINT MARK ································ 1-29
Deleting images ··································································· 1-29
Playing back images in a continuous loop
–SLIDE SHOW ··································································· 1-30
Additional Information ···························································· 1-30
Usable cassettes ··································································· 1-30
Troubleshooting ··································································· 1-31
Self-diagnosis display ·························································· 1-32
Warning indicators and messages ········································1-32
Using your camcorder abroad ·············································· 1-33
Maintenance information and precautions···························1-33
Quick Reference ······································································ 1-34
Identifying the parts and controls ········································ 1-34
2.
DISASSEMBLY
2-1.
LCD PANEL (PD-110 BOARD,
INVERTOR TRANS UNIT) ···········································2-1
2-2.
FRONT PANEL ASSEMBLY ·········································2-2
2-3.
CABINET (L), BT PANEL ASSEMBLY ·······················2-2
2-4.
EVF ················································································· 2-3
2-5.
LB-60 BOARD································································2-3
2-6.
DD-123 BOARD, VC-217 BOARD
·······························2-4
2-7.
MECHANISM DECK ····················································· 2-4
2-8.
CS FLAME ASSEMBLY ················································2-5
2-9.
LENS, OUTER CONNECTOR (HOT SHOE),
JK-170 BOARD ······························································ 2-5
2-10.
MS SHASSIS,
CONTROL SWITCH BLOCK (PS-4550) ······················ 2-6
2-11.
CK-84 BOARD, SPEAKER ··········································· 2-6
2-12.
LCD, CONTROL SWITCH BLOCK ·····························2-7
2-13.
SERVICE POSITION
(Mainly for voltage measurement and check) ················· 2-8
2-14.
CIRCUIT BOARD LOCATION ·····································2-9
2-15.
FLEXIBLE BOARDS LOCATION ······························2-10
3.
BLOCK DIAGRAMS
3-1.
OVERALL BLOCK DIAGRAM (TRV8/TRV8E)
·········3-1
3-2.
OVERALL BLOCK DIAGRAM (TRV10/TRV10E) ·····3-5
3-3.
POWER BLOCK DIAGRAM ·········································3-9
4.
PRINTED WIRING BOARDS AND
SCHEMATIC DIAGRAMS
4-1.
FRAME SCHEMATIC DIAGRAM································4-1
4-2.
PRINTED WIRING BOARDS AND
SCHEMATIC DIAGRAMS ············································4-4
•FP-83 (CCD IMAGER)
PRINTED WIRING BOARD AND
SCHEMATIC DIAGRAM ······························4-6
•VC-217 (FOCUS/ZOOM MOTOR DRIVE)(1/11)
SCHEMATIC DIAGRAM ······························4-9
• VC-217 (CAMERA)(2/11)
SCHEMATIC DIAGRAM ····························4-12
• VC-217 (BLOCKING COMPRESS)(3/11)
SCHEMATIC DIAGRAM ····························4-15
•VC-217 (VIDEO INTERFACE)(4/11)
SCHEMATIC DIAGRAM ····························4-18
•VC-217 (DV PROCESS)(5/11)
SCHEMATIC DIAGRAM ····························4-21
• VC-217 (REC/PB
HEAD AMP)(6/11)
SCHEMATIC DIAGRAM ····························4-25
• VC-217 (VIDEO IN/OUT)(7/11)
SCHEMATIC DIAGRAM ····························4-29