Sony DPF X1000 Operating Instructions - Page 31
Single view mode, Group, Image, Style, Explanation
 |
UPC - 027242763333
View all Sony DPF X1000 manuals
Add to My Manuals
Save this manual to your list of manuals |
Page 31 highlights
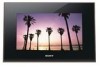
Basic operations Single view mode Group A Image Style A Entire image B Fit to screen C Entire image (with Exif) D Fit to screen (with Exif) B Explanation Displays an entire image in the screen. You can switch the images to be displayed by pressing B/b. Displays an image over the whole screen. You can switch the images to be displayed by pressing B/b. Displays image information, such as the image number, file name, and shooting date while displaying the entire image. You can switch the images to be displayed by pressing B/b. Refer to "About the information display" (page 33) for details on the image information. Displays image information, such as the image number, file name, and shooting date in fit to screen mode. You can switch the images to be displayed by pressing B/b. Refer to "About the information display" (page 33) for details on the image information. C D Tips • If the power is on, and no memory card is inserted, and no device is connected, the images stored in internal memory are displayed. If no images are saved in internal memory, demonstration mode starts automatically. Demonstration mode ends if a button other than 1 (on/standby) is pressed. • Panorama playback starts when you press when the panorama image is displayed in single view mode. • You can set the image display mode by pressing VIEW MODE and pressing B/b to select either entire image or fit to screen mode. Not all images are able to use the fit to screen mode. • You can use the VIEW MODE button on the photo frame. 31 GB
-
 1
1 -
2
-
3
-
4
-
5
-
6
-
7
-
8
-
9
-
10
-
11
-
12
-
13
-
14
-
15
-
16
-
17
-
18
-
19
-
20
-
21
-
22
-
23
-
24
-
25
-
 26
26 -
 27
27 -
 28
28 -
 29
29 -
 30
30 -
 31
31 -
 32
32 -
 33
33 -
 34
34 -
 35
35 -
 36
36 -
37
-
38
-
39
-
40
-
41
-
42
-
43
-
44
-
45
-
46
-
47
-
48
-
49
-
50
-
51
-
52
-
53
-
54
-
55
-
56
-
57
-
58
-
59
-
60
-
61
-
62
-
63
-
64
-
65
-
66
-
67
-
68
-
69
-
70
-
71
-
72
-
73
-
74
-
75
-
76
-
77
-
78
-
79
-
80
-
81
-
82
-
83
-
84
-
85
-
86
-
87
-
88
 |
 |
