Sony DSR 25 Operating Instructions - Page 68
Maintenance, Troubleshooting
 |
UPC - 027242604001
View all Sony DSR 25 manuals
Add to My Manuals
Save this manual to your list of manuals |
Page 68 highlights
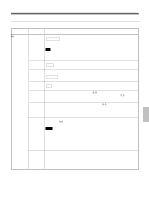
Troubleshooting 6 Chapter Maintenance Troubleshooting Please check the following before contacting your Sony dealer. Symptom The power cannot be turned on. The unit will not operate even if the power has been turned on. The cassette cannot be inserted. It takes time to eject the cassette. No picture. Noise appears on the screen. No picture via the DV jack. Cause/Remedy • The AC power cord is disconnected. t Connect the AC power cord. • The KEY INH switch is set to ON. t Set the switch to OFF. • The KEY INH switch is set to ON. t Set the switch to OFF. • Moisture condensation has occurred. t Turn off the power, disconnect the AC power cord. Reconnect the AC power cord after about one minute and turn on the power. Then if there is a cassette in the unit, remove the cassette and leave it for more than one hour. • The cassette is not inserted straight. t Eject and reinsert it straight. • There is moisture condensation on the head drum. t With the unit powered on, wait more than one hour. • The cassette is not inserted straight. t Eject and reinsert it straight. • Another cassette has been loaded already. t Remove the cassette and insert the one you want to load. • The cassette compartment is closed. t Press the EJECT button to open the compartment. This is not a malfunction. t This unit ejects the cassette slowly to protect the tape. While the cassette is being ejected, the q (cassette) indicator flashes. The video heads are dirty. t Clean the video heads using the supplied cleaning cassette. • A damaged tape is loaded. t Remove the cassette and insert another one. • The video heads are dirty. t Clean the video heads using the supplied cleaning cassette. • You have tried to make the unit play back a tape recorded in the LP mode of the DV format. t This unit can play back only tapes recorded in the DVCAM format or in the SP mode of the DV format. A tape recorded in the LP mode of the DV format cannot be played back on this unit. • Reconnect the i.LINK cable (DV cable) (not supplied). • The INPUT SELECT selector is set to a position other than DV. t Set the selector to DV. 68 (GB) Chapter 6 Maintenance Chapter 6 Maintenance
-
 1
1 -
2
-
3
-
4
-
5
-
6
-
7
-
8
-
9
-
10
-
11
-
12
-
13
-
14
-
15
-
16
-
17
-
18
-
19
-
20
-
21
-
22
-
23
-
24
-
25
-
26
-
27
-
28
-
29
-
30
-
31
-
32
-
33
-
34
-
35
-
36
-
37
-
38
-
39
-
40
-
41
-
42
-
43
-
44
-
45
-
46
-
47
-
48
-
49
-
50
-
51
-
52
-
53
-
54
-
55
-
56
-
57
-
58
-
59
-
60
-
61
-
62
-
 63
63 -
 64
64 -
 65
65 -
 66
66 -
 67
67 -
 68
68 -
 69
69 -
 70
70 -
 71
71 -
 72
72 -
 73
73 -
74
-
75
-
76
-
77
-
78
-
79
-
80
-
81
-
82
-
83
-
84
-
85
-
86
-
87
-
88
-
89
-
90
-
91
-
92
-
93
-
94
-
95
-
96
-
97
-
98
-
99
-
100
-
101
-
102
-
103
-
104
-
105
-
106
-
107
-
108
-
109
-
110
-
111
-
112
-
113
-
114
-
115
-
116
-
117
-
118
-
119
-
120
-
121
-
122
-
123
-
124
-
125
-
126
-
127
-
128
-
129
-
130
-
131
-
132
-
133
-
134
-
135
-
136
-
137
-
138
-
139
-
140
-
141
-
142
-
143
-
144
-
145
-
146
-
147
-
148
-
149
-
150
-
151
-
152
-
153
-
154
-
155
-
156
-
157
-
158
-
159
-
160
-
161
-
162
-
163
-
164
-
165
-
166
-
167
-
168
 |
 |
