Sony DVP-NS400D Operating Instructions - Page 74
Adjusting the speaker volume and level, After you stop playback, select, SPEAKER SETUP
 |
UPC - 027242586543
View all Sony DVP-NS400D manuals
Add to My Manuals
Save this manual to your list of manuals |
Page 74 highlights
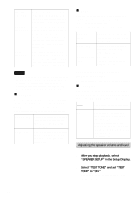
FRONT (12ft/3.6m) CENTER (12ft/3.6m) REAR (10ft/3m) Front speaker distance from the listening position can be set in 1 foot (0.3 meter) increments from 4 to 50 feet (1.2 to 15.2 meters). Center speaker distance can be moved up to 2 feet (0.6 meters) backward from the front speakers or 5 feet (1.5 meters) forward closer to the listening position, in 1 foot (0.3 meter) increments. Rear speaker distance can be moved up to 16 feet (4.8 meters) closer to your listening position from the front speaker position, in 1 foot (0.3 meter) increments. Notes • If each or the front or rear speakers are not placed at an equal distance from your listening position, set the distance according to the closest speaker. • Do not place the rear speakers farther away from your listening position than the front speakers. xBALANCE You can vary the balance of the left and right speakers as follows. Be sure to set "TEST TONE" to "ON" for easy adjustment. The default adjustments are in parentheses. FRONT (0dB) Adjust the balance between the front left and right speakers (- 6dB [L] to +6dB [R], 0.5dB increments). REAR (0dB) Adjust the balance between the rear left and right speakers (- 6dB [L] to +6dB [R], 0.5dB increments). xLEVEL You can vary the level of each speaker as follows. Be sure to set "TEST TONE" to "ON" for easy adjustment. The default adjustments are in parentheses. CENTER (0dB) Adjust the level of the center speaker (-6dB to +6dB, 0.5dB increments). REAR (0dB) Adjust the level of the rear speakers (-6dB to +6dB, 0.5dB increments). SUBWOOFER Adjust the level of the (0dB) subwoofer (-10dB to +10dB, 0.5dB increments). To adjust the volume of all the speakers at one time Use the amplifier's (receiver's) volume control. xTEST TONE The speakers will emit a test tone. Use this when you use the 5.1CH OUTPUT jacks and adjust the "BALANCE" and "LEVEL". OFF ON The test tone is not emitted from the speakers. The test tone is emitted from each speaker in sequence while adjusting balance or level. When you select one of the "SPEAKER SETUP" items, the test tone is emitted from both left and right speakers simultaneously. Adjusting the speaker volume and level 1 After you stop playback, select "SPEAKER SETUP" in the Setup Display. 2 Select "TEST TONE" and set "TEST TONE" to "ON." You will hear the test tone from each speaker in sequence. 74
-
 1
1 -
2
-
3
-
4
-
5
-
6
-
7
-
8
-
9
-
10
-
11
-
12
-
13
-
14
-
15
-
16
-
17
-
18
-
19
-
20
-
21
-
22
-
23
-
24
-
25
-
26
-
27
-
28
-
29
-
30
-
31
-
32
-
33
-
34
-
35
-
36
-
37
-
38
-
39
-
40
-
41
-
42
-
43
-
44
-
45
-
46
-
47
-
48
-
49
-
50
-
51
-
52
-
53
-
54
-
55
-
56
-
57
-
58
-
59
-
60
-
61
-
62
-
63
-
64
-
65
-
66
-
67
-
68
-
 69
69 -
 70
70 -
 71
71 -
 72
72 -
 73
73 -
 74
74 -
 75
75 -
 76
76 -
 77
77 -
 78
78 -
 79
79 -
80
-
81
-
82
-
83
-
84
-
85
-
86
-
87
-
88
 |
 |
