Sony GTK-XB7 Operating Instructions - Page 11
Getting Started, Inserting batteries, Turning on the system, Carrying the system, Press LIGHT - remote
 |
View all Sony GTK-XB7 manuals
Add to My Manuals
Save this manual to your list of manuals |
Page 11 highlights
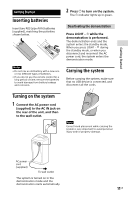
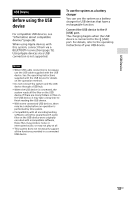
Getting Started Getting Started Inserting batteries Insert two R03 (size AAA) batteries (supplied), matching the polarities shown below. Notes ••Do not mix an old battery with a new one or mix different types of batteries. ••If you do not use the remote control for a long period of time, remove the batteries to avoid damage from battery leakage and corrosion. 2 Press to turn on the system. The indicator lights up in green. Deactivating the demonstration Press LIGHT - while the demonstration is performed. The demonstration ends and the system enters the standby mode. When you press LIGHT - during the standby mode, or when you disconnect and reconnect the AC power cord, the system enters the demonstration mode. Carrying the system Before carrying the system, make sure that no USB device is connected, and disconnect all the cords. Turning on the system 1 Connect the AC power cord (supplied) to the AC IN jack on the rear of the unit, and then to the wall outlet. Note Correct hand placement while carrying the system is very important to avoid personal injury and/or property damage. AC power cord (supplied) To wall outlet The system is turned on in the demonstration mode and the demonstration starts automatically. 11GB
-
 1
1 -
2
-
3
-
4
-
5
-
 6
6 -
 7
7 -
 8
8 -
 9
9 -
 10
10 -
 11
11 -
 12
12 -
 13
13 -
 14
14 -
 15
15 -
 16
16 -
17
-
18
-
19
-
20
-
21
-
22
-
23
-
24
-
25
-
26
-
27
-
28
-
29
-
30
-
31
-
32
-
33
-
34
-
35
-
36
-
37
-
38
-
39
-
40
-
41
-
42
-
43
-
44
-
45
-
46
-
47
-
48
-
49
-
50
-
51
-
52
-
53
-
54
-
55
-
56
-
57
-
58
-
59
-
60
-
61
-
62
-
63
-
64
-
65
-
66
-
67
-
68
-
69
-
70
-
71
-
72
-
73
-
74
-
75
-
76
-
77
-
78
-
79
-
80
-
81
-
82
-
83
-
84
-
85
-
86
-
87
-
88
-
89
-
90
-
91
-
92
-
93
-
94
-
95
-
96
-
97
-
98
-
99
-
100
-
101
-
102
-
103
-
104
-
105
-
106
-
107
 |
 |
