Sony HCD-C700 Operating Instructions - Page 28
Repeat Steps 3 and 4 to adjust other parameters in, If you do not operate the remote for a few seconds
 |
View all Sony HCD-C700 manuals
Add to My Manuals
Save this manual to your list of manuals |
Page 28 highlights
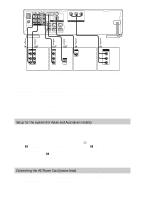
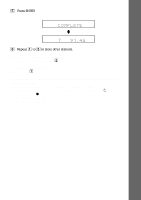
Height diagram C C 60 D D 30 • R. H. LOW Select this if the rear speakers are located in the section D. • R. H. HIGH Select this if the rear speakers are located in the section C. These parameters are not available when "REAR" is set to "NO". To specify the balance and level of the speakers 1 Press AMP MENU repeatedly to display 9 LEVEL on the front panel display. 2 Using X/x to select T.TONE and use C/c to set T.TONE to ON. You will hear the test tone from each speaker in sequence. 3 Sit in your listening position and select the item to be adjusted using X/x. • Items adjusted in 9 LEVEL - Balance of the front and rear speakers - Volume level of the centre and rear speakers and subwoofer 4 Adjust the volume level so that the volume of the test tone from each speaker sounds the same using C/c. The adjusted value will appear on the front panel display. 5 Repeat Steps 3 and 4 to adjust other parameters in 9 LEVEL. If you do not operate the remote for a few seconds, the value disappears from the display and is stored in the system. 6 Using X/x to select T.TONE and use C/c to set T.TONE to OFF. xBALANCE You can vary the balance of each speaker as follows. The default adjustments are in the parentheses. • F ___I___ (centre) (front speakers) Adjust the balance between the front left and right speakers (You can adjust from centre, 6 steps left or right). • R ___I___ (centre) (rear speakers) Adjust the balance between the rear left and right speakers (You can adjust from centre, 6 steps left or right). 28
-
 1
1 -
2
-
3
-
4
-
5
-
6
-
7
-
8
-
9
-
10
-
11
-
12
-
13
-
14
-
15
-
16
-
17
-
18
-
19
-
20
-
21
-
22
-
 23
23 -
 24
24 -
 25
25 -
 26
26 -
 27
27 -
 28
28 -
 29
29 -
 30
30 -
 31
31 -
 32
32 -
 33
33 -
34
-
35
-
36
-
37
-
38
-
39
-
40
-
41
-
42
-
43
-
44
-
45
-
46
-
47
-
48
-
49
-
50
-
51
-
52
-
53
-
54
-
55
-
56
-
57
-
58
-
59
-
60
-
61
-
62
-
63
-
64
-
65
-
66
-
67
-
68
-
69
-
70
-
71
-
72
-
73
-
74
-
75
-
76
-
77
-
78
-
79
-
80
-
81
-
82
-
83
-
84
 |
 |
