Sony HCD-GSX100W Operating Instructions - Page 33
Listening to audio from a connected component, Optional Components
 |
View all Sony HCD-GSX100W manuals
Add to My Manuals
Save this manual to your list of manuals |
Page 33 highlights
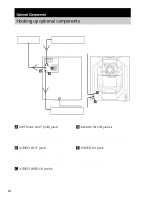
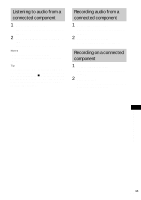
Listening to audio from a connected component 1 Connect the audio cords. See "Hooking up optional components" on page 32. 2 Press VIDEO (MD) to select "VIDEO" or "MD". Start playing the connected component. Notes • The function is factory-set to VIDEO. • You cannot switch the function in Power Saving Mode. Tip If you cannot select "MD" by pressing VIDEO (MD) repeatedly, turn off the system and then press VIDEO (MD) while holding down x on the unit. The function will change from "VIDEO" to "MD", and "MD" will appear in the display. To change back to "VIDEO", repeat the same procedure. Recording audio from a connected component 1 Connect the audio cords. See "Hooking up optional components" on page 32. 2 Start recording manually. See "Recording on a tape" on page 22. Recording on a connected component 1 Connect an optical cable. See "Hooking up optional components" on page 32. 2 Start recording. Refer to the operating instructions provided with connected component. Optional Components 33GB
-
 1
1 -
2
-
3
-
4
-
5
-
6
-
7
-
8
-
9
-
10
-
11
-
12
-
13
-
14
-
15
-
16
-
17
-
18
-
19
-
20
-
21
-
22
-
23
-
24
-
25
-
26
-
27
-
 28
28 -
 29
29 -
 30
30 -
 31
31 -
 32
32 -
 33
33 -
 34
34 -
 35
35 -
 36
36 -
 37
37 -
 38
38 -
39
-
40
-
41
-
42
-
43
-
44
 |
 |