Sony HCD-LF10 Operating Instructions - Page 15
Step 1: Speaker System Hookup, Connecting the subwoofer, Required cords
 |
View all Sony HCD-LF10 manuals
Add to My Manuals
Save this manual to your list of manuals |
Page 15 highlights
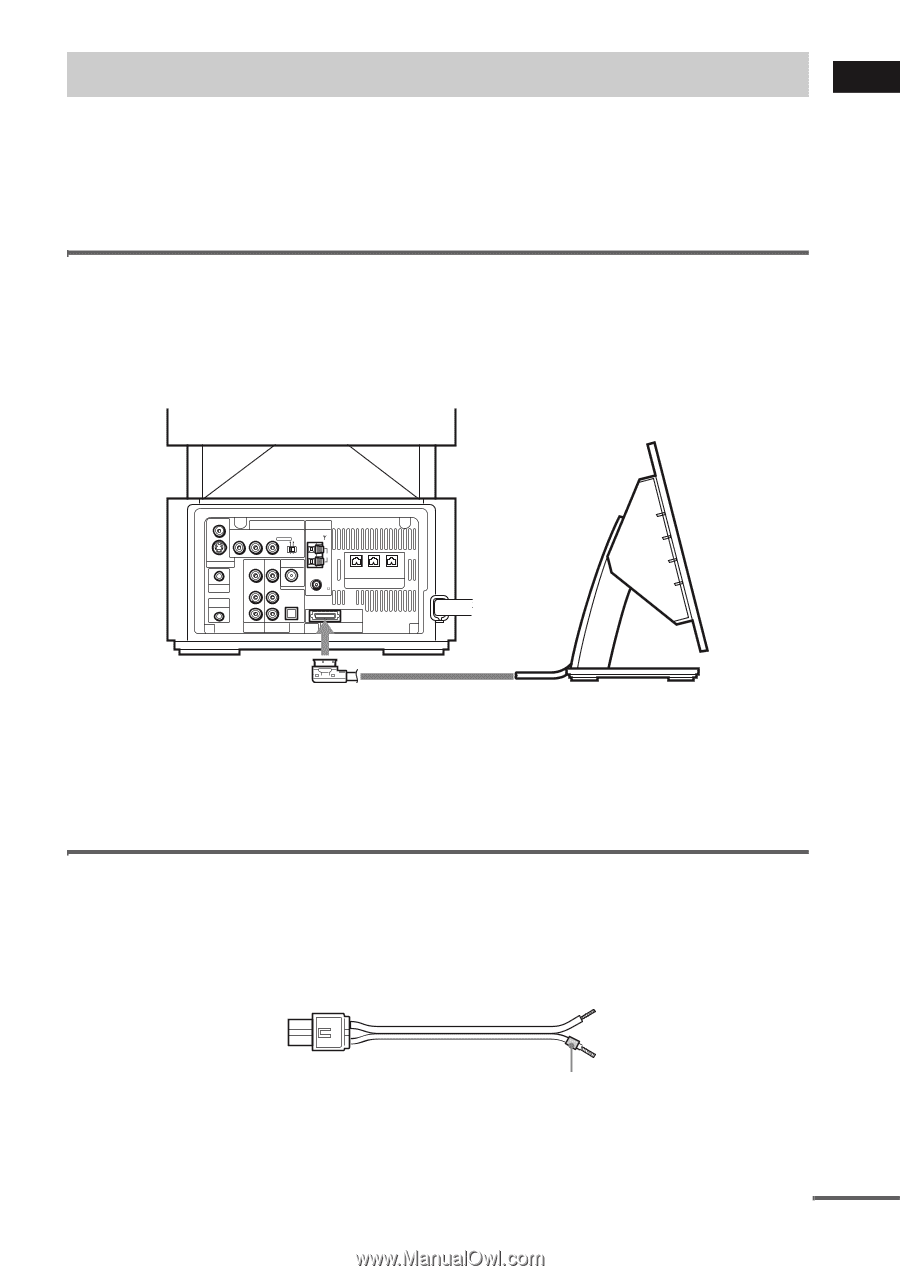
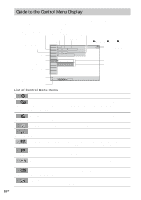
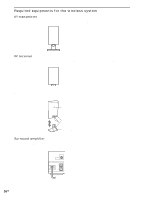
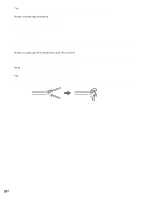
Getting Started Step 1: Speaker System Hookup Connect the supplied speaker system using the supplied speaker cords by matching the colors of the jacks to those of the cords. For the surround speakers connect them to the surround amplifier that receives the sound by wireless. Do not connect any speakers other than those supplied with this system. To obtain the best possible surround sound, specify the speaker parameters (distance, level, etc.) on page 36. Connecting the subwoofer Connect the system connector of the control unit to the SYSTEM CONNECTOR jack of the subwoofer. To insert the plug of the SYSTEM CONNECTOR cord, press and hold both sides of the plug. Subwoofer VIDEO COMPONENT VIDEO OUT ANTENNA Y PB/CB PR/CR SCAN SELECT SELECTABLE INTERLACE S VIDEO (DVD ONLY) MONITOR OUTPUT VIDEO IN VIDEO IN DIR-T1 PHONES DIR-R4 AUDIO IN L AUDIO IN OPTICAL L DIGITAL IN R VIDEO R SAT AM FM 75 COAXIAL FRONT R CENTER FRONT L (FOR SS-TSL10 , SS-CTL10) SPEAKER SYSTEM CONNECTOR FOR HCD-LF10 SYSTEM CONNECTOR cord Control unit Notes • Do not handle the clear plastic panel when you move or operate the control unit as it may break. • Before connecting/disconnecting the SYSTEM CONNECTOR cord, make sure the AC power cord (mains lead) is disconnected from the wall outlet (mains). Required cords Speaker cords The connector and the color tube of the speaker cords are the same color as the label of the jacks to be connected. (-) (-) (+) (+) color tube continued 15GB
-
 1
1 -
2
-
3
-
4
-
5
-
6
-
7
-
8
-
9
-
 10
10 -
 11
11 -
 12
12 -
 13
13 -
 14
14 -
 15
15 -
 16
16 -
 17
17 -
 18
18 -
 19
19 -
 20
20 -
21
-
22
-
23
-
24
-
25
-
26
-
27
-
28
-
29
-
30
-
31
-
32
-
33
-
34
-
35
-
36
-
37
-
38
-
39
-
40
-
41
-
42
-
43
-
44
-
45
-
46
-
47
-
48
-
49
-
50
-
51
-
52
-
53
-
54
-
55
-
56
-
57
-
58
-
59
-
60
-
61
-
62
-
63
-
64
-
65
-
66
-
67
-
68
-
69
-
70
-
71
-
72
-
73
-
74
-
75
-
76
-
77
-
78
-
79
-
80
-
81
-
82
-
83
-
84
-
85
-
86
-
87
-
88
-
89
-
90
-
91
-
92
-
93
-
94
-
95
-
96
-
97
-
98
-
99
-
100
-
101
-
102
-
103
-
104
-
105
-
106
-
107
-
108
-
109
-
110
-
111
-
112
-
113
-
114
-
115
-
116
-
117
-
118
-
119
-
120
 |
 |