Sony HMD-A100 Operating Instructions - Page 6
Setup
 |
View all Sony HMD-A100 manuals
Add to My Manuals
Save this manual to your list of manuals |
Page 6 highlights
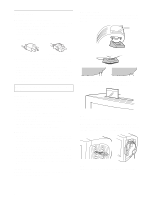
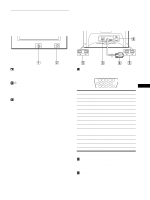
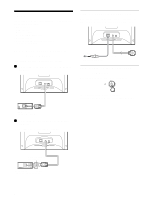
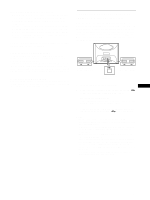
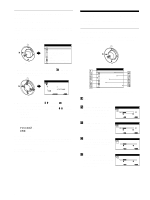
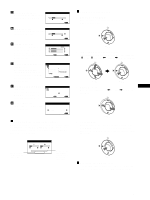
Setup Before using your monitor, check that the following accessories are included in your carton: • Power cord (1) • USB cable (1) • Monitor stand (1) • Hook (1) (HMD-A100 only) • Warranty card (1) • Notes on cleaning the screen's surface (1) • This instruction manual (1) Step 1: Connect your monitor to your computer Turn off the monitor and computer before connecting. x Connecting to an IBM PC/AT or compatible computer AC IN Step 2: Connect the power cord With the monitor and computer switched off, first connect the power cord to the monitor, then connect it to a power outlet. AC IN to a power outlet power cord (supplied) to AC IN Step 3: Turn on the monitor and computer First turn on the monitor, then turn on the computer. to video output IBM PC/AT or compatible computer x Connecting to a Macintosh or compatible computer You will need a Macintosh adapter (not supplied). AC IN The installation of your monitor is complete. If necessary, use the monitor's controls to adjust the picture. Macintosh adapter (not supplied) Macintosh or to video compatible computer output 6
-
 1
1 -
 2
2 -
 3
3 -
 4
4 -
 5
5 -
 6
6 -
 7
7 -
 8
8 -
 9
9 -
 10
10 -
 11
11 -
 12
12 -
13
-
14
-
15
-
16
-
17
-
18
-
19
-
20
-
21
-
22
-
23
-
24
-
25
-
26
-
27
-
28
-
29
-
30
-
31
-
32
-
33
-
34
-
35
-
36
-
37
-
38
-
39
-
40
-
41
-
42
-
43
-
44
-
45
-
46
-
47
-
48
 |
 |
