Sony ICD-SX712 Operating Instructions (Large File - 11.69 MB) - Page 116
Installing Sound Organizer, If the [Welcome to Sound Organizer
 |
UPC - 027242807723
View all Sony ICD-SX712 manuals
Add to My Manuals
Save this manual to your list of manuals |
Page 116 highlights
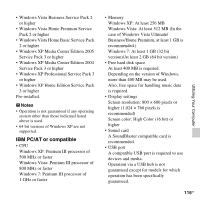
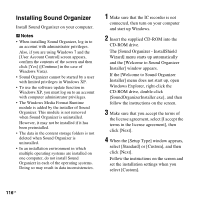
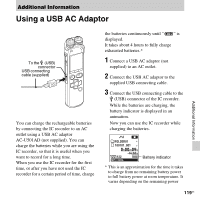
Installing Sound Organizer Install Sound Organizer on your computer. P Notes • When installing Sound Organizer, log in to an account with administrator privileges. Also, if you are using Windows 7 and the [User Account Control] screen appears, confirm the contents of the screen and then click [Yes] ([Continue] in the case of Windows Vista). • Sound Organizer cannot be started by a user with limited privileges in Windows XP. • To use the software update function in Windows XP, you must log on to an account with computer administrator privileges. • The Windows Media Format Runtime module is added by the installer of Sound Organizer. This module is not removed when Sound Organizer is uninstalled. However, it may not be installed if it has been preinstalled. • The data in the content storage folders is not deleted when Sound Organizer is uninstalled. • In an installation environment in which multiple operating systems are installed on one computer, do not install Sound Organizer in each of the operating systems. Doing so may result in data inconsistencies. 1 Make sure that the IC recorder is not connected, then turn on your computer and start up Windows. 2 Insert the supplied CD-ROM into the CD-ROM drive. The [Sound Organizer - InstallShield Wizard] menu starts up automatically and the [Welcome to Sound Organizer Installer] window appears. If the [Welcome to Sound Organizer Installer] menu does not start up, open Windows Explorer, right-click the CD-ROM drive, double-click [SoundOrganizerInstaller.exe], and then follow the instructions on the screen. 3 Make sure that you accept the terms of the license agreement, select [I accept the terms in the license agreement], then click [Next]. 4 When the [Setup Type] window appears, select [Standard] or [Custom], and then click [Next]. Follow the instructions on the screen and set the installation settings when you select [Custom]. 116GB
-
 1
1 -
2
-
3
-
4
-
5
-
6
-
7
-
8
-
9
-
10
-
11
-
12
-
13
-
14
-
15
-
16
-
17
-
18
-
19
-
20
-
21
-
22
-
23
-
24
-
25
-
26
-
27
-
28
-
29
-
30
-
31
-
32
-
33
-
34
-
35
-
36
-
37
-
38
-
39
-
40
-
41
-
42
-
43
-
44
-
45
-
46
-
47
-
48
-
49
-
50
-
51
-
52
-
53
-
54
-
55
-
56
-
57
-
58
-
59
-
60
-
61
-
62
-
63
-
64
-
65
-
66
-
67
-
68
-
69
-
70
-
71
-
72
-
73
-
74
-
75
-
76
-
77
-
78
-
79
-
80
-
81
-
82
-
83
-
84
-
85
-
86
-
87
-
88
-
89
-
90
-
91
-
92
-
93
-
94
-
95
-
96
-
97
-
98
-
99
-
100
-
101
-
102
-
103
-
104
-
105
-
106
-
107
-
108
-
109
-
110
-
 111
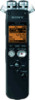
111 -
 112
112 -
 113
113 -
 114
114 -
 115
115 -
 116
116 -
 117
117 -
 118
118 -
 119
119 -
 120
120 -
 121
121 -
122
-
123
-
124
-
125
-
126
-
127
-
128
-
129
-
130
-
131
-
132
-
133
-
134
-
135
-
136
-
137
-
138
-
139
-
140
-
141
-
142
-
143
-
144
-
145
-
146
-
147
-
148
-
149
-
150
-
151
-
152
-
153
-
154
-
155
 |
 |