Sony ICD-SX712 Operating Instructions (Large File - 11.69 MB) - Page 17
When you select Manual, proceed to, the next steps. - ic recorder
 |
UPC - 027242807723
View all Sony ICD-SX712 manuals
Add to My Manuals
Save this manual to your list of manuals |
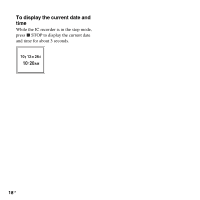
Page 17 highlights
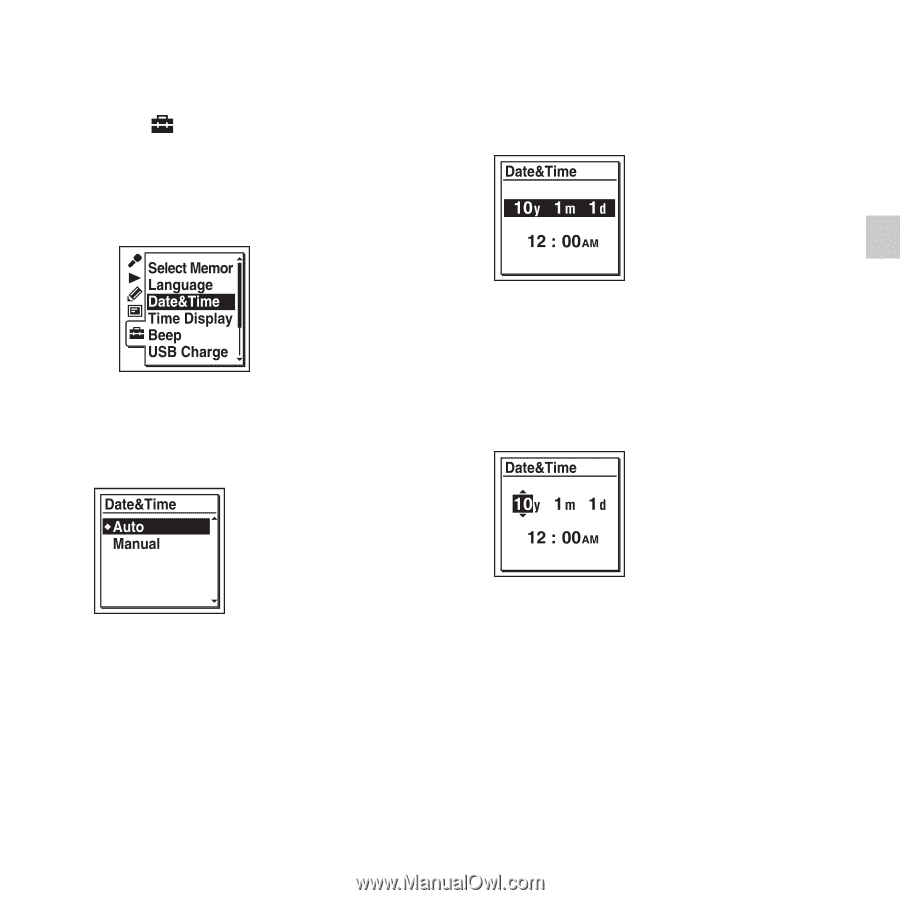
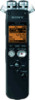
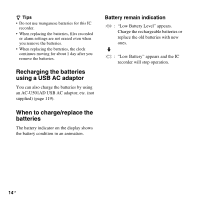
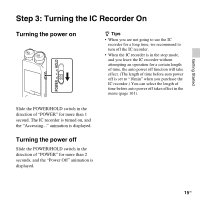
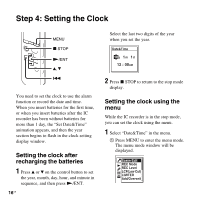
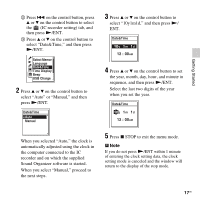
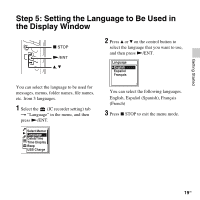
Getting Started 2 Press . on the control button, press v or V on the control button to select the (IC recorder setting) tab, and then press N/ENT. 3 Press v or V on the control button to select "Date&Time," and then press N/ENT. 3 Press v or V on the control button to select "10y1m1d," and then press N/ ENT. 2 Press v or V on the control button to select "Auto" or "Manual," and then press N/ENT. 4 Press v or V on the control button to set the year, month, day, hour, and minute in sequence, and then press N/ENT. Select the last two digits of the year when you set the year. When you selected "Auto," the clock is automatically adjusted using the clock in the computer connected to the IC recorder and on which the supplied Sound Organizer software is started. When you select "Manual," proceed to the next steps. 5 Press x STOP to exit the menu mode. P Note If you do not press N/ENT within 1 minute of entering the clock setting data, the clock setting mode is canceled and the window will return to the display of the stop mode. 17GB
-
 1
1 -
2
-
3
-
4
-
5
-
6
-
7
-
8
-
9
-
10
-
11
-
 12
12 -
 13
13 -
 14
14 -
 15
15 -
 16
16 -
 17
17 -
 18
18 -
 19
19 -
 20
20 -
 21
21 -
 22
22 -
23
-
24
-
25
-
26
-
27
-
28
-
29
-
30
-
31
-
32
-
33
-
34
-
35
-
36
-
37
-
38
-
39
-
40
-
41
-
42
-
43
-
44
-
45
-
46
-
47
-
48
-
49
-
50
-
51
-
52
-
53
-
54
-
55
-
56
-
57
-
58
-
59
-
60
-
61
-
62
-
63
-
64
-
65
-
66
-
67
-
68
-
69
-
70
-
71
-
72
-
73
-
74
-
75
-
76
-
77
-
78
-
79
-
80
-
81
-
82
-
83
-
84
-
85
-
86
-
87
-
88
-
89
-
90
-
91
-
92
-
93
-
94
-
95
-
96
-
97
-
98
-
99
-
100
-
101
-
102
-
103
-
104
-
105
-
106
-
107
-
108
-
109
-
110
-
111
-
112
-
113
-
114
-
115
-
116
-
117
-
118
-
119
-
120
-
121
-
122
-
123
-
124
-
125
-
126
-
127
-
128
-
129
-
130
-
131
-
132
-
133
-
134
-
135
-
136
-
137
-
138
-
139
-
140
-
141
-
142
-
143
-
144
-
145
-
146
-
147
-
148
-
149
-
150
-
151
-
152
-
153
-
154
-
155
 |
 |