Sony KP-61HS10 Operating Instructions - Page 26
Basic Set Up, Using the Remote Control, selected item. There are some exceptions to - help
 |
View all Sony KP-61HS10 manuals
Add to My Manuals
Save this manual to your list of manuals |
Page 26 highlights
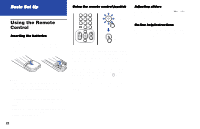
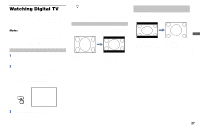
Basic Set Up Using the Remote Control Inserting the batteries Insert two size AA (R6) batteries (supplied) by matching the + and - on the batteries to the diagram inside the remote control's battery compartment. Notes: • Remove the batteries to avoid damage from possible battery leakage whenever you anticipate that the remote control will not be used for an extended period. • Handle the remote control with care. Avoid dropping it, getting it wet, or placing it in direct sunlight, near a heater or where the humidity is high. • Your remote control can be programmed to operate most video equipment. (see "Operating Video Equipment" on page 53) Using the remote control joystick 123 456 789 0 Move m Select The supplied remote control has a joystick which moves the on-screen selector in eight directions. In most cases, moving the joystick up, down, left or right will cause the selector to move in the selected direction. In some cases, the selector may move in eight directions according to the function. Pressing down on the center of the joystick ( ) will activate the selected item. You may also move the joystick right to activate a selected item. (There are some exceptions to this option.) Adjusting sliders When menu items present a slider ( or ), move the joystick up, down, left or right to adjust the setting. On-line help/instructions Several menu windows will provide prompts and instructions to assist you in navigating through the different functions. 22
-
 1
1 -
2
-
3
-
4
-
5
-
6
-
7
-
8
-
9
-
10
-
11
-
12
-
13
-
14
-
15
-
16
-
17
-
18
-
19
-
20
-
 21
21 -
 22
22 -
 23
23 -
 24
24 -
 25
25 -
 26
26 -
 27
27 -
 28
28 -
 29
29 -
 30
30 -
 31
31 -
32
-
33
-
34
-
35
-
36
-
37
-
38
-
39
-
40
-
41
-
42
-
43
-
44
-
45
-
46
-
47
-
48
-
49
-
50
-
51
-
52
-
53
-
54
-
55
-
56
-
57
-
58
-
59
-
60
-
61
-
62
-
63
-
64
-
65
-
66
 |
 |
