Sony LBT-GTZ4i Operating Instructions - Page 15
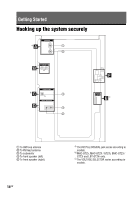
Getting Started, Attaching the speaker pads
 |
UPC - 027242752221
View all Sony LBT-GTZ4i manuals
Add to My Manuals
Save this manual to your list of manuals |
Page 15 highlights
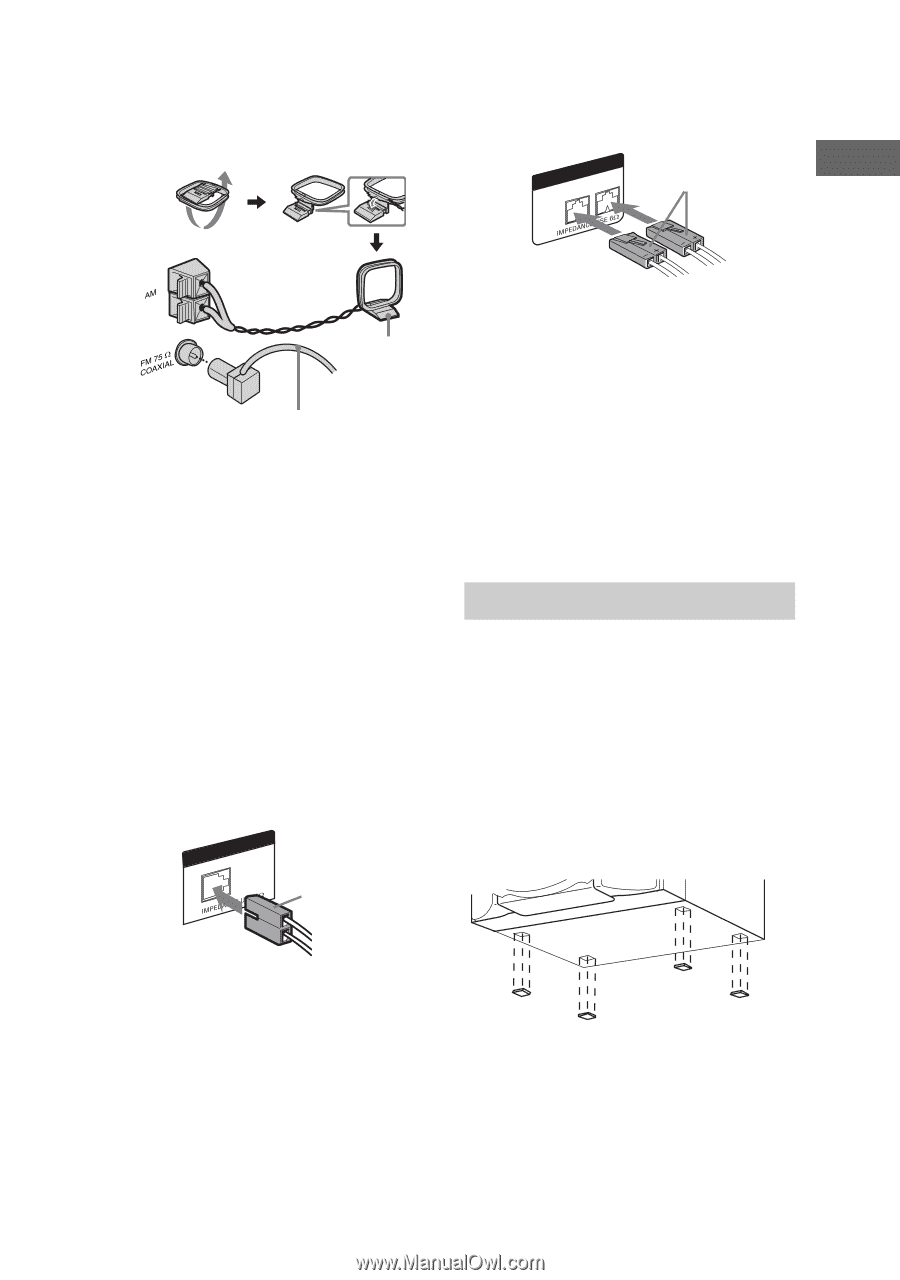
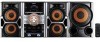
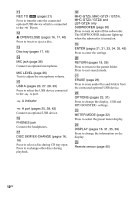
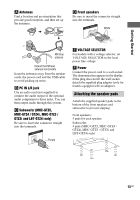
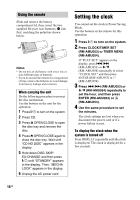
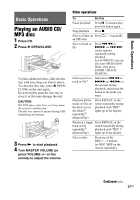
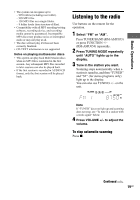
Getting Started A Antennas Find a location and an orientation that provide good reception, and then set up the antennas. D Front speakers Be sure to insert the connector straight into the terminals. FRONT SPEAKER L R White AM loop antenna Extend the FM lead antenna horizontally Keep the antennas away from the speaker cords, the power cord and the USB cable to avoid picking up noise. B PC IN L/R jack Use an audio cord (not supplied) to connect the audio output of the optional audio component to these jacks. You can then output audio through this system. C Subwoofer (MHC-GTZ5, MHC-GTZ4 / GTZ4i, MHC-GTZ3 / GTZ3i and LBT-GTZ4i only) Be sure to insert the connector straight into the terminals. SUBWOOFER Purple E VOLTAGE SELECTOR For models with a voltage selector, set VOLTAGE SELECTOR to the local power line voltage. F Power Connect the power cord to a wall socket. The demonstration appears in the display. If the plug does not fit the wall socket, detach the supplied plug adaptor (only for models equipped with an adaptor). Attaching the speaker pads Attach the supplied speaker pads to the bottom of the front speakers and subwoofer to prevent slipping. Front speakers: 4 pads for each speaker Subwoofer: 4 pads (MHC-GTZ5, MHC-GTZ4 / GTZ4i, MHC-GTZ3 / GTZ3i and LBT-GTZ4i only) 15GB
-
 1
1 -
2
-
3
-
4
-
5
-
6
-
7
-
8
-
9
-
 10
10 -
 11
11 -
 12
12 -
 13
13 -
 14
14 -
 15
15 -
 16
16 -
 17
17 -
 18
18 -
 19
19 -
 20
20 -
21
-
22
-
23
-
24
-
25
-
26
-
27
-
28
-
29
-
30
-
31
-
32
-
33
-
34
-
35
-
36
-
37
-
38
-
39
-
40
-
41
-
42
-
43
-
44
-
45
-
46
-
47
-
48
-
49
-
50
-
51
-
52
-
53
-
54
-
55
-
56
 |
 |