Sony MHC-NX3AV Operating Instructions (primary manual) - Page 15
Press TUNER BAND repeatedly, Basic Operations, To listen to non-preset radio, stations
 |
View all Sony MHC-NX3AV manuals
Add to My Manuals
Save this manual to your list of manuals |
Page 15 highlights
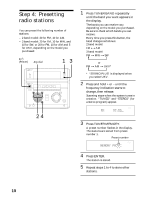
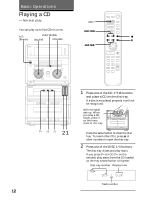
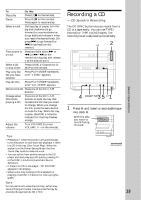
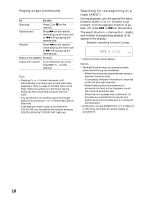
1 Press TUNER BAND repeatedly until the band you want appears in the display. The bands you can receive vary depending on the model you purchased. Be sure to check which bands you can receive. Every time you press the button, the band changes as follows: 2 band model: FM ˜ AM 3 band model: FM n MW n SW n or FM n AM n UKV* n * "STEREO PLUS" is displayed when you select UKV. 2 Turn the jog dial (or press = or + on the remote) to tune in the desired preset station. Turn counterclockwise (or press = ≠ on the remote) for lower preset numbers. Preset number Turn clockwise (or press + + on the remote) for higher preset numbers. Frequency MHz TUNED STEREO To Turn off the radio Adjust the volume Do this Press 1/u (power). Turn VOLUME (or press VOLUME +/- on the remote). To listen to non-preset radio stations Use manual or automatic tuning. For manual tuning, press - or + repeatedly. For automatic tuning, press and hold - or +. Tips • Pressing TUNER BAND when the power is off automatically turns the power on and tunes to the last received station (One Touch Play). When the system is in the Power Saving Mode, the One Touch Play function does not work. • You can switch from another source to the radio just by pressing TUNER BAND (Automatic Source Selection). • When an FM programme is noisy, press STEREO/ MONO so that "MONO" appears in the display. There will be no stereo effect, but the reception will improve. Press the button again to restore the stereo effect. • To improve broadcast reception, reorient the supplied antennas. When only one station is preset, "ONE PRESET" appears in the display. Basic Operations 15
-
 1
1 -
2
-
3
-
4
-
5
-
6
-
7
-
8
-
9
-
 10
10 -
 11
11 -
 12
12 -
 13
13 -
 14
14 -
 15
15 -
 16
16 -
 17
17 -
 18
18 -
 19
19 -
 20
20 -
21
-
22
-
23
-
24
-
25
-
26
-
27
-
28
-
29
-
30
-
31
-
32
-
33
-
34
-
35
-
36
-
37
-
38
-
39
-
40
-
41
-
42
-
43
-
44
-
45
-
46
-
47
-
48
-
49
-
50
-
51
-
52
 |
 |