Sony MVC-CD200 Operating Instructions - Page 21
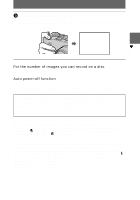
For the number of images you can record on a disc, Auto power-off function - cd rw
 |
UPC - 027242589247
View all Sony MVC-CD200 manuals
Add to My Manuals
Save this manual to your list of manuals |
Page 21 highlights
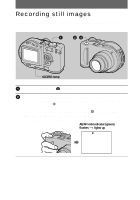
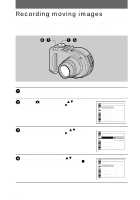
B Recording 3 Press the shutter button fully down. The shutter clicks. "RECORDING" appears on the LCD screen, and the image will be recorded on the disc. When "RECORDING" disappears from the LCD screen, you can start the next recording. RECORDING For the number of images you can record on a disc See page 54. Auto power-off function If you do not operate the camera for about three minutes, the camera turns off automatically to prevent wearing down the battery pack. To use the camera again, push the POWER switch in the arrow direction to turn on the camera again. While the image is being recorded on a disc, the ACCESS lamp lights. When this lamp is lit, do not shake or strike the camera. Also, do not turn the power off, not remove the battery pack/disc, or not open the disc cover. Otherwise, an image data breakdown may occur or the disc may become unusable. Notes • When using a CD-R, even if you delete images, the disc remaining space does not increase. • Only when using a CD-RW, the disc remaining space increases after deleting the last-recorded image if the is indicated on the LCD screen before deleting. If you modify an image, or open and close the disc cover, will disappear. • When recording bright subjects, the color of the LCD screen may change after the AE is locked. However, this will not affect the recorded image. • After you change the disc, "REPAIRING DATA" appears on the LCD screen and it may take about 10 minutes to get ready for recording depending on the disc condition. • When you press the shutter button fully down at once, the camera starts recording after the automatic adjustment is complete. However, the recording cannot be carried out while the / CHG lamp (page 8) is flashing. (During this time, the camera is charging the flash.) • When the AE/AF lock indicator flashes slowly, the subject may be hard to focus on because it is too dark or no contrast, or it may be too close to the camera. Release the shutter button, and focus on it again. 21
-
 1
1 -
2
-
3
-
4
-
5
-
6
-
7
-
8
-
9
-
10
-
11
-
12
-
13
-
14
-
15
-
 16
16 -
 17
17 -
 18
18 -
 19
19 -
 20
20 -
 21
21 -
 22
22 -
 23
23 -
 24
24 -
 25
25 -
 26
26 -
27
-
28
-
29
-
30
-
31
-
32
-
33
-
34
-
35
-
36
-
37
-
38
-
39
-
40
-
41
-
42
-
43
-
44
-
45
-
46
-
47
-
48
-
49
-
50
-
51
-
52
-
53
-
54
-
55
-
56
-
57
-
58
-
59
-
60
-
61
-
62
-
63
-
64
-
65
-
66
-
67
-
68
-
69
-
70
-
71
-
72
-
73
-
74
-
75
-
76
-
77
-
78
-
79
-
80
-
81
-
82
-
83
-
84
-
85
-
86
-
87
-
88
-
89
-
90
-
91
-
92
-
93
-
94
-
95
-
96
-
97
-
98
-
99
-
100
-
101
-
102
-
103
-
104
-
105
-
106
-
107
-
108
 |
 |
