Sony MVC-CD200 Operating Instructions - Page 22
To turn off the LCD backlight, If you cannot get a sharp focus on a close subject - review
 |
UPC - 027242589247
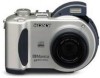
View all Sony MVC-CD200 manuals
Add to My Manuals
Save this manual to your list of manuals |
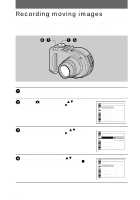
Page 22 highlights
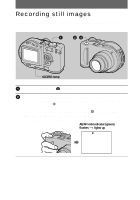
Checking the last recorded image (Quick Review) You can check the last recorded image by clearing the menu from the screen (page 46) and pressing b (7) on the control button. To return to the normal recording mode: press the shutter button lightly, or press b (7) again. To delete the image: 1. Press MENU. 2. Select [DELETE] with B, then press the center z. 3. Select [OK] with v, then press the center z. Adjusting the brightness of the LCD screen Adjust the brightness with the [LCD BRIGHTNESS] item in the setup settings (page 85). This adjustment does not affect the brightness of the images recorded on the disc. To turn off the LCD backlight Press DISPLAY/LCD BACK LIGHT ON/OFF repeatedly to turn off the LCD backlight (page 23). The battery life will be longer. Using the zoom feature The lens part moves in/out while zooming. Be careful not to touch the lens. Zoom buttons W: for wide-angle (subject appears farther away) T: for telephoto (subject appears closer) If you cannot get a sharp focus on a close subject Press the zoom W button repeatedly and move closer to the subject until the focus is sharp (page 66). Minimum focal distance to the subject W side: Approx. 50 cm (19 3/4 inches) (MVC-CD200) Approx. 50 cm (19 3/4 inches) (MVC-CD300) T side: Approx. 60 cm (23 5/8 inches) (MVC-CD200) Approx. 50 cm (19 3/4 inches) (MVC-CD300) To record even closer subjects, see page 66. 22
-
 1
1 -
2
-
3
-
4
-
5
-
6
-
7
-
8
-
9
-
10
-
11
-
12
-
13
-
14
-
15
-
16
-
 17
17 -
 18
18 -
 19
19 -
 20
20 -
 21
21 -
 22
22 -
 23
23 -
 24
24 -
 25
25 -
 26
26 -
 27
27 -
28
-
29
-
30
-
31
-
32
-
33
-
34
-
35
-
36
-
37
-
38
-
39
-
40
-
41
-
42
-
43
-
44
-
45
-
46
-
47
-
48
-
49
-
50
-
51
-
52
-
53
-
54
-
55
-
56
-
57
-
58
-
59
-
60
-
61
-
62
-
63
-
64
-
65
-
66
-
67
-
68
-
69
-
70
-
71
-
72
-
73
-
74
-
75
-
76
-
77
-
78
-
79
-
80
-
81
-
82
-
83
-
84
-
85
-
86
-
87
-
88
-
89
-
90
-
91
-
92
-
93
-
94
-
95
-
96
-
97
-
98
-
99
-
100
-
101
-
102
-
103
-
104
-
105
-
106
-
107
-
108
 |
 |
