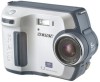
Sony MVCFD100 Operating Instructions - Page 29
Step 1, Playback, General procedure for viewing images - driver
 |
UPC - 027242602311
View all Sony MVCFD100 manuals
Add to My Manuals
Save this manual to your list of manuals |
Page 29 highlights
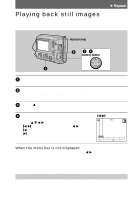
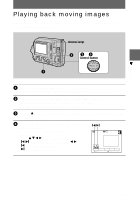
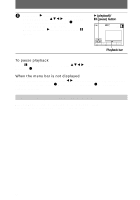
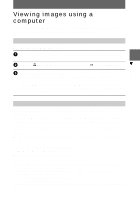
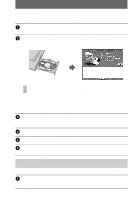
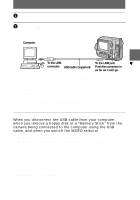
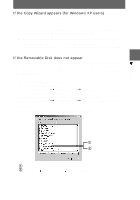
B Playback General procedure for viewing images Step 1 Installing the USB driver to the computer (page 29) Perform this step only when you view images on your computer for the first time. Step 2 Connecting your camera to your computer using the USB cable (page 30) Step 3 Viewing images on Windows (page 32) For Windows XP users You do not have to install a USB driver. Windows XP recognizes the camera as a drive as soon as it is connected it to the computer using the USB cable. Begin the procedure from Step 2. The operation below is explained using Windows Me. The window screen and operation method may be different depending on the type of OS. Step 1 Installing the USB driver to the computer Before connecting your camera to your computer, install the USB driver to the computer. The USB driver is included with the application software in the CD-ROM which is supplied with your camera. For Windows 98, Windows 98SE, Windows 2000, and Windows Me users Do not connect your camera to your computer yet. Be sure to complete installation of the USB driver before connecting your camera to the computer. If you connect the USB cable first, you will be unable to install the USB driver properly. See "If the Removable Disk does not appear" (page 33) for corrective measures if the USB cable was connected before installing the driver and the driver software could not be installed correctly. 29
-
 1
1 -
2
-
3
-
4
-
5
-
6
-
7
-
8
-
9
-
10
-
11
-
12
-
13
-
14
-
15
-
16
-
17
-
18
-
19
-
20
-
21
-
22
-
23
-
 24
24 -
 25
25 -
 26
26 -
 27
27 -
 28
28 -
 29
29 -
 30
30 -
 31
31 -
 32
32 -
 33
33 -
 34
34 -
35
-
36
-
37
-
38
-
39
-
40
-
41
-
42
-
43
-
44
-
45
-
46
-
47
-
48
-
49
-
50
-
51
-
52
-
53
-
54
-
55
-
56
-
57
-
58
-
59
-
60
-
61
-
62
-
63
-
64
-
65
-
66
-
67
-
68
-
69
-
70
-
71
-
72
-
73
-
74
-
75
-
76
-
77
-
78
-
79
-
80
-
81
-
82
-
83
-
84
-
85
-
86
-
87
-
88
-
89
-
90
-
91
-
92
-
93
-
94
-
95
-
96
-
97
-
98
-
99
-
100
 |
 |