Sony RCD-W10 Operating Instructions - Page 26
Labeling Tracks/Discs
 |
View all Sony RCD-W10 manuals
Add to My Manuals
Save this manual to your list of manuals |
Page 26 highlights
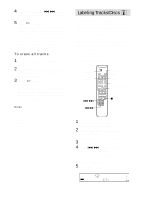
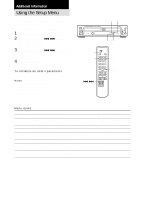
4 Turn AMS (or press ./> on the remote) to select the first of the tracks you want to erase. 5 Press H (or YES). Erasing of the last track starts. During erasing, "Tr Erase" appears in the display and the remaining time for erasing the last track (may not be accurate) appears. When this process is finished, the total track number and the total playing time appears in the display. To erase all tracks 1 Place an unfinalized CD-RW disc in DECK B. 2 Press ERASE repeatedly until "Disc Erase?" appears in the display while the unit is stopped. 3 Press H (or YES). Erasing starts. During erasing, "Disc Erase" appears in the display and the remaining time of erasing (may not be accurate) appears. When the entire disc is erased, "Blank Disc" appears. Notes • Once the erasing process has started, you cannot stop in the middle of the process. • You can erase only from the last track. • Do not turn off the unit or disconnect the unit from the power source in the middle of the erasing process. Labeling Tracks/Discs Z You can create titles for tracks/discs for a recorded CD-R or CD-RW with capital and small letters, numbers, and symbols. You can enter a disc name of up to 70 characters, and a track name of up to 70 characters per track, for 40 tracks per disc. Label the track/disc before finalizing it. You cannot label the track/disc on a finalized disc. After labeling, you must finalize the disc before you remove the disc or turn off the unit. Otherwise, the titles will be cleared. When using the remote, set SELECT to CDR. SELECT MENU/NO ./> m/M NAME EDIT/ SELECT YES Letter/number/ symbol buttons CLEAR x 1 Place a CD-R or CD-RW disc that has not been finalized in DECK B. 2 Press NAME EDIT/SELECT while the unit is stopped. "Name In?" appears in the display. 3 Press YES. 4 Press ./> to select the disc or track you want to label. When you label the disc name, select "Disc," and when you label the track name, select the track number. 5 Press YES. A flashing cursor appears. TOC DECK B CD TEXT CD - RW 26
-
 1
1 -
2
-
3
-
4
-
5
-
6
-
7
-
8
-
9
-
10
-
11
-
12
-
13
-
14
-
15
-
16
-
17
-
18
-
19
-
20
-
 21
21 -
 22
22 -
 23
23 -
 24
24 -
 25
25 -
 26
26 -
 27
27 -
 28
28 -
 29
29 -
 30
30 -
 31
31 -
32
 |
 |
