Sony RCP-1500 Operation Guide - Page 31
Setting BRIDGE Mode, LEGACY], Network], Bridge], Edit], Active], Passive], Semi-auto]
 |
View all Sony RCP-1500 manuals
Add to My Manuals
Save this manual to your list of manuals |
Page 31 highlights
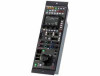
5 Press [CNS]. The CNS screen appears. CNS Engineer Mode Exit Legacy Set Mode:Semi-Auto Bridge Target: Edit Cancel 192.168.0.1 Mode:Master MCS Master: Edit 192.168.0.1 RCP No. 96 5 Press [CNS]. The CNS screen appears. CNS Engineer Mode Exit Legacy Set Mode:Semi-Auto Bridge Target: Edit Cancel 192.168.0.1 Mode:Master MCS Master: Edit 192.168.0.1 RCP No. 96 6 Press [LEGACY]. 7 Press [Set]. The control panel is set to LEGACY mode. Setting BRIDGE Mode Set the control panel to BRIDGE mode when connecting the control panel and a camera device on a LAN on a one-to-one basis. The TCP/IP needs to be set in BRIDGE mode. The IP address of the connection target camera device also needs to be set in the RCP or MSU. The RCP number does not need to be set. Multi-camera operation is not possible in BRIDGE mode. 1 Enter engineer mode. (page 51) 2 Press the MENU button. The menu closes and the control panel remains in engineer mode. 3 Display the RCP Config screen. (page 50) RCP Config Engineer Mode Exit Customize Date /Time Display /Sound Network Mode Information VR Setting Security Option Key 4 Press [Network]. The Network screen appears. Network Engineer Mode Backup Exit Network Info CNS LAN I/F TCP/IP 6 Press [Bridge]. 7 Press [Set]. The control panel is set to BRIDGE mode. 8 Set the connection mode. 1 Press [Edit]. The Bridge Mode Set screen appears. Bridge Mode Set Engineer Mode Exit Connection Mode 7 8 9 Active Passive Semiauto 4 5 6 Target 1 2 3 192 168 0 1 Set Cancel BS 0 Enter 2 Press a button to set the sub mode of BRIDGE mode. Set the sub mode in accordance with the connection state. [Active] : Performs the process to connect to the target by itself. [Passive] : Waits for a connection from the target. [Semi-auto] : Switches between Active and Passive depending on the connection environment. Active is enabled when the RCP stands alone, and Passive is enabled when the RCP is connected to a CCU or camera via a CCA-5 cable. 9 Set the IP address of the connection target camera device. 1 Set the target IP address. Press the IP address input field, and then use the numeric keypad on the screen to enter the IP address. 2 Press [Set]. 10Press [Exit]. The CNS screen reappears. 11Press [Exit]. The Network screen reappears. 12Set the TCP/IP. 31
-
 1
1 -
2
-
3
-
4
-
5
-
6
-
7
-
8
-
9
-
10
-
11
-
12
-
13
-
14
-
15
-
16
-
17
-
18
-
19
-
20
-
21
-
22
-
23
-
24
-
25
-
 26
26 -
 27
27 -
 28
28 -
 29
29 -
 30
30 -
 31
31 -
 32
32 -
 33
33 -
 34
34 -
 35
35 -
 36
36 -
37
-
38
-
39
-
40
-
41
-
42
-
43
-
44
-
45
-
46
-
47
-
48
-
49
-
50
-
51
-
52
-
53
-
54
-
55
-
56
-
57
-
58
-
59
-
60
-
61
-
62
-
63
-
64
-
65
-
66
-
67
-
68
-
69
-
70
-
71
-
72
-
73
-
74
-
75
-
76
-
77
-
78
-
79
-
80
-
81
-
82
-
83
-
84
-
85
-
86
-
87
-
88
 |
 |
