Sony RCP-1500 Operation Guide - Page 38
To perform RPN correction, Mode], Screen°Saver], Preview], Exit], Maintenance] - maintenance manual
 |
View all Sony RCP-1500 manuals
Add to My Manuals
Save this manual to your list of manuals |
Page 38 highlights
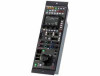
4 Press [Mode]. The Mode screen appears. RCP Mode Engineer Mode Exit Screen Saver Panel Active PIX/WF Preview Matrix Gate Extend Call 1 Enter engineer mode. (page 51) Security Engineer Mode Exit Page Item Code Permission Permission Change ALL Preset Engeneer Mode 5 Press [Screen Saver]. The Screen Saver screen appears. Screen Saver Screen Saver ON Wait Time 3 min Type Vertical Drawing Exit Preview 6 Press [ON] to light the button and turn ON the screen saver. 7 Set the screen saver. The following settings can be configured. You can press b or B to change both of the settings. Wait Time: Sets the time until the screen saver is activated in minutes. Type: Selects the type of screen saver. Press [Preview] to display a preview of the selected screen saver. Press any place on the LCD to cancel the preview display. To perform RPN correction The CCD image sensor is manufactured with high precision technology. However, cosmic rays and other noise may affect the pixels of the CCD image sensor, resulting in small white dots appearing on the display. This is a physical characteristic of CCD image sensors and is not a malfunction. Performing auto black balance adjustment activates the correction function, and may reduce the effects of this phenomenon. You can also perform correction manually to reduce the white dots. 2 Press [Exit] to return to the Category Select screen. Category Select Engineer Mode Exit Scene Config Function File Multi Maintenance Paint 3 Press [Maintenance]. The Maintenance screen appears. Maintenance Engineer Mode Exit Camera RPN Lens CCU SD Adjusting 4 Press [RPN]. The RPN Correction screen appears. RPN Correction Engineer Mode Exit R G B Enter Cursor Indication H Cursor V Cursor H/V Cursor H Cursor V Cursor 500 157ev A cross-shaped cursor appears on the PIX monitor. Perform the following steps while viewing the PIX monitor. 5 Press the button that corresponds to the channel you want to correct ([R], [G], or [B]) to light it. 38
-
 1
1 -
2
-
3
-
4
-
5
-
6
-
7
-
8
-
9
-
10
-
11
-
12
-
13
-
14
-
15
-
16
-
17
-
18
-
19
-
20
-
21
-
22
-
23
-
24
-
25
-
26
-
27
-
28
-
29
-
30
-
31
-
32
-
 33
33 -
 34
34 -
 35
35 -
 36
36 -
 37
37 -
 38
38 -
 39
39 -
 40
40 -
 41
41 -
 42
42 -
 43
43 -
44
-
45
-
46
-
47
-
48
-
49
-
50
-
51
-
52
-
53
-
54
-
55
-
56
-
57
-
58
-
59
-
60
-
61
-
62
-
63
-
64
-
65
-
66
-
67
-
68
-
69
-
70
-
71
-
72
-
73
-
74
-
75
-
76
-
77
-
78
-
79
-
80
-
81
-
82
-
83
-
84
-
85
-
86
-
87
-
88
 |
 |
