Sony RDR VX530 Operating Instructions - Page 102
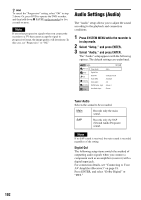
Audio Settings (Audio), Press SYSTEM MENU while the recorder is, in stop mode., Select Setup
 |
UPC - 027242692268
View all Sony RDR VX530 manuals
Add to My Manuals
Save this manual to your list of manuals |
Page 102 highlights
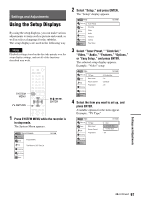
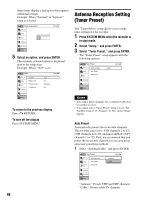
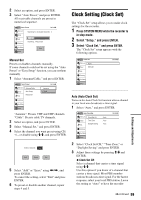
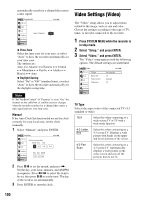
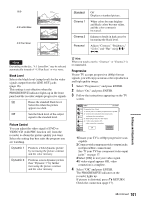
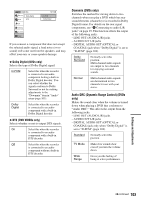
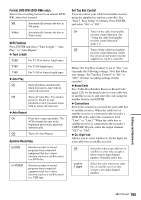
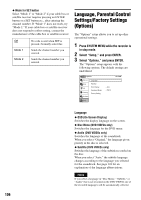
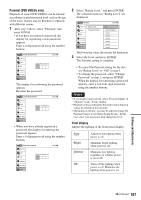
z Hint To cancel the "Progressive" setting, select "Off" in step 2 above. Or, press DVD to operate the DVD recorder, and then hold down X PAUSE on the recorder for five seconds or more. Note If you select progressive signals when you connect the recorder to a TV that cannot accept the signal in progressive format, the image quality will deteriorate. In this case, set "Progressive" to "Off." Audio Settings (Audio) The "Audio" setup allows you to adjust the sound according to the playback and connection conditions. 1 Press SYSTEM MENU while the recorder is in stop mode. 2 Select "Setup," and press ENTER. 3 Select "Audio," and press ENTER. The "Audio" setup appears with the following options. The default settings are underlined. Audio 10:10 AM Title List Timer Edit Dubbing Disc Setting Setup Tuner Audio : Main Digital Out Downmix : Dolby Surround Audio DRC : Standard Scan Audio : On DV/D8 Audio Input : Stereo 1 Line Audio Input : Stereo Tuner Audio Selects the sound to be recorded. Main Records only the main sound. SAP Records only the SAP (Second Audio Program) sound. Note If no SAP sound is received, the main sound is recorded regardless of the setting. Digital Out The following setup items switch the method of outputting audio signals when you connect a component such as an amplifier (receiver) with a digital input jack. For connection details, see "Connecting to Your AV Amplifier (Receiver)" on page 18. Press ENTER, and select "Dolby Digital" or "DTS." 102
-
 1
1 -
2
-
3
-
4
-
5
-
6
-
7
-
8
-
9
-
10
-
11
-
12
-
13
-
14
-
15
-
16
-
17
-
18
-
19
-
20
-
21
-
22
-
23
-
24
-
25
-
26
-
27
-
28
-
29
-
30
-
31
-
32
-
33
-
34
-
35
-
36
-
37
-
38
-
39
-
40
-
41
-
42
-
43
-
44
-
45
-
46
-
47
-
48
-
49
-
50
-
51
-
52
-
53
-
54
-
55
-
56
-
57
-
58
-
59
-
60
-
61
-
62
-
63
-
64
-
65
-
66
-
67
-
68
-
69
-
70
-
71
-
72
-
73
-
74
-
75
-
76
-
77
-
78
-
79
-
80
-
81
-
82
-
83
-
84
-
85
-
86
-
87
-
88
-
89
-
90
-
91
-
92
-
93
-
94
-
95
-
96
-
 97
97 -
 98
98 -
 99
99 -
 100
100 -
 101
101 -
 102
102 -
 103
103 -
 104
104 -
 105
105 -
 106
106 -
 107
107 -
108
-
109
-
110
-
111
-
112
-
113
-
114
-
115
-
116
-
117
-
118
-
119
-
120
-
121
-
122
-
123
-
124
-
125
-
126
-
127
-
128
-
129
-
130
-
131
-
132
 |
 |
