Sony SDM-X75K Operating Instructions (English starts on page 25) - Page 30
Setup, Setup 1: Assemble the stand
 |
View all Sony SDM-X75K manuals
Add to My Manuals
Save this manual to your list of manuals |
Page 30 highlights
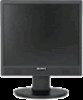
Rear of the display 9 MAIN POWER switch (page 10) This switch is to turn the MAIN POWER button of the display on and off. 0 AC IN connector (page 9) This connector connects the power cord (supplied). qa DVI-D input connector (digital RGB) (page 8) This connector inputs digital RGB video signals that comply with DVI Rev.1.0. qs HD15 input connector (analog RGB) (page 8) This connector inputs analog RGB video signals (0.700 Vp-p, positive) and sync signals. qd Cable holder (page 9) This part secures cables and cords to the display. qf USB downstream port (page 8) (USB port-equipped models only) Connecting the USB mouse and USB keyboard to the display, you can connect up to two computers to the display switching the input back and forth. qg USB upstream port (USB port-equipped models only) Connect the USB cable to your computer and display. qh Security lock hole The Kensington Micro Saver Security System should be used for the security lock hole. Micro Saver Security System is a trademark of Kensington. qj Audio Jack for INPUT1 This jack inputs audio signals when connected to the audio output jack of a computer or other audio equipment connected to INPUT1. q, Audio Jack for INPUT2 This jack inputs audio signals when connected to the audio output jack of a computer or other equipment connected to INPUT2. Setup Before using your display, check that the following items are included in your carton: • LCD display • Power cord • Stand Base • HD15-HD15 video signal cable (analog RGB) • DVI-D video signal cable (digital RGB) • Audio cord (stereo miniplug) • USB cable • CD-ROM (utility software for Windows/Macintosh, Operating Instructions, etc.) • Warranty card • Quick Setup Guide The contents with mark for specifications vary depending on the models. For details, see "Specifications" (page 22). Setup 1: Assemble the stand Do not press the LCD screen when placing or raising the display straight on a desk or a like. It may affect the uniformity of the screen or damage the LCD display. x When using supplied stand 1 Open the carton and take out the stand base. 2 Confirm the supplied items. • With a screw attached to the bottom of Stand Base. 3 Put a soft mat or a like on a desk or a like. You may damage the LCD screen and the display itself, if putting the display directly on the desk. 4 Take the display out from the carton and then place the frame of the laid display along the edge of the desk. Display Stand Soft mat or a like 6
-
 1
1 -
2
-
3
-
4
-
5
-
6
-
7
-
8
-
9
-
10
-
11
-
12
-
13
-
14
-
15
-
16
-
17
-
18
-
19
-
20
-
21
-
22
-
23
-
24
-
 25
25 -
 26
26 -
 27
27 -
 28
28 -
 29
29 -
 30
30 -
 31
31 -
 32
32 -
 33
33 -
 34
34 -
 35
35 -
36
-
37
-
38
-
39
-
40
-
41
-
42
-
43
-
44
-
45
-
46
-
47
-
48
-
49
-
50
-
51
-
52
-
53
-
54
-
55
-
56
-
57
-
58
-
59
-
60
-
61
-
62
-
63
-
64
-
65
-
66
-
67
-
68
-
69
-
70
-
71
-
72
-
73
-
74
-
75
-
76
-
77
-
78
-
79
-
80
-
81
-
82
-
83
-
84
-
85
-
86
-
87
-
88
-
89
-
90
-
91
-
92
-
93
-
94
-
95
-
96
-
97
-
98
-
99
-
100
-
101
-
102
-
103
-
104
-
105
-
106
-
107
-
108
-
109
-
110
-
111
-
112
-
113
-
114
-
115
-
116
-
117
-
118
-
119
-
120
-
121
-
122
-
123
-
124
-
125
-
126
-
127
-
128
-
129
-
130
-
131
-
132
-
133
-
134
-
135
-
136
-
137
-
138
-
139
-
140
-
141
-
142
-
143
-
144
-
145
-
146
-
147
-
148
-
149
-
150
-
151
-
152
-
153
-
154
-
155
-
156
-
157
-
158
-
159
-
160
-
161
-
162
-
163
-
164
-
165
-
166
-
167
-
168
-
169
-
170
-
171
-
172
-
173
-
174
-
175
-
176
-
177
-
178
-
179
-
180
-
181
-
182
-
183
-
184
-
185
-
186
-
187
-
188
-
189
-
190
-
191
-
192
-
193
-
194
-
195
-
196
-
197
-
198
-
199
-
200
-
201
-
202
-
203
-
204
-
205
-
206
-
207
-
208
-
209
-
210
-
211
-
212
-
213
-
214
-
215
-
216
-
217
-
218
-
219
-
220
-
221
-
222
-
223
-
224
-
225
-
226
-
227
-
228
-
229
-
230
-
231
-
232
-
233
-
234
-
235
-
236
-
237
-
238
-
239
-
240
-
241
-
242
-
243
-
244
-
245
-
246
-
247
-
248
-
249
-
250
-
251
-
252
-
253
-
254
-
255
-
256
-
257
-
258
-
259
-
260
-
261
-
262
-
263
-
264
-
265
-
266
-
267
-
268
-
269
-
270
-
271
-
272
-
273
-
274
-
275
-
276
-
277
-
278
-
279
-
280
-
281
-
282
-
283
-
284
-
285
-
286
-
287
-
288
-
289
-
290
-
291
-
292
-
293
-
294
-
295
-
296
-
297
-
298
-
299
-
300
-
301
-
302
-
303
-
304
-
305
-
306
-
307
-
308
-
309
-
310
-
311
-
312
-
313
-
314
-
315
-
316
-
317
-
318
-
319
-
320
-
321
-
322
-
323
-
324
-
325
-
326
-
327
-
328
-
329
-
330
-
331
-
332
-
333
-
334
-
335
-
336
-
337
-
338
-
339
-
340
-
341
-
342
-
343
-
344
-
345
-
346
-
347
-
348
-
349
-
350
-
351
-
352
-
353
-
354
-
355
-
356
-
357
-
358
-
359
-
360
-
361
-
362
-
363
-
364
-
365
-
366
-
367
-
368
-
369
-
370
-
371
-
372
-
373
-
374
-
375
-
376
-
377
-
378
-
379
-
380
-
381
-
382
-
383
-
384
-
385
 |
 |
