Sony SLV-N50 Operating Instructions - Page 7
Step 3 : Hookups - power cord for
 |
View all Sony SLV-N50 manuals
Add to My Manuals
Save this manual to your list of manuals |
Page 7 highlights
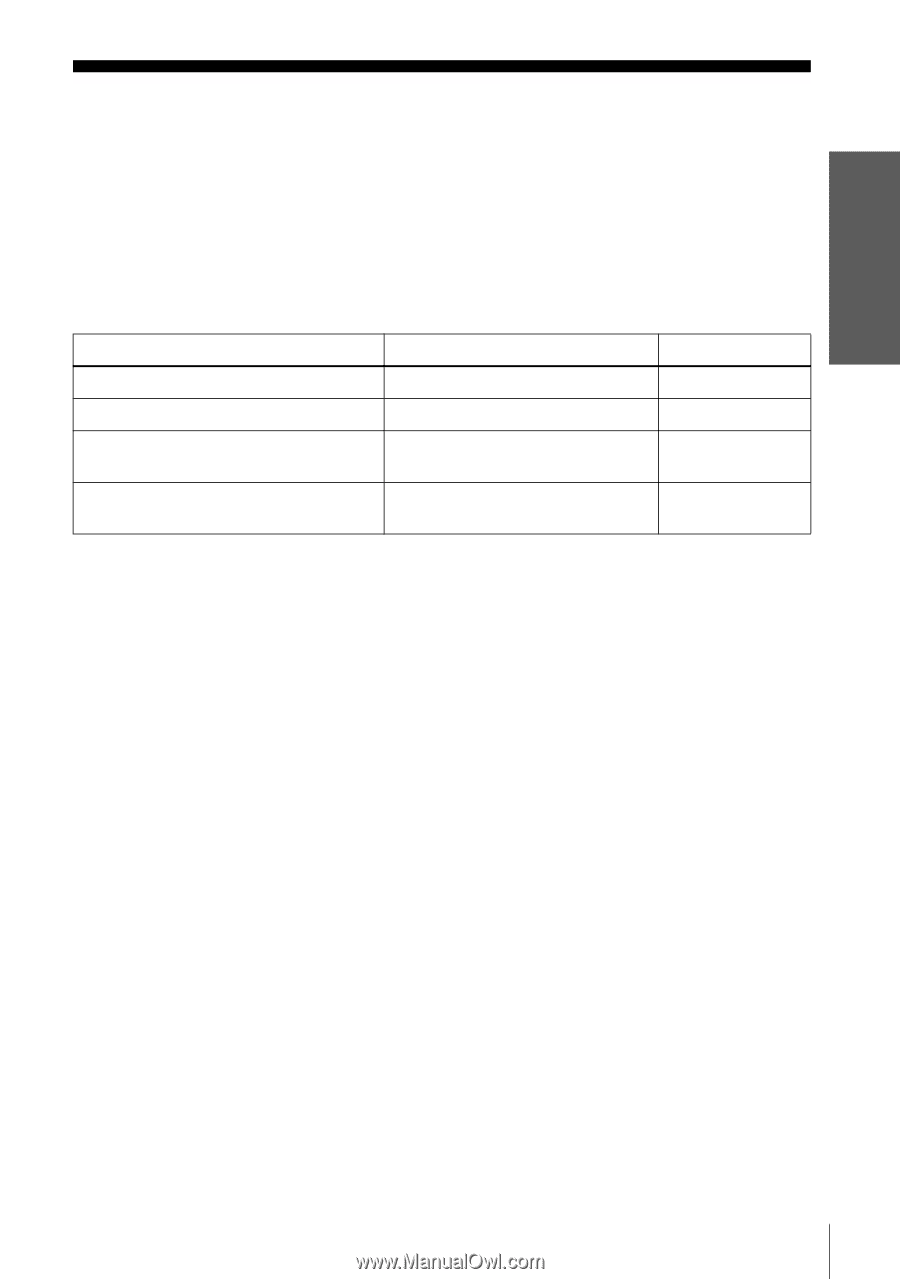
Getting Started Step 3 : Hookups Selecting the best hookup option There are many ways in which your VCR can be hooked up. To hook up your VCR so that it works best for you, first scan through the table below. Then use the accompanying diagrams and procedures on the following pages to set up your VCR. If your TV has audio/video inputs, refer to pages 8 and 9 for audio/video (A/V) hookup. Then follow one of the hookups below. If you have Use Antenna only, no cable TV Hookup 1 Cable box with many scrambled channels Hookup 2 No cable box or cable box with only a few Hookup 3 scrambled channels Cable box with only a few scrambled Hookup 4 channels and you are using an A/B switch Refer to Pages 10 to 12 Pages 13 to 15 Pages 16 to 18 Pages 19 to 21 After you've completed the connections, follow the instructions for setup. During setup, if you need more details on the procedure described, page numbers are provided where you can find complete, step-by-step instructions. After you've completed the setup, you're ready to use your VCR. Procedures differ depending on the hookup you used. For an overview, refer to "Quick reference to using the VCR" on the back cover. Before you get started • Turn off the power to all equipment. • Do not connect the AC power cords until all of the connections are completed. • Be sure you make connections firmly. Loose connections may cause picture distortion. • If your TV doesn't match any of the examples provided, see your nearest Sony dealer or qualified technician. Hookups 7
-
 1
1 -
 2
2 -
 3
3 -
 4
4 -
 5
5 -
 6
6 -
 7
7 -
 8
8 -
 9
9 -
 10
10 -
 11
11 -
 12
12 -
13
-
14
-
15
-
16
-
17
-
18
-
19
-
20
-
21
-
22
-
23
-
24
-
25
-
26
-
27
-
28
-
29
-
30
-
31
-
32
-
33
-
34
-
35
-
36
-
37
-
38
-
39
-
40
-
41
-
42
-
43
-
44
-
45
-
46
-
47
-
48
-
49
-
50
-
51
-
52
-
53
-
54
-
55
-
56
-
57
-
58
-
59
-
60
-
61
-
62
-
63
-
64
-
65
-
66
-
67
-
68
-
69
-
70
-
71
-
72
-
73
-
74
-
75
-
76
-
77
-
78
-
79
-
80
-
81
-
82
-
83
-
84
 |
 |