Sony STR-D360Z Operating Instructions - Page 13
Recording
 |
View all Sony STR-D360Z manuals
Add to My Manuals
Save this manual to your list of manuals |
Page 13 highlights
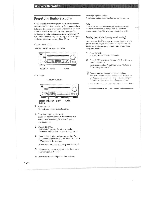
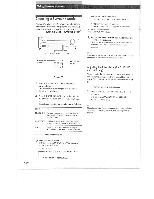
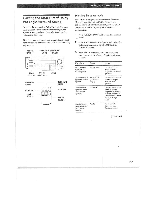
Receiver Operations Recording This receiver makes it easy to record to and from the components connected to the receiver. You don't have to connect playback and recording components directly: once you select a program source on the receiver, you can record and edit as you normally would using the controls on each component. Before you begin, make sure you've connected all components properly. FUNCTION BUTTONS 0 0= a0 CO=1 • ga.00 ou OOO Playback component (program source) Audio signal flow -b..: Video signal flow Recording component (Tape deck, MD recorder, VCR) Recording on an audio tape or MiniDisc You can record on a cassette tape or MiniDisc using the receiver. See the instruction manual of your tape deck or MD recorder if you need help. 1 Press one of the function buttons to select the program source. 2 Set the component to be ready for playing. For example, insert a CD into the CD player. 3 Insert a blank tape or disc into the recording deck and adjust the recording level, if necessary. 4 Start recording on the recording deck and then start playing the component. Recording on a video tape You can record TV program or digital broadcasting system using the receiver. You can also' add audio from a variety of audio sources when editing a video tape. See your VCR's instruction manual if you need help. 1 Press TV /DBS to select the program source. z Set the component to be ready for playing. For example, turn on the Ty and TV tuner. 3 Insert a blank video tape into the VCR for recording. 4 Start recording on the VCR. t You can replace audio while editing a video tape At the point you want to start adding different sound, press another function button (for example, CD) and start playback. The sound from the selected component will be recorded over the original audio. To resume recording the original sound, press the TV/DBS function button. Note: You cannot record the audio and video signal during 5.1 /DVD mode. 13EN
-
 1
1 -
2
-
3
-
4
-
5
-
6
-
7
-
 8
8 -
 9
9 -
 10
10 -
 11
11 -
 12
12 -
 13
13 -
 14
14 -
 15
15 -
 16
16 -
 17
17 -
 18
18 -
19
-
20
-
21
-
22
-
23
 |
 |
