Sony STR-DA5800ES Operating Instructions (Large File - 19.74 MB) - Page 131
Troubleshooting, General, Video - in protector mode
 |
View all Sony STR-DA5800ES manuals
Add to My Manuals
Save this manual to your list of manuals |
Page 131 highlights
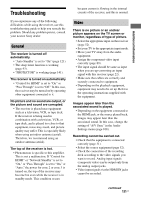
Additional Information Troubleshooting If you experience any of the following difficulties while using the receiver, use this troubleshooting guide to help you remedy the problem. Should any problem persist, consult your nearest Sony dealer. General The receiver is turned off automatically. • "Auto Standby" is set to "On" (page 121). • The sleep timer function is working (page 93). • "PROTECTOR" is working (page 141). The receiver is turned on automatically. • "Control for HDMI" is set to "On" or "Pass Through" is set to "Off." In this case, the receiver may be turned on by operating other equipment connected to it. No picture and no sound are output, or the picture and sound are corrupted. • The receiver is placed near equipment such as a television, VCR, or tape deck. If the receiver is being used in combination with a television, VCR, or tape deck, and is placed too close to that equipment, noise may result, and picture quality may suffer. This is especially likely when using an indoor antenna (aerial). Therefore, we recommend using an outdoor antenna (aerial). The top of the receiver is hot. • Phenomenon is specific to this amplifier. This is not a malfunction. If "Control for HDMI" or "Network Standby" is set to "On," or "Pass Through" is set to "On," or "Auto," the power for zone 2 or zone 3 is turned on, the top of the receiver may become hot even while the receiver is in standby mode. This condition occurs because current is flowing in the internal circuits of the receiver, and this is normal. Video There is no picture or an unclear picture appears on the TV screen or monitor, regardless of type of picture. • Select the appropriate input on the receiver (page 52). • Set your TV to the appropriate input mode. • Move your TV away from the audio equipment. • Assign the component video input correctly (page 89). • The input signal should be same as input when you are up-converting an input signal with this receiver (page 22). • Make sure that cables are correctly and securely connected to equipment. • Depending on the playback equipment, equipment may need to be set up. Refer to the operating instructions supplied with the equipment. Images appear later than the associated sound is played. • Depending on the equipment connected to the HDMI jack, or the source played back, images may appear later than the associated sound. In this case, change the setting of "A/V Sync" in the Audio Settings menu (page 108). Recording cannot be carried out. • Check that the equipment is connected correctly (page 31). • Select the source equipment (page 52). • Check the connection of the recording deck according to the video signals you want to record. Analog input signals (composite video) can be output only from the analog output jacks. • Video input signals via the HDMI IN jacks cannot be recorded. continued 131US
-
 1
1 -
2
-
3
-
4
-
5
-
6
-
7
-
8
-
9
-
10
-
11
-
12
-
13
-
14
-
15
-
16
-
17
-
18
-
19
-
20
-
21
-
22
-
23
-
24
-
25
-
26
-
27
-
28
-
29
-
30
-
31
-
32
-
33
-
34
-
35
-
36
-
37
-
38
-
39
-
40
-
41
-
42
-
43
-
44
-
45
-
46
-
47
-
48
-
49
-
50
-
51
-
52
-
53
-
54
-
55
-
56
-
57
-
58
-
59
-
60
-
61
-
62
-
63
-
64
-
65
-
66
-
67
-
68
-
69
-
70
-
71
-
72
-
73
-
74
-
75
-
76
-
77
-
78
-
79
-
80
-
81
-
82
-
83
-
84
-
85
-
86
-
87
-
88
-
89
-
90
-
91
-
92
-
93
-
94
-
95
-
96
-
97
-
98
-
99
-
100
-
101
-
102
-
103
-
104
-
105
-
106
-
107
-
108
-
109
-
110
-
111
-
112
-
113
-
114
-
115
-
116
-
117
-
118
-
119
-
120
-
121
-
122
-
123
-
124
-
125
-
 126
126 -
 127
127 -
 128
128 -
 129
129 -
 130
130 -
 131
131 -
 132
132 -
 133
133 -
 134
134 -
 135
135 -
 136
136 -
137
-
138
-
139
-
140
-
141
-
142
-
143
-
144
-
145
-
146
-
147
-
148
-
149
-
150
-
151
-
152
-
153
-
154
-
155
-
156
-
157
-
158
-
159
-
160
-
161
-
162
-
163
-
164
-
165
-
166
-
167
-
168
-
169
-
170
-
171
-
172
-
173
-
174
-
175
-
176
-
177
-
178
-
179
-
180
-
181
-
182
-
183
-
184
-
185
-
186
-
187
-
188
-
189
-
190
-
191
-
192
-
193
-
194
-
195
-
196
-
197
-
198
-
199
-
200
-
201
-
202
-
203
-
204
-
205
-
206
-
207
-
208
-
209
-
210
-
211
-
212
-
213
-
214
-
215
-
216
-
217
-
218
-
219
-
220
-
221
-
222
-
223
-
224
-
225
-
226
-
227
-
228
-
229
-
230
-
231
-
232
-
233
-
234
-
235
-
236
-
237
-
238
-
239
-
240
-
241
-
242
-
243
-
244
-
245
-
246
-
247
-
248
-
249
-
250
-
251
-
252
-
253
-
254
-
255
-
256
-
257
-
258
-
259
-
260
-
261
-
262
-
263
-
264
-
265
-
266
-
267
-
268
-
269
-
270
-
271
-
272
-
273
-
274
-
275
-
276
-
277
-
278
-
279
-
280
-
281
-
282
-
283
-
284
-
285
-
286
-
287
-
288
-
289
-
290
-
291
-
292
-
293
-
294
-
295
-
296
-
297
-
298
-
299
 |
 |
