Sony STR-DA6400ES Operating Instructions (Large File - 15.25 MB) - Page 121
Audio settings, Party Setup, Digital Legato Linear D.L.L., A/V Sync Synchronizes audio
 |
UPC - 027242732100
View all Sony STR-DA6400ES manuals
Add to My Manuals
Save this manual to your list of manuals |
Page 121 highlights
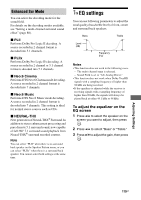
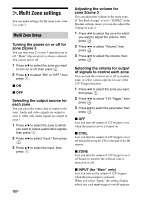
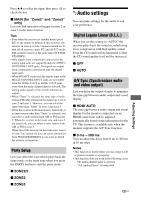
Press V/v to select the input, then press to check the box. x MAIN (for "Zone2" and "Zone3" only) Lets you link operation of trigger in zone 2 or zone 3 to the main receiver. Tips • Even when this receiver is standby mode (press ?/1 on the remote to turned off this receiver), the receiver in zone 2 or zone 3 remains turned on. To turn off all receivers, press ?/1 and AV ?/1 on the RM-AAL012 remote at the same time (SYSTEM STANDBY). • Only signals from components connected to the analog input jacks are output through the ZONE 2 OUT/ZONE 3 OUT jacks. No signals are output from components connected to only the digital input jacks. • When SOURCE is selected, the signals input to the MULTI CHANNEL INPUT jacks are not output from the ZONE 2 OUT or ZONE 3 OUT jacks even when the multi-channel input is selected. The analog audio signals of the current function are output. • When "Tuner" is selected; the same type of radio station (FM/AM) selected in the main zone is set in zone 2 and zone 3. However, you can select the input other than "Tuner" in zone 2 and zone 3. • When the receiver in the main zone is turned off, or an input source other than "Tuner" is selected, you can select a radio station from AM or FM in zone 2. When the receiver in the main zone and zone 2 are turned off, you can select a radio station from AM or FM in zone 3. When two of the receivers in the main zone, zone 2 or zone 3 are turned off, you can select a broadcast from FM/AM/XM/SIRIUS in one zone in which the receiver is turned on. Party Setup Lets you select the zone which plays back the same music as the main zone when you press the PARTY button to start the party mode. x ZONE2/3 x ZONE2 x ZONE3 Audio settings You can make settings for the audio to suit your preference. Digital Legato Linear (D.L.L.) When you set this setting to "AUTO," the receiver plays back the sound recorded using lossy compression with high quality sound. Even the CD sound will be linearized so that the CD sound quality level will be increased. x OFF x AUTO A/V Sync (Synchronizes audio and video output) Lets you delay the output of audio to minimize the time gap between audio output and visual display. x HDMI AUTO The time gap between audio output and visual display for the monitor connected via an HDMI connection will be adjusted automatically based on the information for the TV. This feature is available only when the monitor supports the A/V Sync function. x 0 ms - 300 ms You can adjust the delay from 0 ms to 300 ms in 10 ms steps. Notes • This function is useful when you use a large LCD or plasma monitor or a projector. • This function does not work in the following cases. - The multi-channel input is selected. - "2ch Analog Direct" is being used. 121GB Adjusting Settings
-
 1
1 -
2
-
3
-
4
-
5
-
6
-
7
-
8
-
9
-
10
-
11
-
12
-
13
-
14
-
15
-
16
-
17
-
18
-
19
-
20
-
21
-
22
-
23
-
24
-
25
-
26
-
27
-
28
-
29
-
30
-
31
-
32
-
33
-
34
-
35
-
36
-
37
-
38
-
39
-
40
-
41
-
42
-
43
-
44
-
45
-
46
-
47
-
48
-
49
-
50
-
51
-
52
-
53
-
54
-
55
-
56
-
57
-
58
-
59
-
60
-
61
-
62
-
63
-
64
-
65
-
66
-
67
-
68
-
69
-
70
-
71
-
72
-
73
-
74
-
75
-
76
-
77
-
78
-
79
-
80
-
81
-
82
-
83
-
84
-
85
-
86
-
87
-
88
-
89
-
90
-
91
-
92
-
93
-
94
-
95
-
96
-
97
-
98
-
99
-
100
-
101
-
102
-
103
-
104
-
105
-
106
-
107
-
108
-
109
-
110
-
111
-
112
-
113
-
114
-
115
-
 116
116 -
 117
117 -
 118
118 -
 119
119 -
 120
120 -
 121
121 -
 122
122 -
 123
123 -
 124
124 -
 125
125 -
 126
126 -
127
-
128
-
129
-
130
-
131
-
132
-
133
-
134
-
135
-
136
-
137
-
138
-
139
-
140
-
141
-
142
-
143
-
144
-
145
-
146
-
147
-
148
-
149
-
150
-
151
-
152
-
153
-
154
-
155
-
156
-
157
-
158
-
159
-
160
-
161
-
162
-
163
-
164
-
165
-
166
-
167
-
168
-
169
-
170
-
171
-
172
-
173
-
174
-
175
 |
 |