Sony TA-P9000ES Operating Instructions - Page 10
Location of Parts and Basic Operations, Front Panel Parts Description
 |
View all Sony TA-P9000ES manuals
Add to My Manuals
Save this manual to your list of manuals |
Page 10 highlights
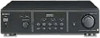
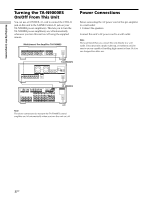
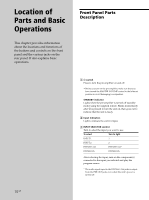
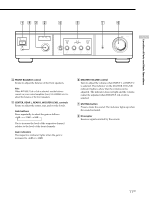
Location of Parts and Basic Operations This chapter provides information about the locations and functions of the buttons and controls on the front panel and the various jacks on the rear panel. It also explains basic operations. Front Panel Parts Description 10GB 1 U switch Press to turn the pre amplifier on and off. • Before you turn on the pre amplifier, make sure that you have turned the MASTER VOLUME control to the leftmost position to avoid damaging your speakers. STANDBY indicator Lights when the pre amplifier is turned off (standby mode) using the supplied remote. Blinks momentarily after U is pressed to turn the unit on, then goes out to indicate that the unit is ready. 2 Input indicators Light to indicate the current input. 3 INPUT SELECTOR control Turn to select the input you want to use. To select Turn to light INPUT 1 1 INPUT 2 2 BYPASS 5.1ch BYPASS 5.1ch* BYPASS 2ch BYPASS 2ch After selecting the input, turn on the component(s) connected to the input you selected and play the program source. * The audio signal input to the BYPASS 5.1ch jacks is output from the PRE OUT jacks even when this unit's power is turned off.
-
 1
1 -
2
-
3
-
4
-
 5
5 -
 6
6 -
 7
7 -
 8
8 -
 9
9 -
 10
10 -
 11
11 -
 12
12 -
 13
13 -
 14
14 -
 15
15 -
16
-
17
-
18
-
19
-
20
-
21
-
22
-
23
-
24
-
25
-
26
-
27
-
28
-
29
-
30
-
31
-
32
 |
 |
