Sony VGP-XL1B User Guide - Page 30
Loading & Unloading Discs, Loading the VGP-XL1B Changer/Recorder
 |
View all Sony VGP-XL1B manuals
Add to My Manuals
Save this manual to your list of manuals |
Page 30 highlights
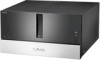
Loading & Unloading Discs Loading the VGP-XL1B Changer/Recorder Before you load discs into the VGP-XL1B Changer/Recorder for the first time, please do the following: 1 Make sure the Changer/Recorder is properly connected to the host computer and is turned on. 2 Make sure the system is connected to the Internet and the Internet connection is working properly. 3 Start Media Center Setup and verify that the correct options were selected during setup. From the main menu, select Settings | General | Media Center Setup | Run Media Center Setup Again. 4 Select Yes when asked, "Do you want Media Center to automatically connect to the Internet to get this information?" 5 Select Yes when asked, "Do you have an always on Internet connection?", if this is so. Once you have completed this procedure, continue with loading discs into the Changer/Recorder. Note: When loading discs, make sure that the label is facing to the right of the slot. To load a single disc • Press the Load button once and insert the disc in the open slot of the optical drive located on the front panel. To load multiple discs • Press the Load button twice and insert each disc in the open slot of the optical drive one at a time. The Changer/Recorder carousal keeps rotating open slots to the drive until all slots are filled or until no disc is inserted after 15 seconds. 24 VGP-XL1B User Guide
-
 1
1 -
2
-
3
-
4
-
5
-
6
-
7
-
8
-
9
-
10
-
11
-
12
-
13
-
14
-
15
-
16
-
17
-
18
-
19
-
20
-
21
-
22
-
23
-
24
-
 25
25 -
 26
26 -
 27
27 -
 28
28 -
 29
29 -
 30
30 -
 31
31 -
 32
32 -
 33
33 -
 34
34 -
 35
35 -
36
-
37
-
38
-
39
-
40
-
41
-
42
-
43
-
44
-
45
-
46
-
47
-
48
-
49
-
50
-
51
-
52
 |
 |
