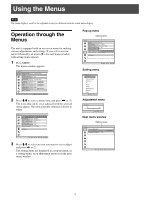
Sony VPL-VW760ES Operating Instructions - Page 20
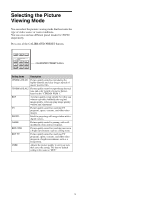
High/Middle/Low, Gamma 7, Setting items, Description
 |
View all Sony VPL-VW760ES manuals
Add to My Manuals
Save this manual to your list of manuals |
Page 20 highlights
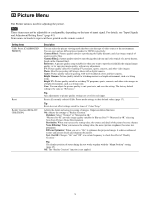
Setting items Sharpness [SHARPNESS] Expert Setting NR (Noise Reduction) MPEG NR (MPEG Noise Reduction) Smooth Gradation Film Mode Gamma Correction [GAMMA CORRECTION] Color Correction Description Sharpens the outline of the picture, or reduces the noise. The higher the setting, the sharper the picture. The lower the setting, the softer the picture, thus reducing the noise. You can make adjustments by pressing the SHARPNESS +/- button on the remote control. Reduces the roughness or noise of the picture. Auto: Detects the noise level to reduce the roughness or noise of the picture automatically. High/Middle/Low: Select a setting according to the roughness or noise of the input signal source. Off: The NR (noise reduction) function is not applied. Tip The noise level may not be detected accurately with "Auto" depending on the input signal source. If the picture is unacceptable with "Auto," select a setting from among "High," "Middle," "Low" or "Off." Reduces block noise and mosquito noise, particularly in digital signals. Auto: Detects the noise level to reduce the block noise and mosquito noise of the picture automatically. High/Middle/Low: Select a setting according to the block noise and mosquito noise of the input signal source. Off: The MPEG NR (MPEG noise reduction) function is not applied. Tip The noise level may not be detected accurately with "Auto" depending on the input signal source. If the picture is unacceptable with "Auto," select a setting from among "High," "Middle," "Low" or "Off." Smooths the gradation of the flat parts of images. High/Middle/Low: You can adjust the smooth gradation effect. Off: The smooth gradation function is not applied. Tip This item is not available for 3D signals. According to the film source you have selected, make a setting for playback. Auto: Suitable for reproducing the original picture movement. Normally, set this to "Auto." Off: Plays back the picture in progressive format without detecting video signals automatically. Tip This item is compatible with a 1080i signal only. Adjusts the response characteristics of the tone of the picture. Select a favorite tone from 10 options. 1.8: Bright Produces a brighter picture overall. 2 2.1 2.2 2.4 2.6: Dark Produces a darker picture overall. Gamma 7: Enhances the dark parts and sharpens the images. Gamma 8: Produces a brighter picture than Gamma 7. Select this when you watch in a bright environment, such as a living room. Gamma 9: Produces a brighter picture than Gamma 8. Gamma 10: Increases the sharpness in images. Select this when you watch TV programs, etc., in a bright environment, such as a living room. Off: The "Gamma Correction" function is not applied. On: Adjusts Hue, Saturation and Brightness of the selected colors. Repeat steps 1 and 2 described below to specify the target color. 1 Press M/m to select "Color Select," then press
-
 1
1 -
2
-
3
-
4
-
5
-
6
-
7
-
8
-
9
-
10
-
11
-
12
-
13
-
14
-
 15
15 -
 16
16 -
 17
17 -
 18
18 -
 19
19 -
 20
20 -
 21
21 -
 22
22 -
 23
23 -
 24
24 -
 25
25 -
26
-
27
-
28
-
29
-
30
-
31
-
32
-
33
-
34
-
35
-
36
-
37
-
38
-
39
-
40
-
41
-
42
-
43
-
44
-
45
-
46
-
47
-
48
-
49
-
50
-
51
-
52
-
53
-
54
 |
 |
