Sony XAV-60 Operating Instructions - Page 52
Troubleshooting, Region code, System requirements for the software, in the supplied CD-ROM - wiring
 |
UPC - 027242776739
View all Sony XAV-60 manuals
Add to My Manuals
Save this manual to your list of manuals |
Page 52 highlights
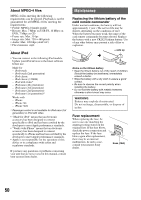
• Halogenated flame retardants are not used in the certain printed wiring boards. • Halogenated flame retardants are not used in cabinets. • Packaging cushions are made from paper. Region code The region system is used to protect software copyrights. The region code is located on the bottom of the unit, and only DVDs labeled with an identical region code can be played on this unit. DVDs labeled ALL can also be played. If you try to play any other DVD, the message "Playback prohibited by region code." will appear on the monitor screen. Depending on the DVD, no region code may be labeled even though playing the DVD is prohibited by area restrictions. System requirements for the software in the supplied CD-ROM Computer • CPU/RAM - IBM PC/AT compatible machine - CPU: Intel Pentium III Processor 450 MHz or higher - RAM: 256 MB or more (For Windows XP), 512 MB or more (For Windows Vista or later) • CD-ROM drive • USB port OS Windows XP, Windows Vista, Windows 7 For details on compatible editions or Service Pack, visit the following support site: http://esupport.sony.com http://www.sony.com/mobileAV Monitor High color (16-bit) or more, 800 × 600 dots or more Other Internet connection Notes • The following system environments are not supported. - Non IBM PC type computers, such as Macintosh, etc. - Homemade computers - OS upgraded computers - Multi-display environment - Multi-boot environment - Virtual machine environment • Depending on the computer condition, operation may not be possible even with the recommended environment. 52 Troubleshooting The following checklist will help you remedy problems you may encounter with your unit. Before going through the checklist below, check the connection and operating procedures. If the problem is not solved, visit the following support site. Support site http://esupport.sony.com http://www.sony.com/mobileAV General No power is being supplied to the unit. • Check the connection or fuse. • If the unit is turned off and the display disappears, it cannot be operated with the remote commander. t Turn on the unit. The power antenna (aerial) does not extend. The power antenna (aerial) does not have a relay box. No beep sound. • The beep sound is canceled (page 40). • An optional power amplifier is connected and you are not using the built-in amplifier. The contents of the memory have been erased. • The reset button has been pressed. t Store again into the memory. • The power supply lead or battery has been disconnected or it is not connected properly. Stored stations and correct time are erased. The fuse has blown. Makes noise when the position of the ignition is switched. The leads are not matched correctly with the car's accessory power connector. The display disappears from/does not appear on the monitor. • The dimmer is set to "ON" (page 40). • The display disappears if you press and hold (SOURCE/OFF). t Press (SOURCE/OFF) on the unit until the display appears. • "M.OFF" is touched and the Monitor Off function is activated (page 11). t Touch anywhere on the display to turn back on. The display does not respond to your touch correctly. • Touch one part of the display at a time. If two or more parts are touched simultaneously, the display will not operate correctly. • Adjust the touch point of the display (page 37). The Auto Off function does not operate. The unit is turned on. The Auto Off function activates after turning off the unit. t Turn off the unit.
-
 1
1 -
2
-
3
-
4
-
5
-
6
-
7
-
8
-
9
-
10
-
11
-
12
-
13
-
14
-
15
-
16
-
17
-
18
-
19
-
20
-
21
-
22
-
23
-
24
-
25
-
26
-
27
-
28
-
29
-
30
-
31
-
32
-
33
-
34
-
35
-
36
-
37
-
38
-
39
-
40
-
41
-
42
-
43
-
44
-
45
-
46
-
 47
47 -
 48
48 -
 49
49 -
 50
50 -
 51
51 -
 52
52 -
 53
53 -
 54
54 -
 55
55 -
 56
56 -
 57
57 -
58
-
59
-
60
-
61
-
62
-
63
-
64
-
65
-
66
-
67
-
68
-
69
-
70
-
71
-
72
-
73
-
74
-
75
-
76
-
77
-
78
-
79
-
80
-
81
-
82
-
83
-
84
-
85
-
86
-
87
-
88
-
89
-
90
-
91
-
92
-
93
-
94
-
95
-
96
-
97
-
98
-
99
-
100
-
101
-
102
-
103
-
104
-
105
-
106
-
107
-
108
-
109
-
110
-
111
-
112
-
113
-
114
-
115
-
116
-
117
-
118
-
119
-
120
-
121
-
122
-
123
-
124
-
125
-
126
-
127
-
128
-
129
-
130
-
131
-
132
-
133
-
134
-
135
-
136
-
137
-
138
-
139
-
140
-
141
-
142
-
143
-
144
-
145
-
146
-
147
-
148
-
149
-
150
-
151
-
152
-
153
-
154
-
155
-
156
-
157
-
158
-
159
-
160
-
161
-
162
-
163
-
164
-
165
-
166
-
167
-
168
-
169
-
170
-
171
-
172
-
173
-
174
-
175
-
176
-
177
-
178
-
179
-
180
 |
 |
