TP-Link AC1900 Archer C9 V2 User Guide - Page 99
Target
 |
View all TP-Link AC1900 manuals
Add to My Manuals
Save this manual to your list of manuals |
Page 99 highlights
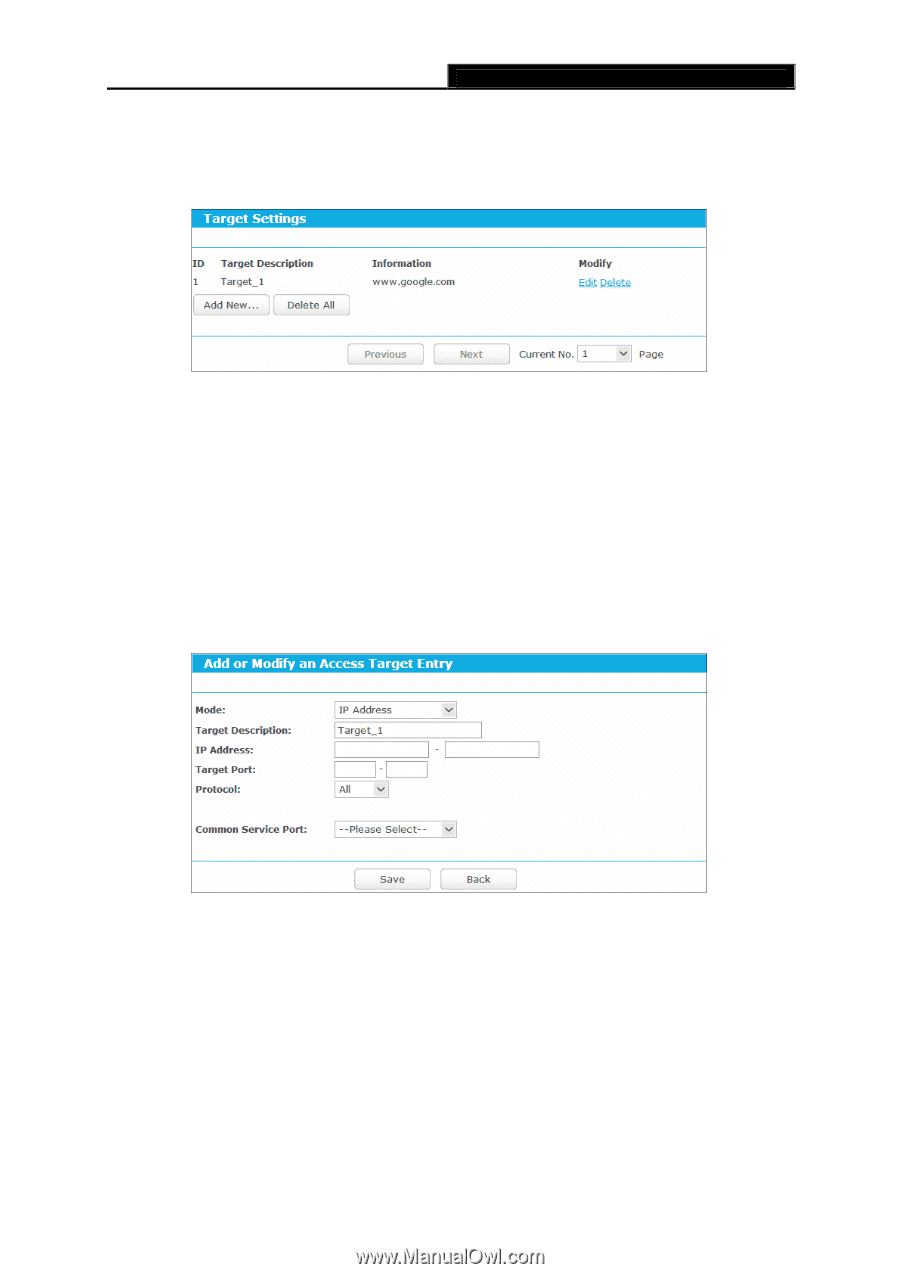
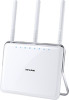
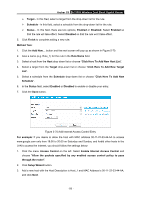
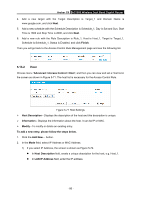
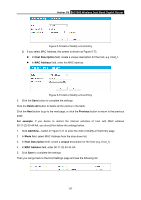
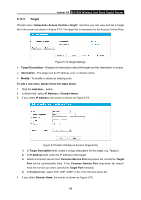
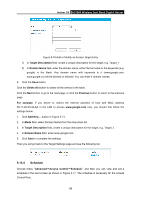
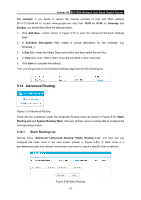
Archer C9 AC1900 Wireless Dual Band Gigabit Router 5.13.3 Target Choose menu "Advanced→Access Control→Target", and then you can view and set a Target list in the screen as shown in Figure 5-74. The target list is necessary for the Access Control Rule. Figure 5-74 Target Settings Target Description - Displays the description about the target and this description is unique. Information - The target can be IP address, port, or domain name. Modify - To modify or delete an existing entry. To add a new entry, please follow the steps below. 1. Click the Add New... button. 2. In Mode field, select IP Address or Domain Name. 3. If you select IP Address, the screen is shown as Figure 5-75. Figure 5-75 Add or Modify an Access Target Entry 1) In Target Description field, create a unique description for the target, e.g. Target_1. 2) In IP Address field, enter the IP address of the target. 3) Select a common service from Common Service Port drop-down list, so that the Target Port will be automatically filled. If the Common Service Port drop-down list doesn't have the service you want, specify the Target Port manually. 4) In Protocol field, select TCP, UDP, ICMP or ALL from the drop-down list. 4. If you select Domain Name, the screen is shown as Figure 5-76. - 88 -
-
 1
1 -
2
-
3
-
4
-
5
-
6
-
7
-
8
-
9
-
10
-
11
-
12
-
13
-
14
-
15
-
16
-
17
-
18
-
19
-
20
-
21
-
22
-
23
-
24
-
25
-
26
-
27
-
28
-
29
-
30
-
31
-
32
-
33
-
34
-
35
-
36
-
37
-
38
-
39
-
40
-
41
-
42
-
43
-
44
-
45
-
46
-
47
-
48
-
49
-
50
-
51
-
52
-
53
-
54
-
55
-
56
-
57
-
58
-
59
-
60
-
61
-
62
-
63
-
64
-
65
-
66
-
67
-
68
-
69
-
70
-
71
-
72
-
73
-
74
-
75
-
76
-
77
-
78
-
79
-
80
-
81
-
82
-
83
-
84
-
85
-
86
-
87
-
88
-
89
-
90
-
91
-
92
-
93
-
 94
94 -
 95
95 -
 96
96 -
 97
97 -
 98
98 -
 99
99 -
 100
100 -
 101
101 -
 102
102 -
 103
103 -
 104
104 -
105
-
106
-
107
-
108
-
109
-
110
-
111
-
112
-
113
-
114
-
115
-
116
-
117
-
118
-
119
-
120
-
121
-
122
-
123
-
124
-
125
-
126
-
127
-
128
-
129
-
130
-
131
-
132
-
133
-
134
-
135
-
136
-
137
-
138
-
139
-
140
-
141
-
142
-
143
 |
 |