TP-Link Archer VR900 Archer VR900 V1 User Guide - Page 71
LAN Settings, 12. 1. 1. Change the LAN IP Address
 |
View all TP-Link Archer VR900 manuals
Add to My Manuals
Save this manual to your list of manuals |
Page 71 highlights
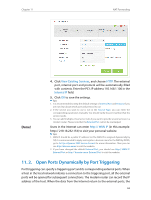
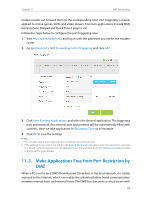
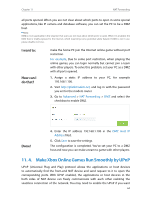
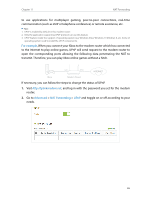
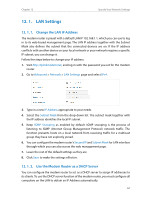
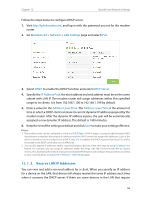
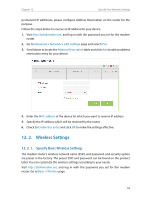
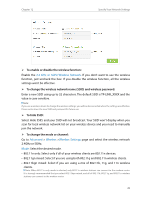
Chapter 12 Specify Your Network Settings 12. 1. LAN Settings 12. 1. 1. Change the LAN IP Address The modem router is preset with a default LAN IP 192.168.1.1, which you can use to log in to its web-based management page. The LAN IP address together with the Subnet Mask also defines the subnet that the connected devices are on. If the IP address conflicts with another device on your local network or your network requires a specific IP subnet, you can change it. Follow the steps below to change your IP address. 1. Visit http://tplinkmodem.net, and log in with the password you set for the modem router. 2. Go to Advanced > Network > LAN Settings page and select IPv4. 3. Type in a new IP Address appropriate to your needs. 4. Select the Subnet Mask from the drop-down list. The subnet mask together with the IP address identifies the local IP subnet. 5. Keep IGMP Snooping as enabled by default. IGMP snooping is the process of listening to IGMP (Internet Group Management Protocol) network traffic. The function prevents hosts on a local network from receiving traffic for a multicast group they have not explicitly joined. 6. You can configure the modem router's Second IP and Subnet Mask for LAN interface through which you can also access the web management page. 7. Leave the rest of the default settings as they are. 8. Click Save to make the settings effective. 12. 1. 2. Use the Modem Router as a DHCP Server You can configure the modem router to act as a DHCP server to assign IP addresses to its clients. To use the DHCP server function of the modem router, you must configure all computers on the LAN to obtain an IP Address automatically. 67
-
 1
1 -
2
-
3
-
4
-
5
-
6
-
7
-
8
-
9
-
10
-
11
-
12
-
13
-
14
-
15
-
16
-
17
-
18
-
19
-
20
-
21
-
22
-
23
-
24
-
25
-
26
-
27
-
28
-
29
-
30
-
31
-
32
-
33
-
34
-
35
-
36
-
37
-
38
-
39
-
40
-
41
-
42
-
43
-
44
-
45
-
46
-
47
-
48
-
49
-
50
-
51
-
52
-
53
-
54
-
55
-
56
-
57
-
58
-
59
-
60
-
61
-
62
-
63
-
64
-
65
-
 66
66 -
 67
67 -
 68
68 -
 69
69 -
 70
70 -
 71
71 -
 72
72 -
 73
73 -
 74
74 -
 75
75 -
 76
76 -
77
-
78
-
79
-
80
-
81
-
82
-
83
-
84
-
85
-
86
-
87
-
88
-
89
-
90
-
91
-
92
-
93
-
94
-
95
-
96
-
97
-
98
-
99
-
100
-
101
-
102
-
103
-
104
-
105
-
106
-
107
-
108
-
109
-
110
-
111
-
112
-
113
-
114
-
115
-
116
-
117
-
118
-
119
-
120
-
121
-
122
 |
 |
