TP-Link EAP110-Outdoor EAP110-OutdoorEU V1 Installation Guide - Page 11
Option 2: Wall Mounting
 |
View all TP-Link EAP110-Outdoor manuals
Add to My Manuals
Save this manual to your list of manuals |
Page 11 highlights
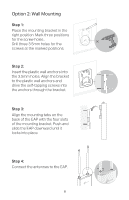
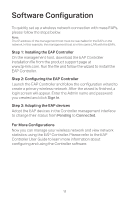
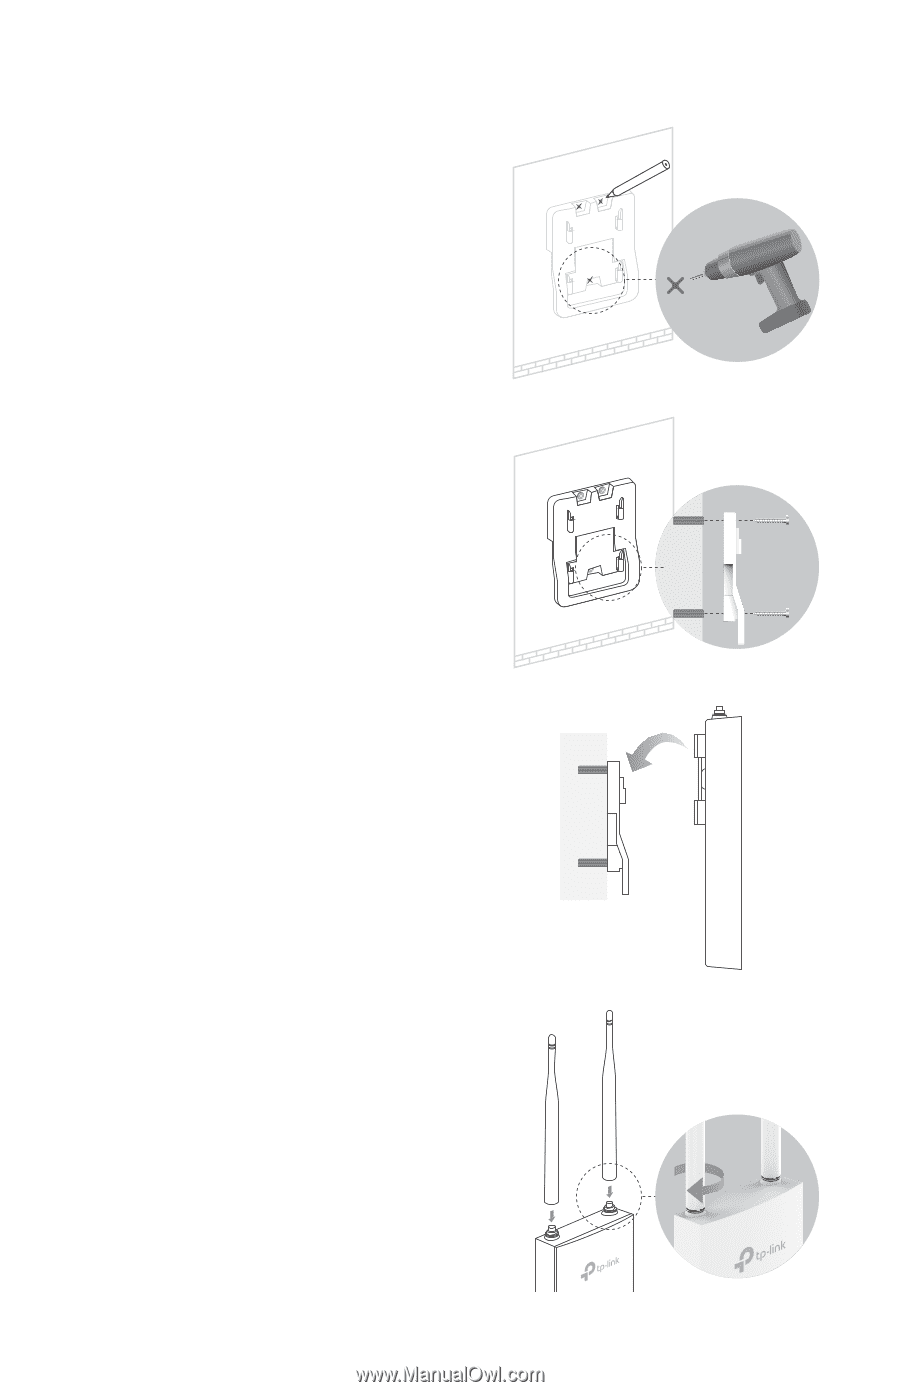
Option 2: Wall Mounting Step 1: Place the mounting bracket in the right position. Mark three positions for the screw holes . Drill three 3.5mm holes for the screws at the marked positions. Step 2: Insert the plastic wall anchors into the 3.5mm holes. Align the bracket to the plastic wall anchors and drive the self-tapping screws into the anchors through the bracket. Step 3: Align the mounting tabs on the back of the EAP with the four slots of the mounting bracket. Push and slide the EAP downward until it locks into place. Step 4: Connect the antennas to the EAP. 8
-
 1
1 -
2
-
3
-
4
-
5
-
 6
6 -
 7
7 -
 8
8 -
 9
9 -
 10
10 -
 11
11 -
 12
12 -
 13
13 -
 14
14 -
 15
15 -
 16
16
 |
 |
8
Option 2: Wall Mounting
Step 4:
Connect the antennas to the EAP.
Step 1:
Place the mounting bracket in the
right position. Mark three positions
for the screw holes .
Drill three 3.5mm holes for the
screws at the marked positions.
Step 2:
Insert the plastic wall anchors into
the 3.5mm holes. Align the bracket
to the plastic wall anchors and
drive the self-tapping screws into
the anchors through the bracket.
Step 3:
Align the mounting tabs on the
back of the EAP with the four slots
of the mounting bracket. Push and
slide the EAP downward until it
locks into place.