TP-Link RE580D RE580DUS V1.0.0 User Guide - Page 27
Modify or Remove a Device in the Blacklist/Whitelist, Device Name, MAC Address
 |
View all TP-Link RE580D manuals
Add to My Manuals
Save this manual to your list of manuals |
Page 27 highlights
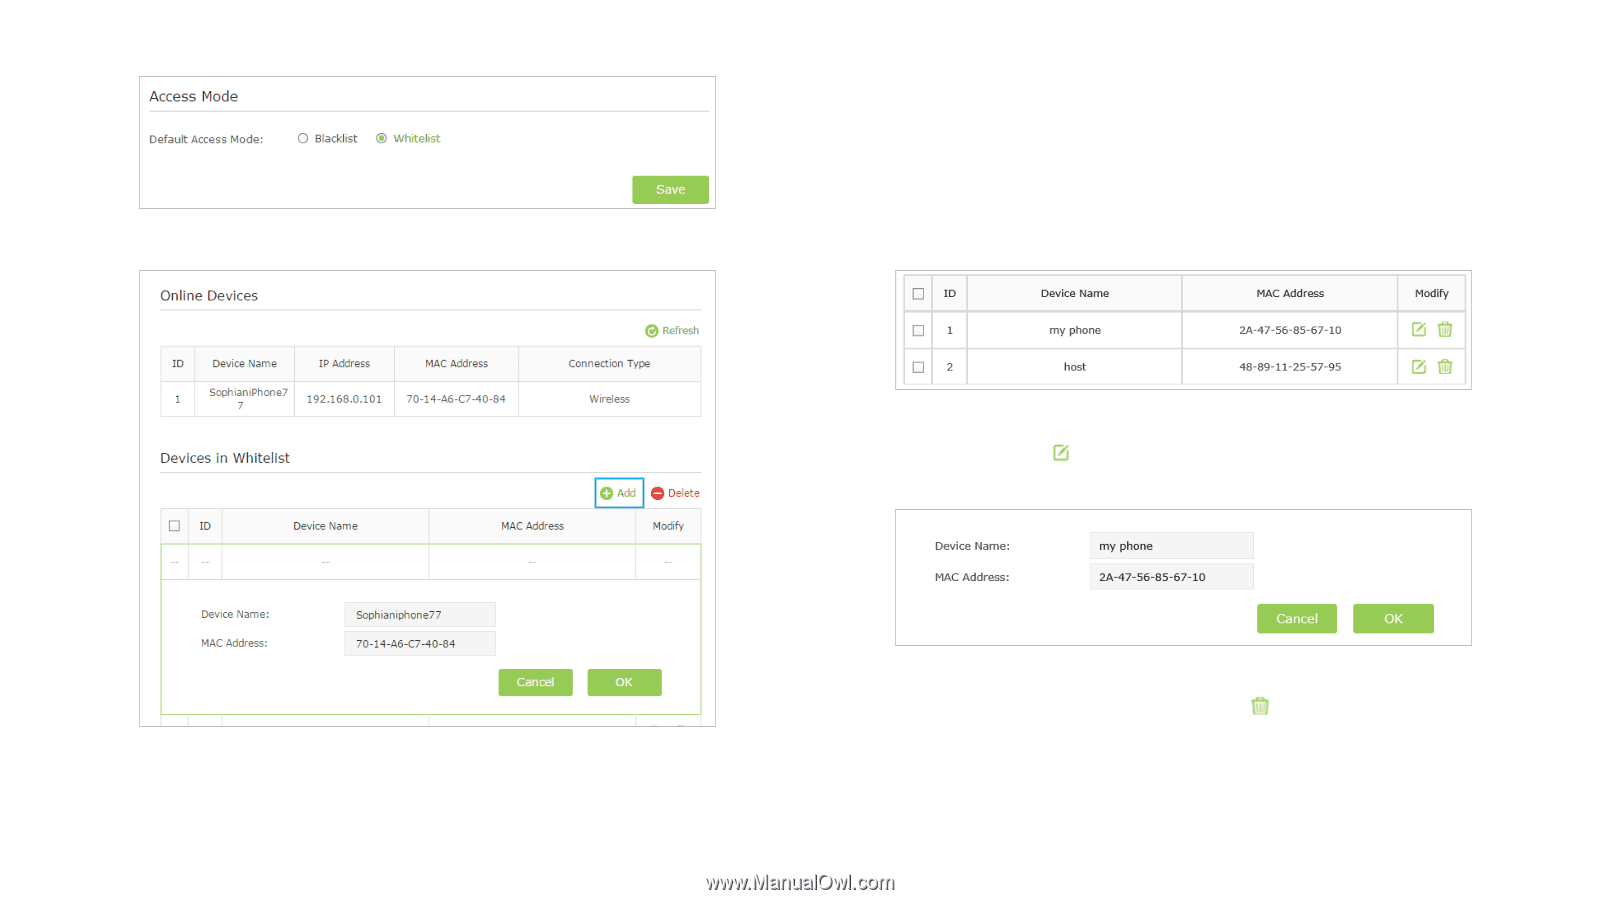
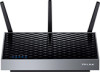
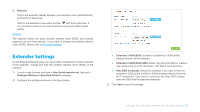
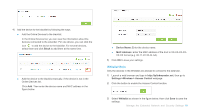
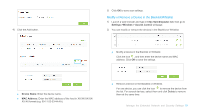
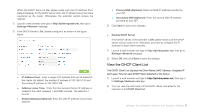
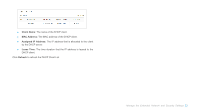
4) Click the Add button. 5) Click OK to save your settings. Modify or Remove a Device in the Blacklist/Whitelist 1) Launch a web browser and type in http://tplinkrepeater.net, then go to Settings->Wireless-> Access Control webpage. 2) You can modify or remove the devices in the Blacklist or Whitelist. ● Modify a Device in the Blacklist or Whitelist. Click the icon , and then enter the device name and MAC address. Click OK to save the setings. Device Name: Enter the device name. MAC Address: Enter the MAC address of the host in XX-XX-XX-XXXX-XX format (e.g. 00-11-22-33-44-AA). ● Remove a Device in the Blacklist or Whitelist. For one device, you can click the icon to remove the device from the list. For several devices, select them and click Delete to remove them at the same time. Manage the Extended Network and Security Settings 19
-
 1
1 -
2
-
3
-
4
-
5
-
6
-
7
-
8
-
9
-
10
-
11
-
12
-
13
-
14
-
15
-
16
-
17
-
18
-
19
-
20
-
21
-
 22
22 -
 23
23 -
 24
24 -
 25
25 -
 26
26 -
 27
27 -
 28
28 -
 29
29 -
 30
30 -
 31
31 -
 32
32 -
33
-
34
-
35
-
36
-
37
-
38
-
39
 |
 |