Thermador PCG366W Installation Instructions - Page 17
Low backguard installation (optional), WARNING, To install the low backguard
 |
View all Thermador PCG366W manuals
Add to My Manuals
Save this manual to your list of manuals |
Page 17 highlights
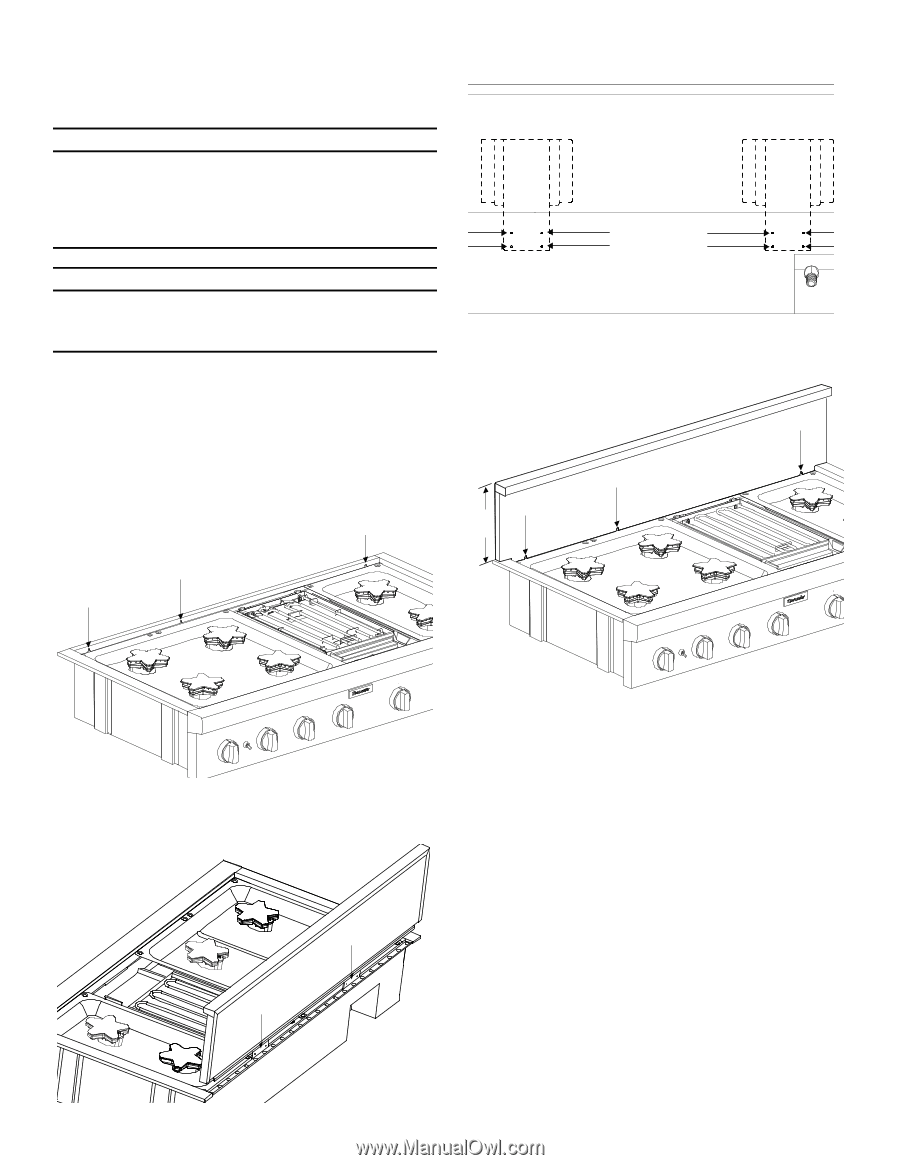
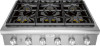
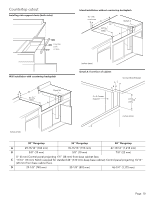
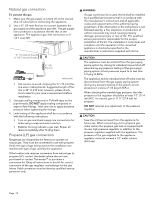
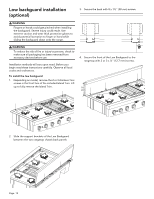
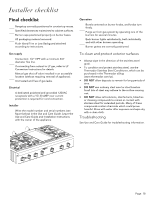
Low backguard installation (optional) 3. Secure the back with 8 x 1½'' (38 mm) screws. 9 WARNING Fingers or hands could get pinched when installing the backguard. Severe injury could result. Use extreme caution and wear thick protective gloves to avoid potential laceration to finger or hand while sliding the backguard down onto the range. 9 WARNING To reduce the risk of fire or injury to persons, check to make sure all packaging has been removed from accessory devices before use. Installation methods will vary upon need. Before you begin read these instructions carefully. Observe all local codes and ordinances. To install the low backguard 1. Depending on model, remove the 2 or 3 stainless Torx screws in the front face of the included Island Trim. Lift up to fully remove the Island Trim. 4. Secure the front of the Low Backguard to the rangetop with 2 or 3 x ½'' (12.7 mm) screws. 9½" (239) 2. Slide the support brackets of the Low Backguard between the two rangetop chassis back panels. Page. 15
-
 1
1 -
2
-
3
-
4
-
5
-
6
-
7
-
8
-
9
-
10
-
11
-
 12
12 -
 13
13 -
 14
14 -
 15
15 -
 16
16 -
 17
17 -
 18
18 -
 19
19 -
 20
20 -
 21
21 -
 22
22 -
23
-
24
-
25
-
26
-
27
-
28
-
29
-
30
-
31
-
32
-
33
-
34
-
35
-
36
-
37
-
38
-
39
-
40
-
41
-
42
-
43
-
44
-
45
-
46
-
47
-
48
-
49
-
50
-
51
-
52
-
53
-
54
-
55
-
56
-
57
-
58
-
59
-
60
 |
 |