Thermador PCG366W Installation Instructions - Page 20
Installer checklist, Final checklist
 |
View all Thermador PCG366W manuals
Add to My Manuals
Save this manual to your list of manuals |
Page 20 highlights
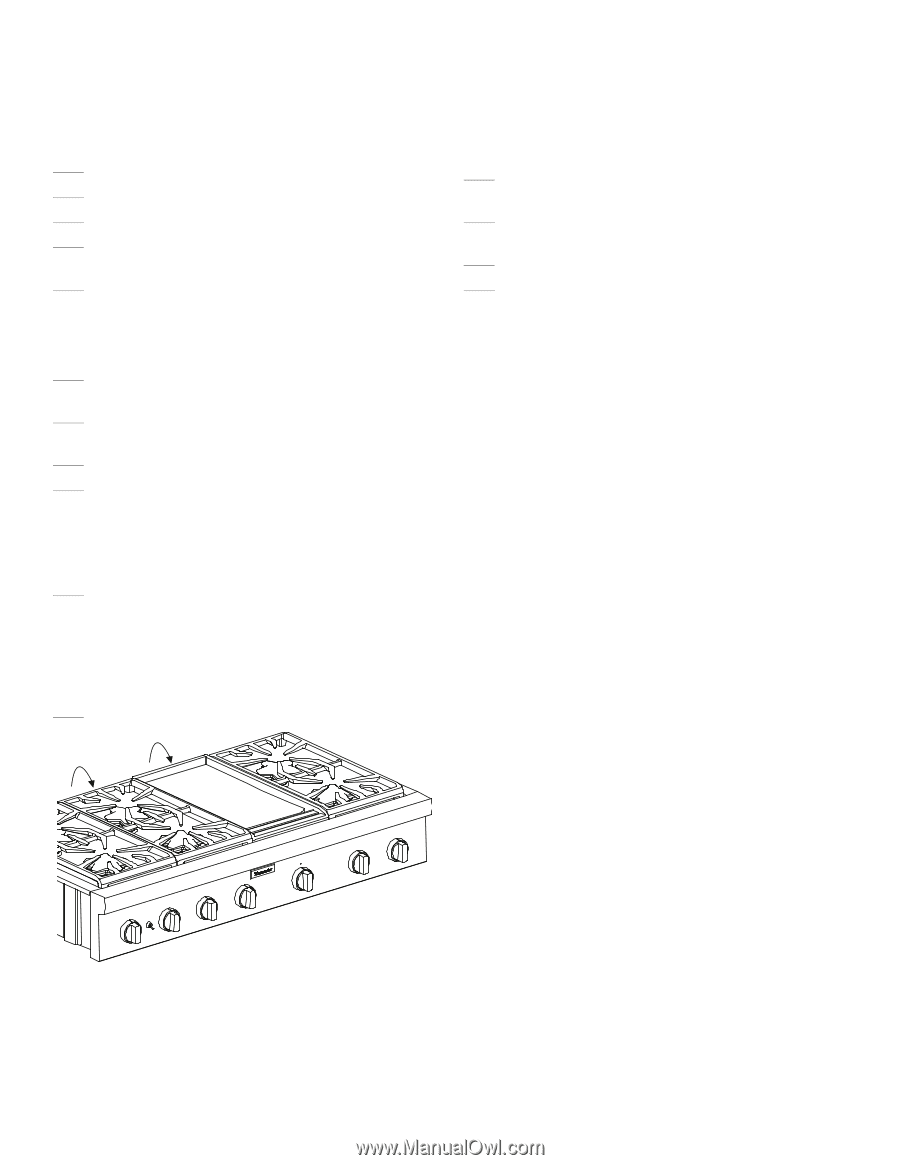
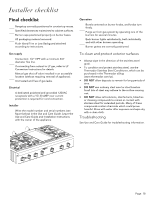
Installer checklist Final checklist Rangetop correctly positioned in countertop recess. Specified clearances maintained to cabinet surfaces. Burner caps positioned properly on burner bases. All packaging material removed. Flush Island Trim or Low Backguard attached according to instructions. Gas supply Connection: 1/2'' NPT with a minimum 3/4'' diameter flex line. If converting from natural to LP gas, refer to LP Conversion Instructions for details. Manual gas shut off valve installed in an accessible location (without requiring removal of appliance). Unit tested and free of gas leaks. Electrical A dedicated polarized and grounded 120VAC receptacle with a 15/ 20 AMP over current protection is required for cord connection. Installer Write the model number and serial numbers (see figure below) in the Use and Care Guide. Leave the Use and Care Guide and Installation Instructions with the owner of the appliance. Operation Bezels centered on burner knobs, and knobs turn freely. Purge air from gas system by operating one of the burners for several minutes. Each burner lights satisfactorily, both individually and with other burners operating. Burner grates are correctly positioned. To clean and protect exterior surfaces • Always wipe in the direction of the stainless steel grain. • To condition and protect stainless steel, use the Thermador Stainless Steel Conditioner, which can be purchased in the Thermador eShop (store.thermador.com/us). • DO NOT allow deposits to remain for long periods of time. • DO NOT use ordinary steel wool or steel brushes. Small bits of steel may adhere to the surface causing rust. • DO NOT allow salt solutions, disinfectants, bleaches or cleaning compounds to remain in contact with stainless steel for extended periods. Many of these compounds contain chemicals which could prove harmful. Rinse with water after exposure and wipe dry with a clean cloth. Troubleshooting See Use and Care Guide for troubleshooting information. Page. 18
-
 1
1 -
2
-
3
-
4
-
5
-
6
-
7
-
8
-
9
-
10
-
11
-
12
-
13
-
14
-
 15
15 -
 16
16 -
 17
17 -
 18
18 -
 19
19 -
 20
20 -
 21
21 -
 22
22 -
 23
23 -
 24
24 -
 25
25 -
26
-
27
-
28
-
29
-
30
-
31
-
32
-
33
-
34
-
35
-
36
-
37
-
38
-
39
-
40
-
41
-
42
-
43
-
44
-
45
-
46
-
47
-
48
-
49
-
50
-
51
-
52
-
53
-
54
-
55
-
56
-
57
-
58
-
59
-
60
 |
 |