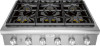
Thermador PCG366W Installation Instructions - Page 7
Installation instructions, Planning information, Ventilation requirements - 36
 |
View all Thermador PCG366W manuals
Add to My Manuals
Save this manual to your list of manuals |
Page 7 highlights
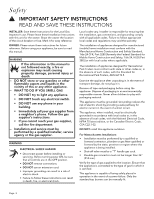
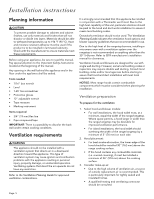
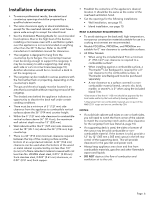
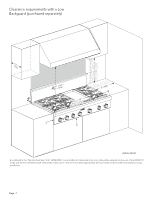
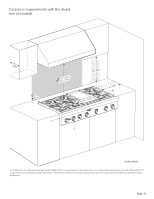
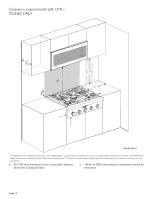
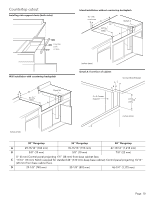
Installation instructions Planning information 9 CAUTION To prevent possible damage to cabinets and cabinet finishes, use only materials and finishes that will not discolor or divide into layers. Materials should be able to withstand temperatures up to 194 °F (90 °C). Heat and moisture resistant adhesive must be used if the product is to be installed in laminated cabinetry. Check with the manufacturer to ensure materials meet these requirements. Before using your appliance, be sure to read this manual. Pay special attention to the Important Safety Instructions located at the beginning of the manual. Any opening in the wall behind the appliance and in the floor under the appliance shall be sealed. Tools needed • 7/16'' box wrench • Level • T-20 Torx screwdriver • Protective gloves • 12'' adjustable wrench • Tape measure • Marking instrument Items required • 3/4'' (19 mm) flex line • Pipe compound/tape IMPORTANT: There is a possibility to discolor the back wall under certain cooking conditions. Ventilation requirements 9 WARNING This appliance should not be installed with a ventilation system that directs air in a downward direction toward the appliance. This type of ventilation system may cause ignition and combustion problems with the appliance resulting in personal injury, property damage, or unintended operation. Ventilating systems that direct the air upwards do not have any restriction. Refer to the Ventilation Planning Guide for approved ventilation combinations. It is strongly recommended that this appliance be installed in conjunction with a Thermador vent hood. Due to the high heat capability of this unit, particular attention should be paid to the hood and duct work installation to assure it meets local building codes. Downdraft ventilation should not be used. The Ventilation Planning Guide indicates the ventilation hood options and blower capacity guidelines that are recommended for use. Due to the high heat of the rangetop burners, installing a microwave oven with a ventilation system over the rangetop is not recommended on anything other than the 30'' 5-Burner. Refer to OTR manufacturer's installation manual for clearances. Ventilation hoods and blowers are designed for use with single wall ducting. However, some local building codes or inspectors may require double wall ducting. Consult local building codes and/or local agencies before starting to assure that hood and duct installation will meet local requirements. NOTICE: Most range hoods contain combustible components which must be considered when planning the installation. Ventilation preparation To prepare for the ventilation 1. Select hood and blower models: • For wall installations, the hood width must, at a minimum, equal the width of the range/rangetop. Where space permits, a hood larger in width than the range/rangetop may be desirable for improved ventilation performance. • For island installations, the hood width should overhang the width of the range/rangetop by a minimum of 3'' (76 mm) on each side. 2. Hood placement: • For best smoke elimination, the lower edge of the hood should be installed 30'' (762 mm) above the range cooking surface. • If the hood contains any combustible materials (i.e. a wood covering), it must be installed a minimum of 36'' (914 mm) above the cooking surface. 3. Consider make-up air: • Due to the high volume of ventilation air, a source of outside replacement air is recommended. This is particularly important for tightly sealed and insulated homes. • A qualified heating and ventilating contractor should be consulted. Page. 5
-
 1
1 -
 2
2 -
 3
3 -
 4
4 -
 5
5 -
 6
6 -
 7
7 -
 8
8 -
 9
9 -
 10
10 -
 11
11 -
 12
12 -
13
-
14
-
15
-
16
-
17
-
18
-
19
-
20
-
21
-
22
-
23
-
24
-
25
-
26
-
27
-
28
-
29
-
30
-
31
-
32
-
33
-
34
-
35
-
36
-
37
-
38
-
39
-
40
-
41
-
42
-
43
-
44
-
45
-
46
-
47
-
48
-
49
-
50
-
51
-
52
-
53
-
54
-
55
-
56
-
57
-
58
-
59
-
60
 |
 |