Thermador PRG366WH Installation Instructions - Page 16
Installing the anti-tip bracket, required
 |
View all Thermador PRG366WH manuals
Add to My Manuals
Save this manual to your list of manuals |
Page 16 highlights
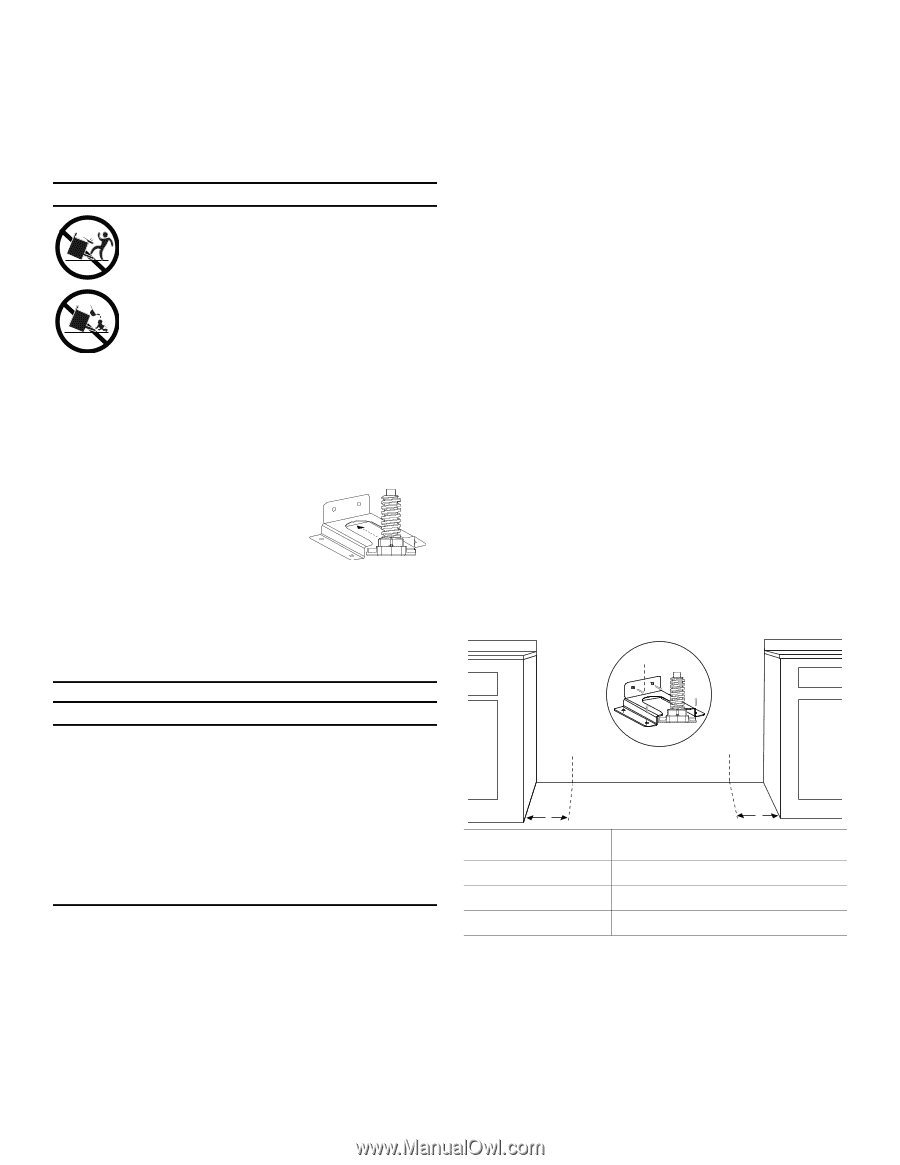
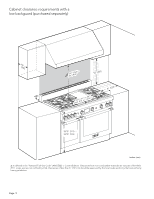
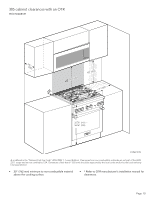
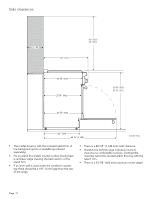
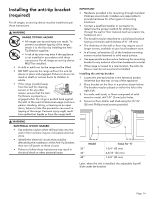
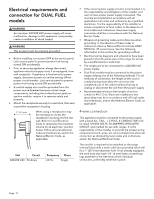
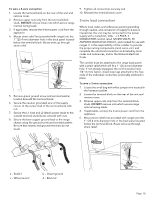
Installing the anti-tip bracket (required) For all ranges, an anti-tip device must be installed as per these instructions. 9 WARNING RANGE TIPPING HAZARD • All ranges can tip and injury can result. To prevent accidental tipping of the range, attach it to the floor by installing the AntiTip Bracket supplied. • A risk of tip-over may exist if the appliance is not installed in accordance with these instructions. For all ranges an anti-tip device MUST be installed. • A child or adult can tip the range and be killed. • DO NOT operate the range without the anti-tip device in place and engaged. Failure to do so can result in death or serious burns to children or adults. • If the range is pulled away from the wall for cleaning, service or for any other reason, ensure that the AntiTip Device is properly reengaged when the range is pushed back against the wall. In the event of abnormal usage (such as a person standing, sitting, or leaning on an open door), failure to take this precaution can result in tipping of the range. Personal injury might result from spilled hot liquids or from the range itself. IMPORTANT: • Hardware provided is for mounting through standard thickness wood studs. Installers are responsible to provide hardware for other types of mounting situations. • Contact a qualified installer or contractor to determine the proper method for drilling holes through the wall or floor material (such as ceramic tile, hardwood, etc.) • The bracket may be attached to a solid wood surface having a minimum wall thickness of ¾'' (19 mm). • The thickness of the wall or floor may require use of longer screws, available at your local hardware store. • In all cases, at least two (2) of the bracket mounting screws must be fastened to solid wood surface. • Use appropriate anchors when fastening the mounting bracket to any material other than hardwood or metal. • If the range is moved to a new location, the Anti-Tip Device must be removed and reinstalled. Installing the anti-tip bracket 1. Locate the anti-tip bracket in the literature packet, inside the box that was on top of the appliance. 2. Place bracket on the floor in a position shown below. The bracket may be placed on either the left or the right side. 3. For walls, wall studs, or floors composed of solid wood or metal, drill 1/8'' (3 mm) pilot holes. 4. Secure to floor and/or wall stud using the (4) 1½'' (38 mm) Phillips head screws provided. CL 9 WARNING ELECTRICAL SHOCK HAZARD • Use extreme caution when drilling holes into the wall or floor as there may be concealed electrical wires. • Identify the electrical circuits that could be affected by the installation of the Anti-Tip Bracket, then turn off power to these circuits. • Failure to follow these instructions may result in electrical shock or other personal injury. CL CL x Model 30'' 36'' 48'' x Value for 'X' 1-3/4'' (45 mm) 2-3/16'' (56 mm) 1-3/4'' (45 mm) Later, when the unit is installed, the adjustable leg will slide under the bracket. Page. 14
-
 1
1 -
2
-
3
-
4
-
5
-
6
-
7
-
8
-
9
-
10
-
 11
11 -
 12
12 -
 13
13 -
 14
14 -
 15
15 -
 16
16 -
 17
17 -
 18
18 -
 19
19 -
 20
20 -
 21
21 -
22
-
23
-
24
-
25
-
26
-
27
-
28
-
29
-
30
-
31
-
32
-
33
-
34
-
35
-
36
-
37
-
38
-
39
-
40
-
41
-
42
-
43
-
44
-
45
-
46
-
47
-
48
-
49
-
50
-
51
-
52
-
53
-
54
-
55
-
56
-
57
-
58
-
59
-
60
-
61
-
62
-
63
-
64
-
65
-
66
-
67
-
68
-
69
-
70
-
71
-
72
-
73
-
74
-
75
-
76
-
77
-
78
-
79
-
80
 |
 |