Thermador PRG366WH Installation Instructions - Page 23
Placing and leveling the range
 |
View all Thermador PRG366WH manuals
Add to My Manuals
Save this manual to your list of manuals |
Page 23 highlights
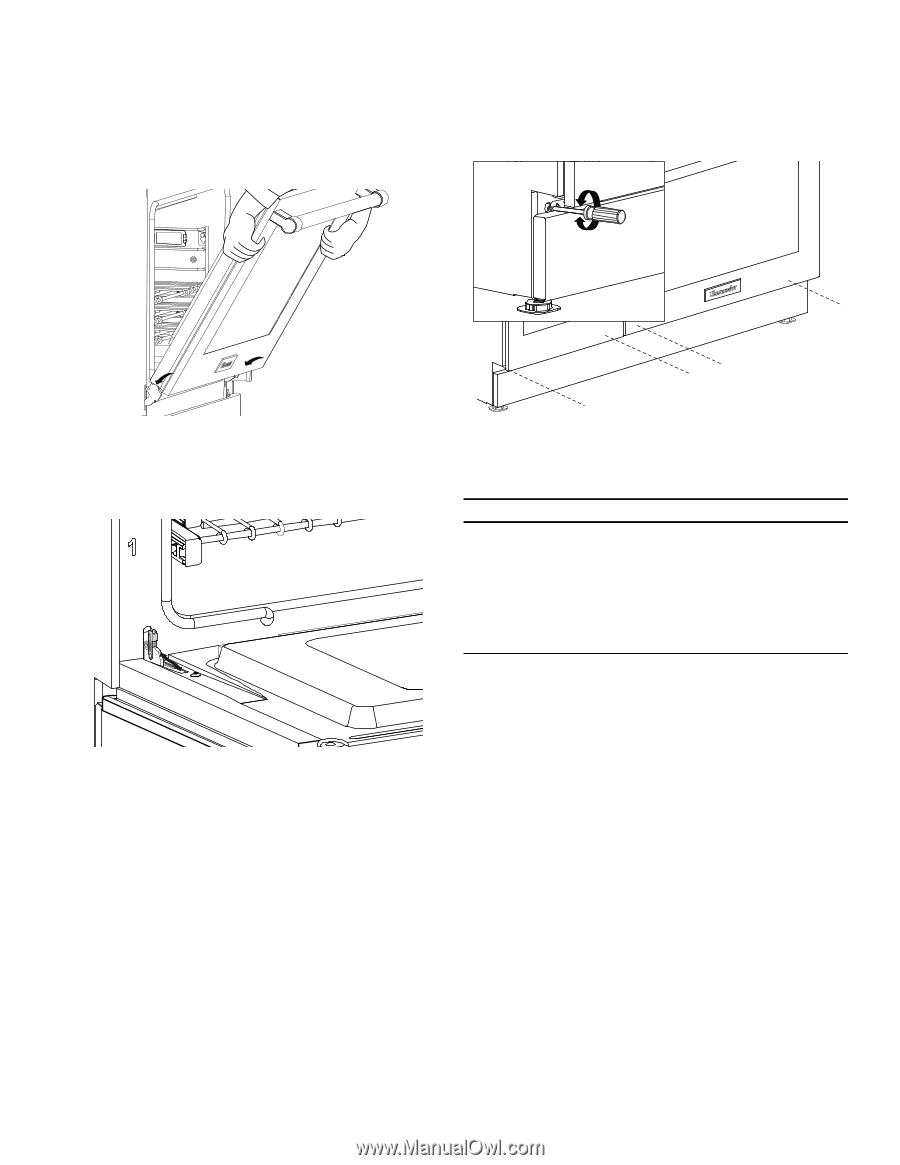
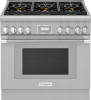
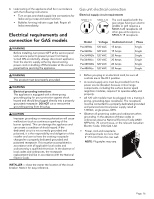
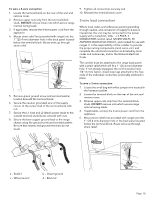
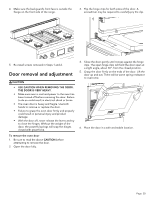
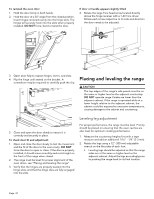
To reinstall the oven door 1. Hold the door firmly in both hands. 2. Hold the door at a 30° angle from the closed position. Insert hinges centered evenly into the hinge slots. The hinges will securely hook into the slots when properly installed. DO NOT force, bend or twist the door. If door or handle appears slightly tilted 4. Rotate the large Torx head screw located directly above the hinge receiver with a T-30 Torx driver. Rotate each screw respective to its side and direction the door needs to be adjusted. 3. Open door fully to expose hinges, levers, and slots. 4. Flip the hinge until seated on the bracket. A screwdriver may be required to carefully push the clip. Placing and leveling the range 9 CAUTION The top edges of the range's side panels must be on the same or higher level as the adjacent countertop. DO NOT operate range if sides are lower than the adjacent cabinet. If the range is operated while at a lower height relative to the adjacent cabinet, the cabinet could be exposed to excessive temperatures, causing damage to the cabinet and countertop. 5. Close and open the door slowly to ensure it is correctly and securely in place. To check door fit and adjustment 1. Open and close the door slowly to test the movement and the fit of the door to the oven cavity. DO NOT force the door to open or close. If the door is properly installed, it should move smoothly and rest straight on the front of the range when closed. 2. The range must be level for proper alignment of the oven doors, see "Placing and leveling the range". 3. Verify that the hinges are properly seated into the hinge slots, and that the hinge clips are fully engaged into the slots. Leveling leg adjustment For proper performance, the range must be level. Priority should be placed on ensuring that the oven cavities are also level for optimum cooking performance. 1. Measure the countertop heights first with a tape measure and add an additional 1/16'' - 1/8'' (2-3 mm). 2. Rotate the legs using a 12'' (305 mm) adjustable wrench on the flat sides of each foot. • Leveling legs should be adjusted so that the range sides are at the same or higher level as the adjacent cabinet. Adjust the legs accordingly prior to pushing the range back to its final location. Page. 21
-
 1
1 -
2
-
3
-
4
-
5
-
6
-
7
-
8
-
9
-
10
-
11
-
12
-
13
-
14
-
15
-
16
-
17
-
 18
18 -
 19
19 -
 20
20 -
 21
21 -
 22
22 -
 23
23 -
 24
24 -
 25
25 -
 26
26 -
 27
27 -
 28
28 -
29
-
30
-
31
-
32
-
33
-
34
-
35
-
36
-
37
-
38
-
39
-
40
-
41
-
42
-
43
-
44
-
45
-
46
-
47
-
48
-
49
-
50
-
51
-
52
-
53
-
54
-
55
-
56
-
57
-
58
-
59
-
60
-
61
-
62
-
63
-
64
-
65
-
66
-
67
-
68
-
69
-
70
-
71
-
72
-
73
-
74
-
75
-
76
-
77
-
78
-
79
-
80
 |
 |