TomTom ONE 140 Quick Start Guide - Page 8
How to plan your first route - gps navigation system
 |
UPC - 636926029711
View all TomTom ONE 140 manuals
Add to My Manuals
Save this manual to your list of manuals |
Page 8 highlights
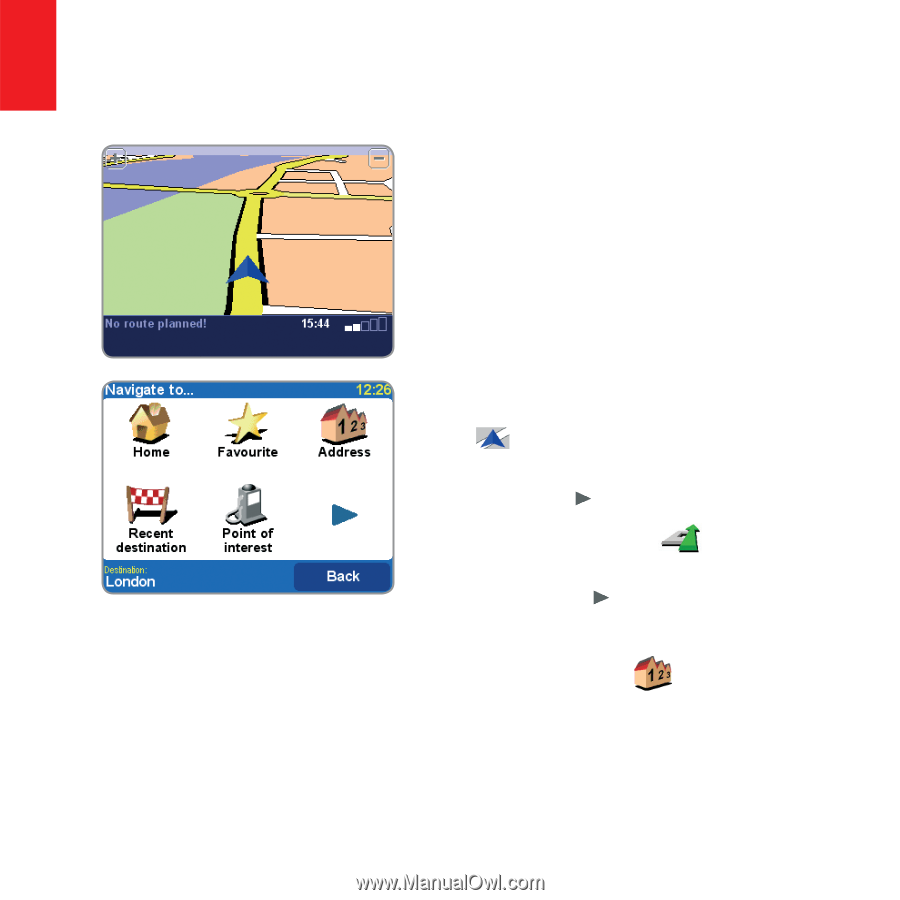
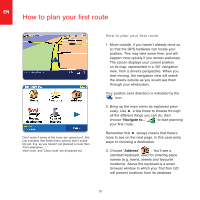
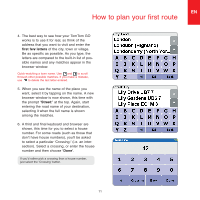
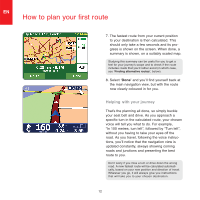
EN How to plan your first route Don't worry if some of the icons are 'greyed out', this just indicates that these menu options aren't available yet. E.g. as you haven't yet planned a route then 'Find alternative...', ' View route' and 'Clear route' are all greyed out. How to plan your first route 1. Move outside, if you haven't already done so, so that the GPS hardware can locate your position. This may take some time, and will happen more quickly if you remain stationary. The screen displays your current position on its map, represented in a '3D' navigation view, from a driver's perspective. When you start moving, the navigation view will match the streets outside as you would see them through your windscreen. Your position (and direction) is indicated by the icon. 2. Bring up the main menu as explained previ- ously. Use a few times to browse through all the different things you can do, then choose 'Navigate to...' to start planning your first route. Remember that always means that there's more to see on the next page, in this case extra ways of choosing a destination. 3. Choose 'Address' . You'll see a standard keyboard, used for entering place names (e.g. towns, streets and favourite locations). Above the keyboard is a small browser window in which your TomTom GO will present locations from its database. 10
-
 1
1 -
2
-
 3
3 -
 4
4 -
 5
5 -
 6
6 -
 7
7 -
 8
8 -
 9
9 -
 10
10 -
 11
11 -
 12
12 -
 13
13 -
14
-
15
-
16
-
17
-
18
-
19
-
20
-
21
-
22
 |
 |