Toshiba Air10 User Guide - Page 51
To install the bundled software from the camcorder, CAMILEO® AIR10 Connect
 |
View all Toshiba Air10 manuals
Add to My Manuals
Save this manual to your list of manuals |
Page 51 highlights
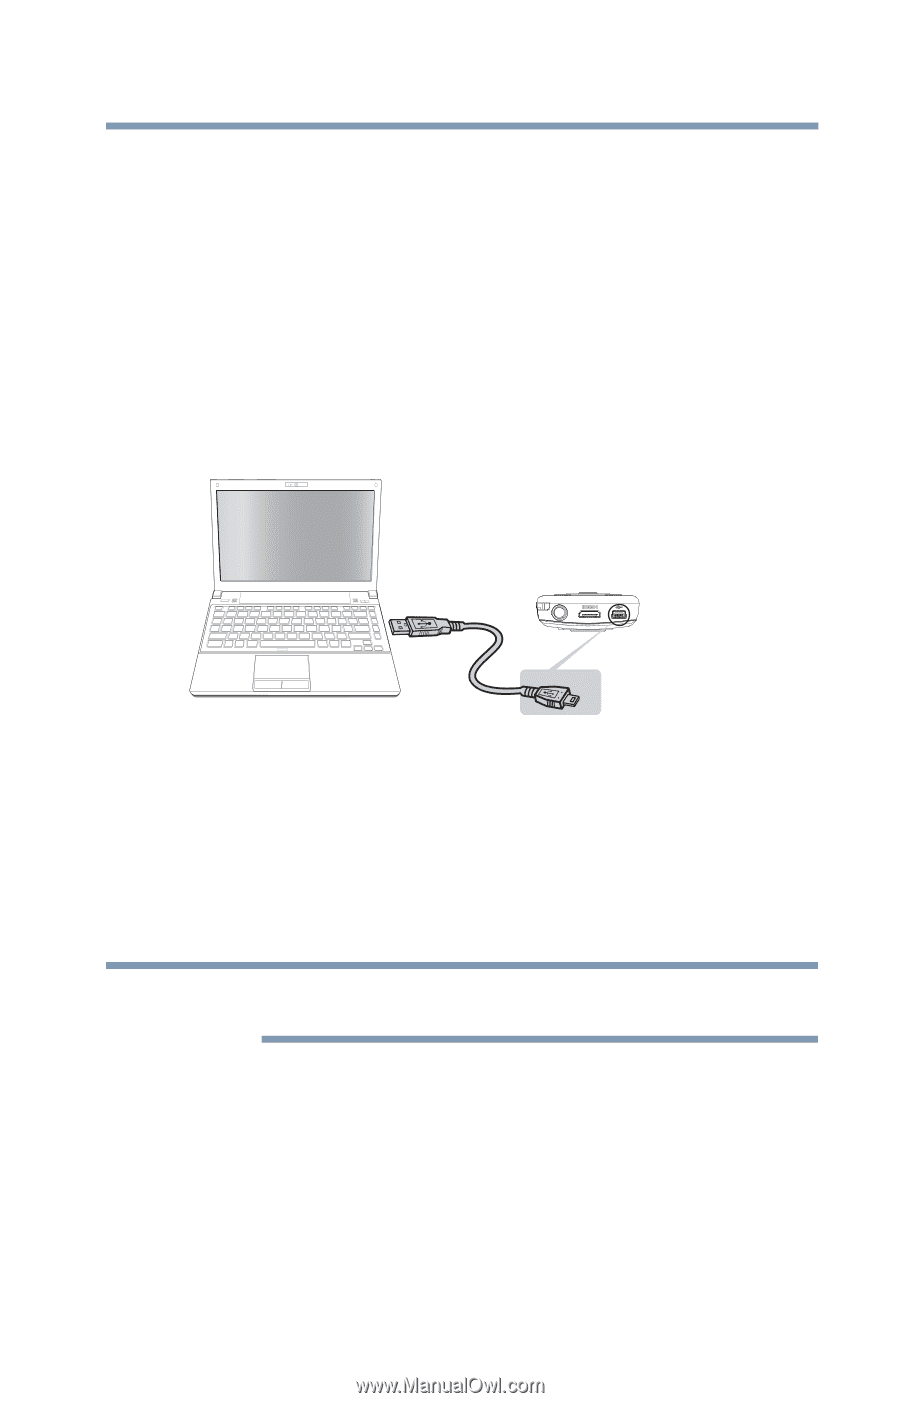
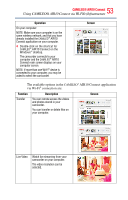
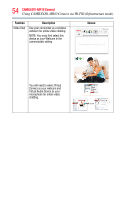
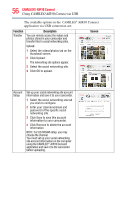
51 CAMILEO® AIR10 Connect Installing CAMILEO® AIR10 Connect install this program. It is a perfect platform to watch live streaming video from your camcorder and use the camcorder as a webcam for your online video chatting. The application also facilitates the configuration of the Wi-Fi® profiles and your social networking site account information. Follow the steps below to install the CAMILEO® AIR10 Connect application on the computer. The program pack is bundled in the camera and on the CD as backup. To install the bundled software from the camcorder: 1 Connect the camcorder to your computer via the included Mini USB cable. (Sample Illustration) Connecting to your computer 2 When the USB connection is made to your computer for the first time, up to three AutoPlay screens will appear on your computer. CD Drive (x:) AIR10_Connect -- CAMILEO® AIR10 Connect Application DV (x:) -- Internal memory of the camcorder Removable Disk (x:) -- Only shows if an SD card is installed in the camcorder NOTE The AutoPlay screens may load on top of one another. Simply drag them into view. Check your taskbar if you do not see them. If the CAMILEO® AIR10 Connect application does not start to install automatically, click on the CAMILEO® AIR10 Connect application. Depending on your computer settings during installation, up to three User Account Control screens (listed below) may pop up during the CAMILEO® AIR10 Connect installation process. Click OK on each one to proceed. Microsoft Visual C++ Setup.exe AIR10_Connect.exe Follow the onscreen instructions to complete the installation.
-
 1
1 -
2
-
3
-
4
-
5
-
6
-
7
-
8
-
9
-
10
-
11
-
12
-
13
-
14
-
15
-
16
-
17
-
18
-
19
-
20
-
21
-
22
-
23
-
24
-
25
-
26
-
27
-
28
-
29
-
30
-
31
-
32
-
33
-
34
-
35
-
36
-
37
-
38
-
39
-
40
-
41
-
42
-
43
-
44
-
45
-
 46
46 -
 47
47 -
 48
48 -
 49
49 -
 50
50 -
 51
51 -
 52
52 -
 53
53 -
 54
54 -
 55
55 -
 56
56 -
57
-
58
-
59
-
60
-
61
-
62
-
63
-
64
-
65
-
66
-
67
-
68
-
69
-
70
-
71
-
72
-
73
-
74
 |
 |