Toshiba D-VR4SU Owners Manual - Page 22
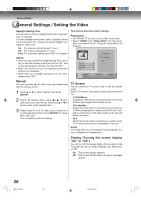
Auto clock setting / Setting the video channel - manual
 |
View all Toshiba D-VR4SU manuals
Add to My Manuals
Save this manual to your list of manuals |
Page 22 highlights
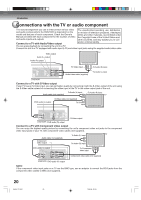
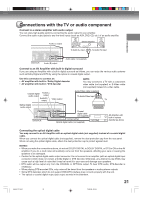
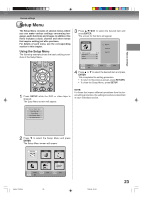
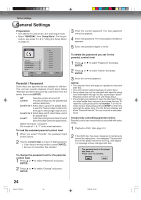
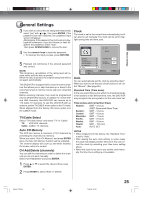
Introduction Auto clock setting / Setting the video channel Auto clock setting Preparation: You must connect the antenna or cable before connecting the AC cord to the power source. After the antenna or cable is connected, wait for at least 3 minutes with the power turned off for the auto clock feature to activate. After the clock is set automatically, you may have to set the Standard Time (time zone) and Daylight Saving Time. (See page 25 and 26.) Press ON/STANDBY to turn on the DVD/VCR after the auto clock operation completed. • When shipped from factory, the "CLOCK" setting is set to "Auto" posi- tion. • If you turn the DVD/VCR on during auto clock setting, the clock is not set. • Depending on the reception condition, auto clock setting may take approx. 30 minutes. • After a power failure or disconnection of the power plug, the clock will be lost. In this case, wait 3 minutes before turning the DVD/VCR on. • With cable box connection, if the auto clock setting is unsuccessful, select the PBS channel carrying the XDS information, then turn the DVD/VCR off. After 3 minutes, turn the DVD/VCR on. • If the clock is not set automatically, set the clock manually. (See page 26.) Setting the video channel To view playback of a recorded tape or DVD disc, or to watch a program selected by the VCR's channel selector, the TV must be set to channel 3 or 4 (video channel). When a TV is connected with the 75 ohm coaxial cable only: 1 Press and hold 3 or 4 on the remote control for 3 seconds in the standby mode to select CH 3 or 4. The selected channel number will flash on the display for about 4 seconds. 2 Turn ON the TV and set to CH 3 or 4 to correspond with the channel selected in step 1. 3 Press ON/STANDBY to turn on the DVD/VCR. NOTES: • When shipped from factory, the video channel is set to CH 3. • If the unit does not operate prop- erly, or there is no key operation from the unit and/or the remote control: Static electricity, etc., may affect the operation. Disconnect the AC power cord once, then connect it again. 4 Press TV/VIDEO to select the VIDEO position. The TV indicator will disappear in the display. 5 Select any channel to receive a TV station in your area. The channel number will appear on the screen for about 4 seconds. For a push-button TV tuner If CH 3 or 4 corresponding to the video channel cannot be tuned on your TV, proceed as follows: set the VCR 3/4 channel selector and the TV to CH 3 or 4, playback a prerecorded tape and tune the TV to receive a sharp color picture from the video cassette recorder. Refer to your TV owner's manual for details. 22 2H5-01 P22-30 22 7/25/05, 23:19
-
 1
1 -
2
-
3
-
4
-
5
-
6
-
7
-
8
-
9
-
10
-
11
-
12
-
13
-
14
-
15
-
16
-
 17
17 -
 18
18 -
 19
19 -
 20
20 -
 21
21 -
 22
22 -
 23
23 -
 24
24 -
 25
25 -
 26
26 -
 27
27 -
28
-
29
-
30
-
31
-
32
-
33
-
34
-
35
-
36
-
37
-
38
-
39
-
40
-
41
-
42
-
43
-
44
-
45
-
46
-
47
-
48
-
49
-
50
-
51
-
52
-
53
-
54
-
55
-
56
-
57
-
58
-
59
-
60
-
61
-
62
-
63
-
64
-
65
-
66
-
67
-
68
-
69
-
70
-
71
-
72
-
73
-
74
-
75
-
76
-
77
-
78
-
79
-
80
-
81
-
82
-
83
-
84
-
85
-
86
-
87
-
88
-
89
-
90
-
91
-
92
 |
 |
