Toshiba KIRAbook 13 i7S1X Touch KIRAbook PSUC2U Windows 10 Users Guide - Page 48
Sample Image Create a recovery drive window, Be sure to save the information stored on your USB flash
 |
View all Toshiba KIRAbook 13 i7S1X Touch manuals
Add to My Manuals
Save this manual to your list of manuals |
Page 48 highlights
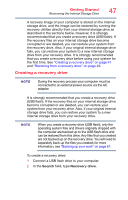
48 Getting Started Recovering the Internal Storage Drive 3 Click or touch Create a recovery drive. A message may appear asking you to allow this app to make changes to your PC. Click or touch the Yes button. (Sample Image) Create a recovery drive window 4 In the Create a recovery drive window click or touch Next. All information stored on your USB flash drive will be erased during the process of creating the recovery drive. Be sure to save the information stored on your USB flash drive to another storage device before executing this procedure. 5 Follow the on-screen prompts to complete the copy process. For information on using the recovery drive you have created with the preceding steps, see "Restoring from a recovery drive" on page 49.
-
 1
1 -
2
-
3
-
4
-
5
-
6
-
7
-
8
-
9
-
10
-
11
-
12
-
13
-
14
-
15
-
16
-
17
-
18
-
19
-
20
-
21
-
22
-
23
-
24
-
25
-
26
-
27
-
28
-
29
-
30
-
31
-
32
-
33
-
34
-
35
-
36
-
37
-
38
-
39
-
40
-
41
-
42
-
 43
43 -
 44
44 -
 45
45 -
 46
46 -
 47
47 -
 48
48 -
 49
49 -
 50
50 -
 51
51 -
 52
52 -
 53
53 -
54
-
55
-
56
-
57
-
58
-
59
-
60
-
61
-
62
-
63
-
64
-
65
-
66
-
67
-
68
-
69
-
70
-
71
-
72
-
73
-
74
-
75
-
76
-
77
-
78
-
79
-
80
-
81
-
82
-
83
-
84
-
85
-
86
-
87
-
88
-
89
-
90
-
91
-
92
-
93
-
94
-
95
-
96
-
97
-
98
-
99
-
100
-
101
-
102
-
103
-
104
-
105
-
106
-
107
-
108
-
109
-
110
-
111
-
112
-
113
-
114
-
115
-
116
-
117
-
118
-
119
-
120
-
121
-
122
-
123
-
124
-
125
-
126
-
127
-
128
-
129
-
130
-
131
-
132
-
133
-
134
-
135
-
136
-
137
-
138
-
139
-
140
-
141
-
142
-
143
-
144
-
145
-
146
-
147
-
148
-
149
-
150
-
151
-
152
-
153
-
154
-
155
-
156
-
157
-
158
-
159
-
160
-
161
-
162
-
163
-
164
-
165
-
166
-
167
-
168
-
169
-
170
-
171
-
172
-
173
-
174
-
175
 |
 |

48
Getting Started
Recovering the Internal Storage Drive
3
Click or touch
Create a recovery drive
.
A message may appear asking you to allow this app to
make changes to your PC. Click or touch the
Yes
button.
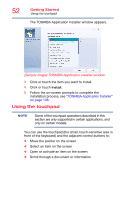
(Sample Image) Create a recovery drive window
4
In the Create a recovery drive window click or touch
Next
.
All information stored on your USB flash drive will be
erased during the process of creating the recovery drive.
Be sure to save the information stored on your USB flash
drive to another storage device before executing this
procedure.
5
Follow the on-screen prompts to complete the copy
process.
For information on using the recovery drive you have created
with the preceding steps, see
“Restoring from a recovery
drive” on page 49
.