Toshiba Qosmio F45-AV410 User Guide - Page 63
Directing the display output when you turn on the computer, Apply
 |
View all Toshiba Qosmio F45-AV410 manuals
Add to My Manuals
Save this manual to your list of manuals |
Page 63 highlights
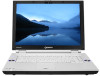
Getting Started Using external display devices 63 4 Click Apply, then click OK to close the Display Settings window. The screen is now displayed correctly on your TV. For more information, see "Directing the display output when you turn on the computer" on page 63. Connecting an external monitor or projector You can easily attach an external monitor or projector to your computer if you need a larger screen or to display anything on your computer screen. To do this: 1 Connect the monitor's video cable to the RGB (monitor) port on the back of the computer. 2 Connect the device's power cable to a live electrical outlet. 3 Turn on the external device. Your computer will automatically detect the external display device and activate a screen with display options. 4 Select the settings you desire and click Apply. 5 Click OK. Directing the display output when you turn on the computer Once you connect an external display device, you can choose to use the internal display only, the external device only, or both simultaneously. NOTE Some modes are only available with the appropriate device attached and turned on. The quickest way to change the display output settings is to use the display hot key (Fn + F5): 1 While holding down Fn, press F5 repeatedly, pausing between each press, until the setting you want takes effect. This hot key cycles through the settings in the following order: ❖ Built-in display only ❖ Built-in display and external monitor simultaneously ❖ External monitor only ❖ Built-in display and TV (or other external video device) simultaneously ❖ TV (or other external video device) only
-
 1
1 -
2
-
3
-
4
-
5
-
6
-
7
-
8
-
9
-
10
-
11
-
12
-
13
-
14
-
15
-
16
-
17
-
18
-
19
-
20
-
21
-
22
-
23
-
24
-
25
-
26
-
27
-
28
-
29
-
30
-
31
-
32
-
33
-
34
-
35
-
36
-
37
-
38
-
39
-
40
-
41
-
42
-
43
-
44
-
45
-
46
-
47
-
48
-
49
-
50
-
51
-
52
-
53
-
54
-
55
-
56
-
57
-
 58
58 -
 59
59 -
 60
60 -
 61
61 -
 62
62 -
 63
63 -
 64
64 -
 65
65 -
 66
66 -
 67
67 -
 68
68 -
69
-
70
-
71
-
72
-
73
-
74
-
75
-
76
-
77
-
78
-
79
-
80
-
81
-
82
-
83
-
84
-
85
-
86
-
87
-
88
-
89
-
90
-
91
-
92
-
93
-
94
-
95
-
96
-
97
-
98
-
99
-
100
-
101
-
102
-
103
-
104
-
105
-
106
-
107
-
108
-
109
-
110
-
111
-
112
-
113
-
114
-
115
-
116
-
117
-
118
-
119
-
120
-
121
-
122
-
123
-
124
-
125
-
126
-
127
-
128
-
129
-
130
-
131
-
132
-
133
-
134
-
135
-
136
-
137
-
138
-
139
-
140
-
141
-
142
-
143
-
144
-
145
-
146
-
147
-
148
-
149
-
150
-
151
-
152
-
153
-
154
-
155
-
156
-
157
-
158
-
159
-
160
-
161
-
162
-
163
-
164
-
165
-
166
-
167
-
168
-
169
-
170
-
171
-
172
-
173
-
174
-
175
-
176
-
177
-
178
-
179
-
180
-
181
-
182
-
183
-
184
-
185
-
186
-
187
-
188
-
189
-
190
-
191
-
192
-
193
-
194
-
195
-
196
-
197
-
198
-
199
-
200
-
201
-
202
-
203
-
204
-
205
-
206
-
207
-
208
-
209
-
210
-
211
-
212
-
213
-
214
-
215
-
216
-
217
-
218
-
219
-
220
-
221
-
222
-
223
-
224
-
225
-
226
-
227
-
228
-
229
-
230
-
231
-
232
-
233
-
234
-
235
-
236
-
237
-
238
-
239
-
240
-
241
 |
 |
